Getting connected, Figure 1: install utility main window initial view, Figure 2: pc com port configuration – NavCom StarUtil Rev.B User Manual
Page 6
INSTALL
UTILITY User Guide
Chapter 2
Establishing Communications & Software Upload
Getting Connected
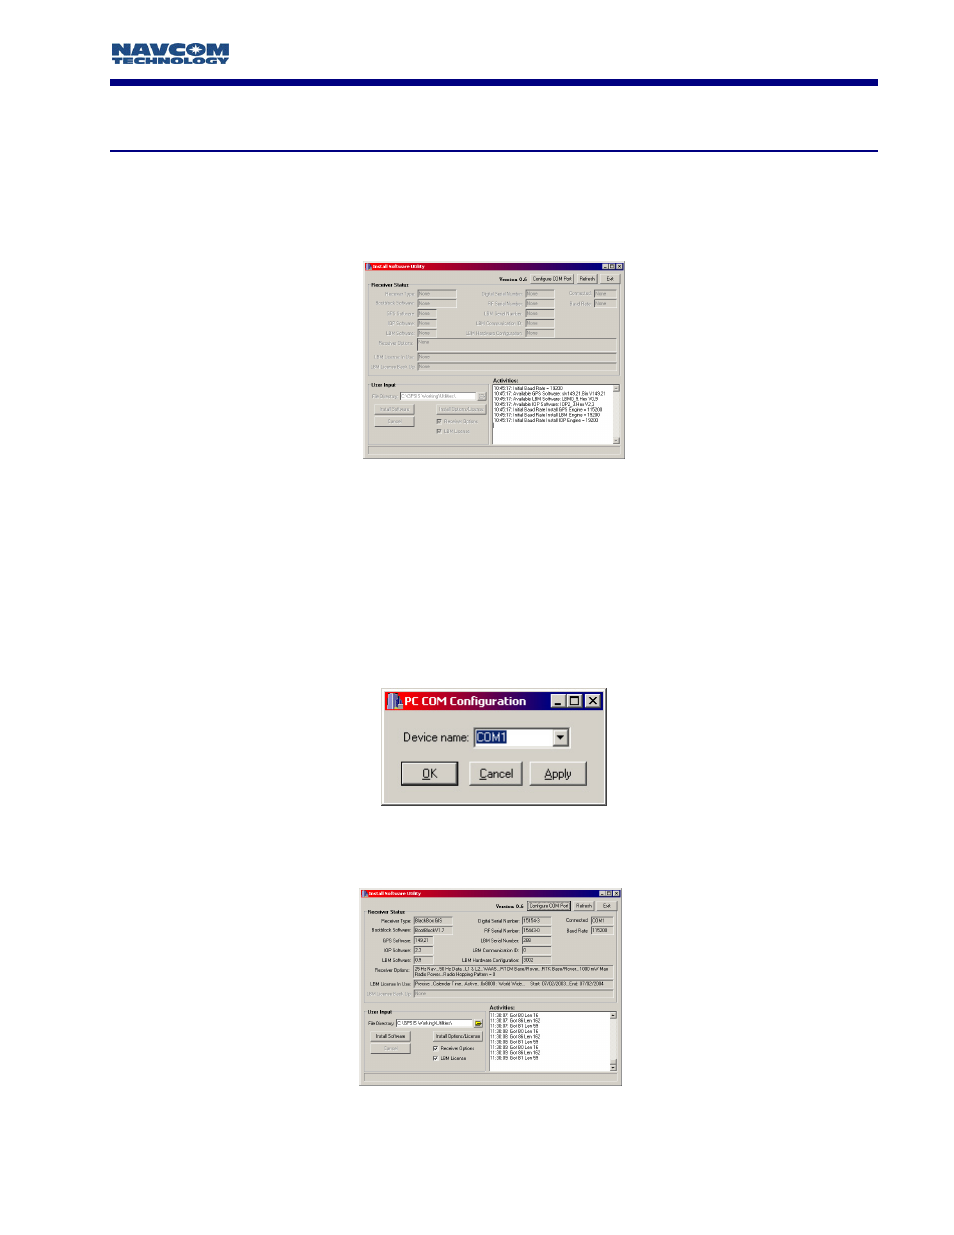
In order to execute Install Utility double click on the icon. Once Install Utility is active
communications with the GPS system must be established by pressing the Configure COM Port
button on the main Install Utility window, see Figure 1.
Figure 1: Install Utility Main Window Initial View
A new window will appear as seen in Figure 2 that will allow you to choose the PC Com port that
the receiver is connected to. We have implemented an Auto Baud Detect feature that will allow for
quick protocol connection between the PC, and the GPS receiver.
Install Utility automatically reads the available serial ports (i.e RS-232 ports) from the Windows
registry, and displays them in a pop-up window. Choose the Com Port that you will be using to
control the GPS receiver. Once the connection is established the receiver options, and software
version information will be displayed in the main Install Utility window as shown in Figure 3.
Figure 2: PC COM Port Configuration
Figure 3: Install Utility Main Window Port Configuration View
1 - 6