Advanced recording, Fade-in and fade-out recording, Synchronized recording – Teac CD-RW901MKII User Manual
Page 28: Sync recording, 5 − recording
28
TASCAM CD-RW901MKII
5 − Recording
Sync recording
1. While recording standby mode, press the
SYNC
REC
key.
2. Set the signal detection threshold level. Use the
SYNC LEVEL option in the REC sub-menu (see
“Operation basics” on page 16).
Rotate the
MULTI JOG
dial to adjust the level. The
level can be set from -72 dB to -24 dB in 6 dB incre-
ments. The default setting is -54 dB.
Press the
MENU
key or push the
MULTI JOG
dial to
enter and return to recording standby mode.
3. Input the source signal.
Recording begins automatically when the source
signal is detected. The source signal should be high-
er than the adjusted threshold level.
S_LVL
Start of recording
level
time
Noise level
NOTE
After SYNC is set, over one second of silence which is
under the adjusted threshold level is required to start
recording automatically. Otherwise, the unit does not
begin recording even if it is detecting a signal.
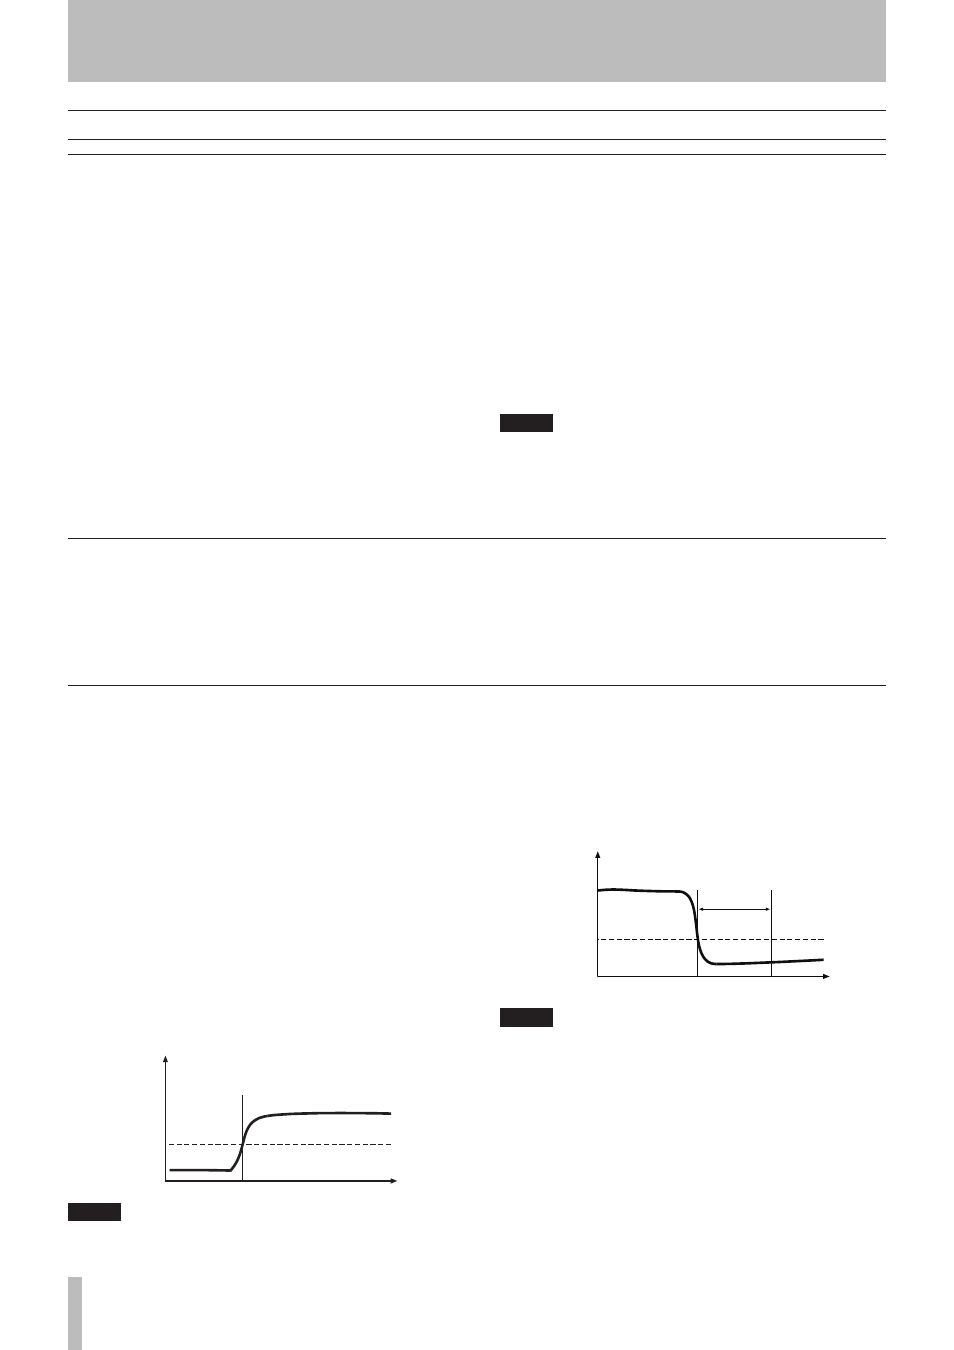
When audio signal is not detected for more than five seconds,
the CD-RW901MKII automatically will stop recording and
enter record standby mode.
S_LVL
REC ready
level
time
Five seconds
NOTE
When the input level drops below the adjusted thresh-
old level for more than five seconds, recording stops
automatically and enters in recording ready mode.
3. To cancel the Sync recording mode, press the
SYNC REC
key. Recording returns to normal and
continues till you press the
STOP
key or the source
signal stops.
Pressing the
STOP
key stops recording.
The setting remains when the function is set on again.
Synchronized recording
Synchronized recording basically means that recording will
begin automatically when a signal is received, and will stop
when the signal ends.
The SYNC indicator appears on the display.
Starting playback of the source automatically starts recording
on the CD-RW901MKII if Sync function is on (see “Sync
recording” below) and manual record start is disabled.
Advanced recording
Fade-in and fade-out recording
At the beginning and end of recording, fade-in and fade-out
effects can be performed.
1. When stopped or when in recording standby mode,
set the operation using the following menu options
on the REC sub-menu (see “Operation basics” on
page 16).
FADE IN?
The length of the fade in to the normal level can be
set between 1 and 30 seconds in 1-second increments
(default setting: 3 seconds).
FADE OUT?
The length of the fade out into complete silence can be
set between 1 and 30 seconds in 1-second incre-ments
(default setting: 3 seconds).
The display shows
Fade Out>XXs
or
Fade In>XXs
.
2. In recording standby mode, press the
FADER
key on
the remote control.
Recording begins and the sound fades in. After the
preset fade-in time, the sound is at normal level.
3. During recording, press the
FADER
key on the
remote control when you wish to fade-out the sound.
Fade-out begins with Fade Out flashing on the
display then the unit enters recording standby mode.
4. Press the
STOP
key and the PMA writing will begin.
NOTE
Fade-in or fade-out function can be operated only by
pressing the FADER key on the remote control unit.