Playback, Playing back recordings, Selecting the playback file (skipping) – Teac DR-44WL User Manual
Page 9: Adjusting the playback volume, Connecting with a computer, Exchanging files with a computer, Disconnecting the unit from a computer, Settings and information display, Turning the built-in speaker off, System settings
TASCAM DR-44WL
9
Playback
Playing back recordings
While the Home Screen is open and playback is
stopped, press the 7/9 button to start playback.
Pausing
While the Home Screen is open and a track is playing
back, press the 7/9 button to pause playback at
the current position.
Stopping
When you press the 8/HOME button while the
Home Screen is open and a track is playing back,
playback is paused.
If you press the 8/HOME button again, playback
will be stopped at the head of the file.
Fast-rewinding and fast-forwarding
(search)
During playback when the Home Screen is open,
press and hold the .// button to search
backward/forward.
Moving the playback position
You can move the playback position by turning the
wheel while the Home Screen is open and a track is
stopped or playing back.
After moving the playback position, the unit pauses.
Selecting the playback file
(skipping)
While the Home Screen is open, press the . or
/
button to select the file that you want to play
back.
If you press the . button at the beginning of
a file playback will skip to the beginning of the
previous file.
If you press the / button at the beginning of or
in the middle of a file playback will skip to the next
file.
Adjusting the playback volume
The volume of sound output through the /LINE
OUT jack can be adjusted by use of the OUTPUT
LEVEL (+/−) button while the Home Screen is open.
Connecting with a Computer
You can transfer audio files on the SD card in the unit
to a computer and also transfer audio files from a
computer to the unit.
Connecting the unit to a computer by USB
1. Use the included USB cable to connect the unit
to a computer. If the power is off, turn it on.
2. On the USB SELECT screen, select
STORAGE
and press the ENTER/MARK
button to connect this unit to the computer.
USB connected
will appear on the
display.
3. When you open Computer in Windows, this
unit shows on the computer screen as an
external drive named “DR-44WL”.
Exchanging files with a
computer
Click the “DR-44WL” drive on the computer to show
the “MTR”, “MUSIC” and “UTILITY” folders.
To transfer files to the computer, open the “MTR” or
“MUSIC” folder and drag and drop the desired files
where you want them to go.
To transfer files from the computer, drag and drop
the desired audio files on the computer to the
“MUSIC” folder.
Disconnecting the unit from a
computer
Before disconnecting the USB cable, follow the
proper procedures for the computer to unmount
this unit.
The power turns off after the unit completes its
shutdown process.
See the computer’s operation manual for instruc-
tions about how to unmount an external device.
Settings and Information
Display
Turning the built-in speaker off
Set the items MENU w TOOLS w SPEAKER
to OFF.
System settings
Use the SYSTEM menu to customize settings for
using the unit. You can also perform operations such
as initializing settings and formatting SD cards.
1. Select MENU w SYSTEM and press the
ENTER/MARK button.
2. Configure necessary settings for each function.
Connecting the unit to a
smartphone via Wi-Fi
CAUTION
This product has been designed to be
compliant with rules and regulations in the
sales area, display as needed has been.
This product is used in the country / region of
the following has been approved.
United States, Canada, Europe (EU Member
States), Australia, New Zealand, Japan
The use of wireless functions in a country
other than those listed above could result in
a violation of that country's wireless trans-
mission laws.
Our company will bear no responsibility
for use in countries other than those listed
above.
You can operate this unit by remote control with a
free dedicated application (TASCAM DR CONTROL).
In addition to transport control operations such as
playback and stop, you can also adjust the input,
transfer recorded files and more via Wi-Fi.
How to obtain and install the
dedicated application (TASCAM
DR CONTROL)
1. Connect your smartphone to the Internet.
2. If your smartphone is an Android device,
download and install the dedicated application
(TASCAM DR CONTROL) from Google Play. If it
is an iOS device, download and install from the
App Store.
Connecting the unit to a smart-
phone via Wi-Fi for the first time
You can connect the unit to a smartphone directly
via Wi-Fi. Therefore, you do not need external devices,
such as a router, or a Wi-Fi network environment.
For the connection, you only need the unit and your
smartphone.
NOTE
While connecting the unit to your smart-
phone, you cannot connect the smartphone
to an external Wi-Fi network.
If using and iOS device
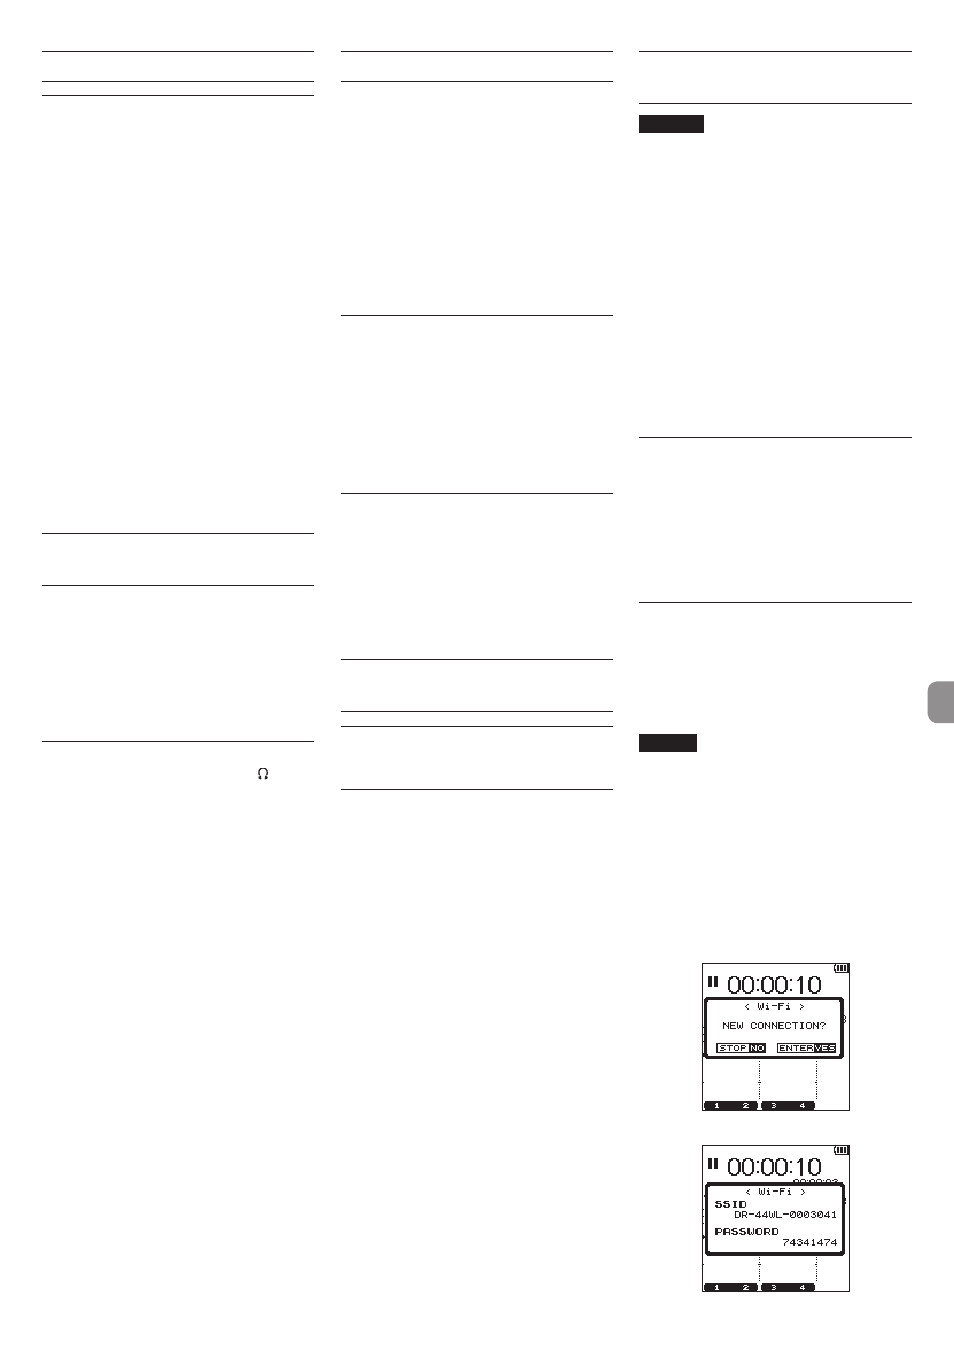
1. Press the Wi-Fi button to make the Wi-Fi
indicator blink.
A NEW CONNECTION? pop-up message
appears on the display to determine whether or
not the connection is new.
2. You will be making a connection to a new
smartphone, so press the ENTER/MARK
button.
3. “SSID” and “PASSWORD” appear on the display.