3 mounting the sunny string-monitor on the base – SMA SSM8-21-BS User Manual
Page 21
SMA Solar Technology AG
5 Mounting
Installation Manual
SSMxx-21-IA-BS-JP-en-20
21
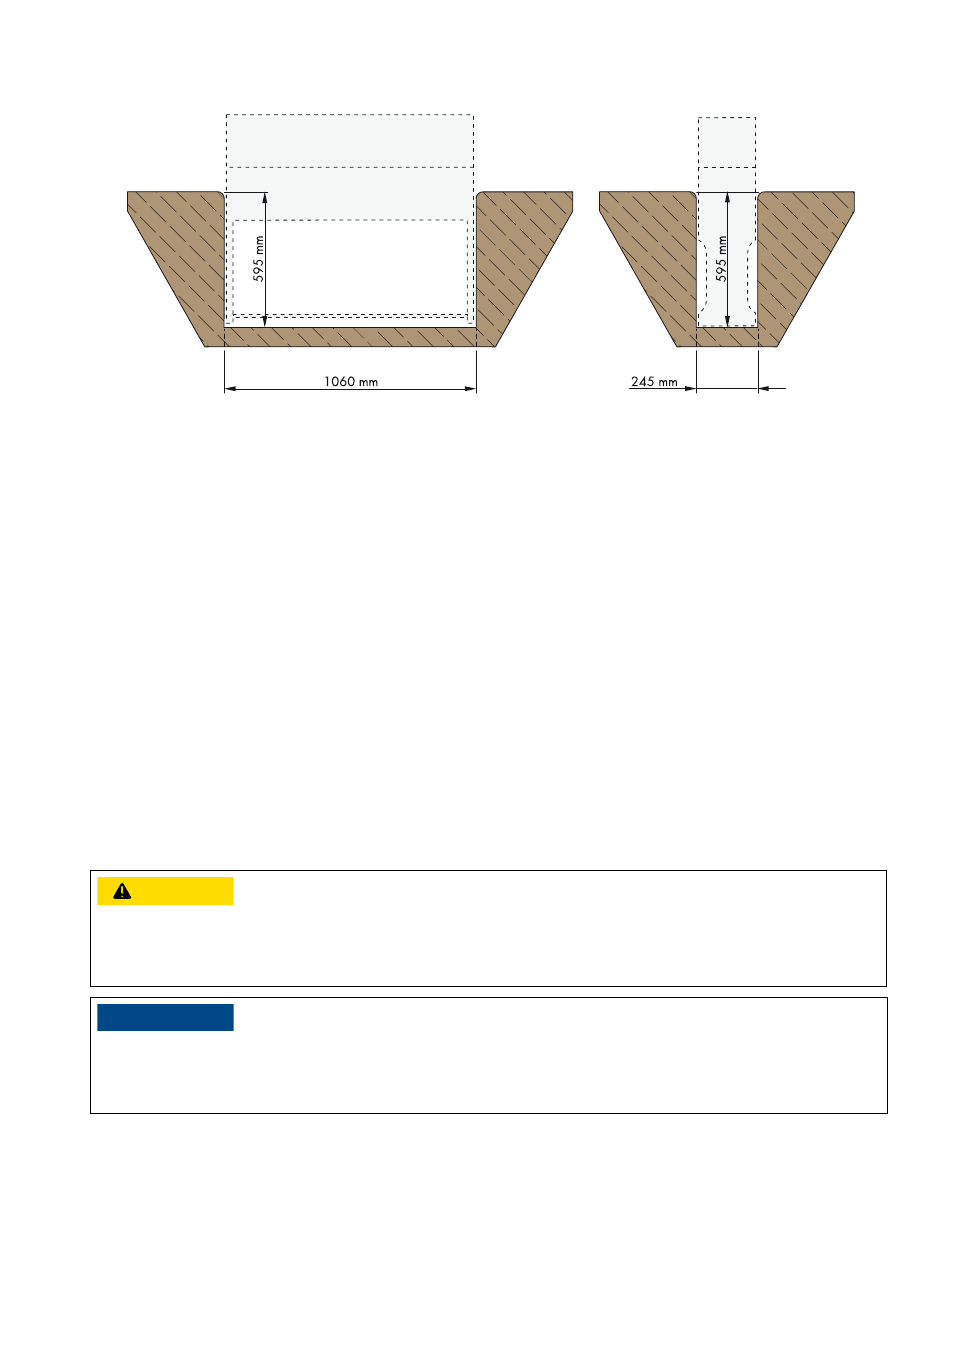
Figure 8: Dimensions of the base foundation
Procedure:
1. Excavate a pit. Make sure to observe the burial depth for the base. Tip: the maximum burial depth is marked on the
sides of the Sunny String-Monitor.
2. Position the base in the excavated pit so that the side with the kick plate faces the front.
3. Remove the upper kick plate.
4. Lay the connection cables in the correct positions in the base.
5. Half-fill the pit with sand or fine gravel.
6. Fill the remaining base area with base filler.
5.2.3 Mounting the Sunny String-Monitor on the Base
Additionally required mounting material (included in the scope of delivery of the accessories):
☐ 1 base
☐ 4 nuts
☐ 4 threaded fittings
☐ 4 fender washers
☐ 2 locking screws for the kick plate
Procedure:
1. Remove four caps in the base plate of the Sunny String-Monitor.
2. Screw four threaded fittings from underneath into the threaded holes of the base plate.
&$87,21
Danger of crushing if the Sunny String-Monitor is dropped
• When mounting the Sunny String-Monitor, take the weight of up to 70 kg into account.
• Two people are needed to mount the Sunny String-Monitor.
/05*$&
Damage to cable glands and plug connections due to improper transport and installation
The cable glands and plug connections protrude from the enclosure.
• Ensure that the cable glands and plug connections are not damaged during mounting and transport.