3 assembly and installation instructions – LeMond g-force RT User Manual
Page 15
15
3 ASSEMBLY AND INSTALLATION INSTRUCTIONS
3.5.5 Seat
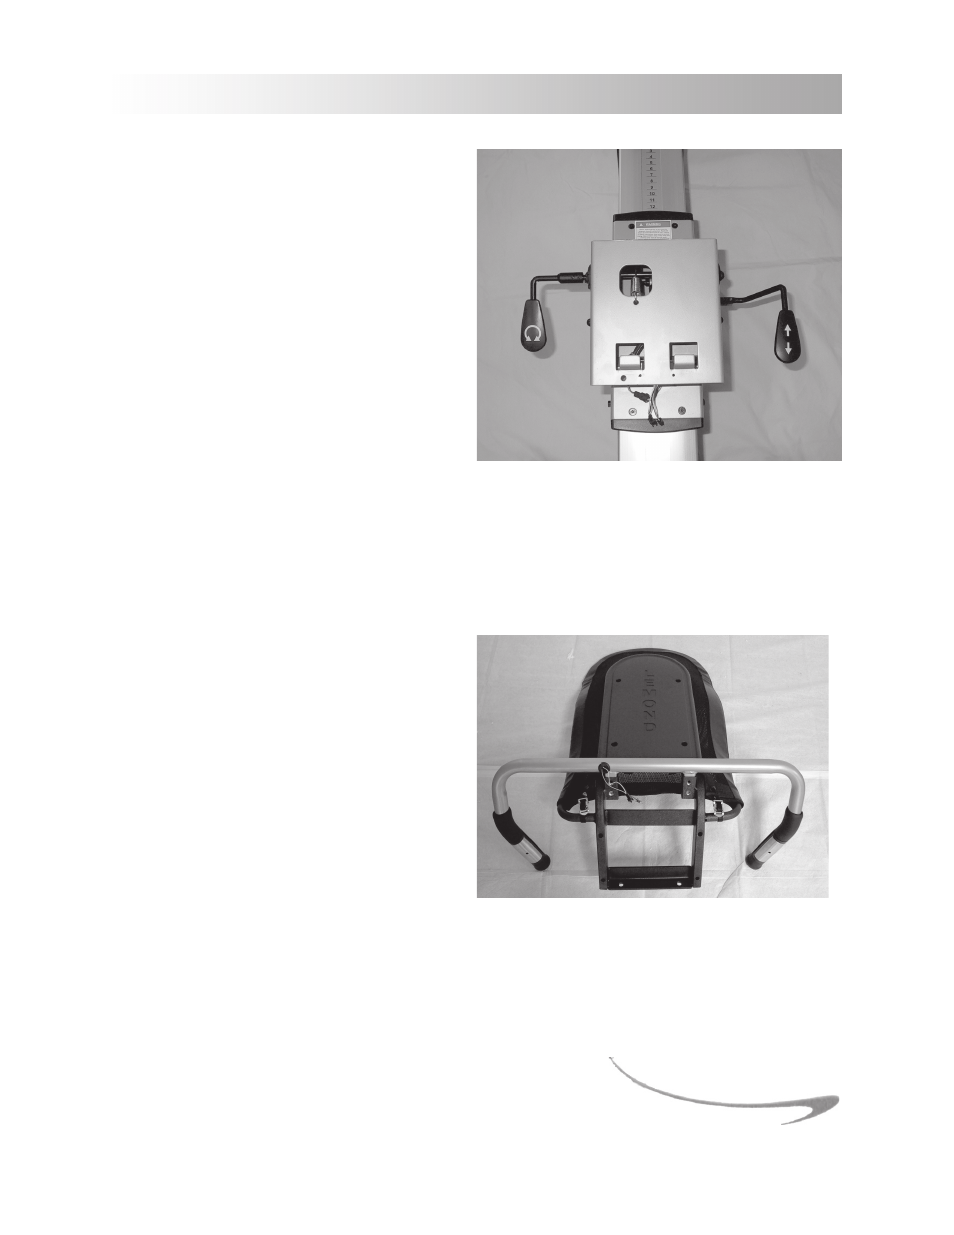
Attaching the Adjustment Handles to the Seat
Carrier
1. Locate the seat adjustment handles. They
can be found in the plastic bag contain-
ing the tools and other hardware.
2. The shorter, L-shaped handle is attached
to the left side of the bike and controls
the seat angle adjustment. Slide the han-
dle onto the post on the left side of the
seat carrier so that the set screws make
contact with the flat portion of the post.
Tighten the (2) set screws at the top of
the handle with the 2.5 mm hex wrench.
3. The longer handle controls the fore/aft adjustment of the seat and is located on the right side of
the bike. Align the (2) holes of the handle with the (2) holes on the right side of the seat carrier.
Attach the handle with (2) M5x25 screws and tighten using the 3mm hex wrench.
Attaching the Handlebars to the Seat Assembly
Attach the handlebars to the seat assembly before
attaching the seat to the body of the bike.
1. Turn the seat assembly upside down so
that the seat rails and the seat back touch
the floor.
2. Insert the handlebars into the seat as-
sembly with the holes on the handlebars
facing up and aligned with the holes on
the seat carrier.
3. Secure the handlebars to the seat assem-
bly by sliding (4) star washers onto each
of the (4) M8x20 screws and tighten using
the 6mm hex wrench.