3 assembly and installation instructions – LeMond g-force RT User Manual
Page 16
16
Attaching the Saddle to the Seat Assembly
1. Place the seat bottom on the rails of the seat
assembly.
2. Attach the seat bottom to the seat assembly by
sliding (4) star washers onto each of (4) M8x50
screws and tighten using the 6mm hex wrench.
Attaching the Seat Assembly to the Body
Note: Install the handlebars and seat bottom before
attaching the seat assembly to the body of the bike.
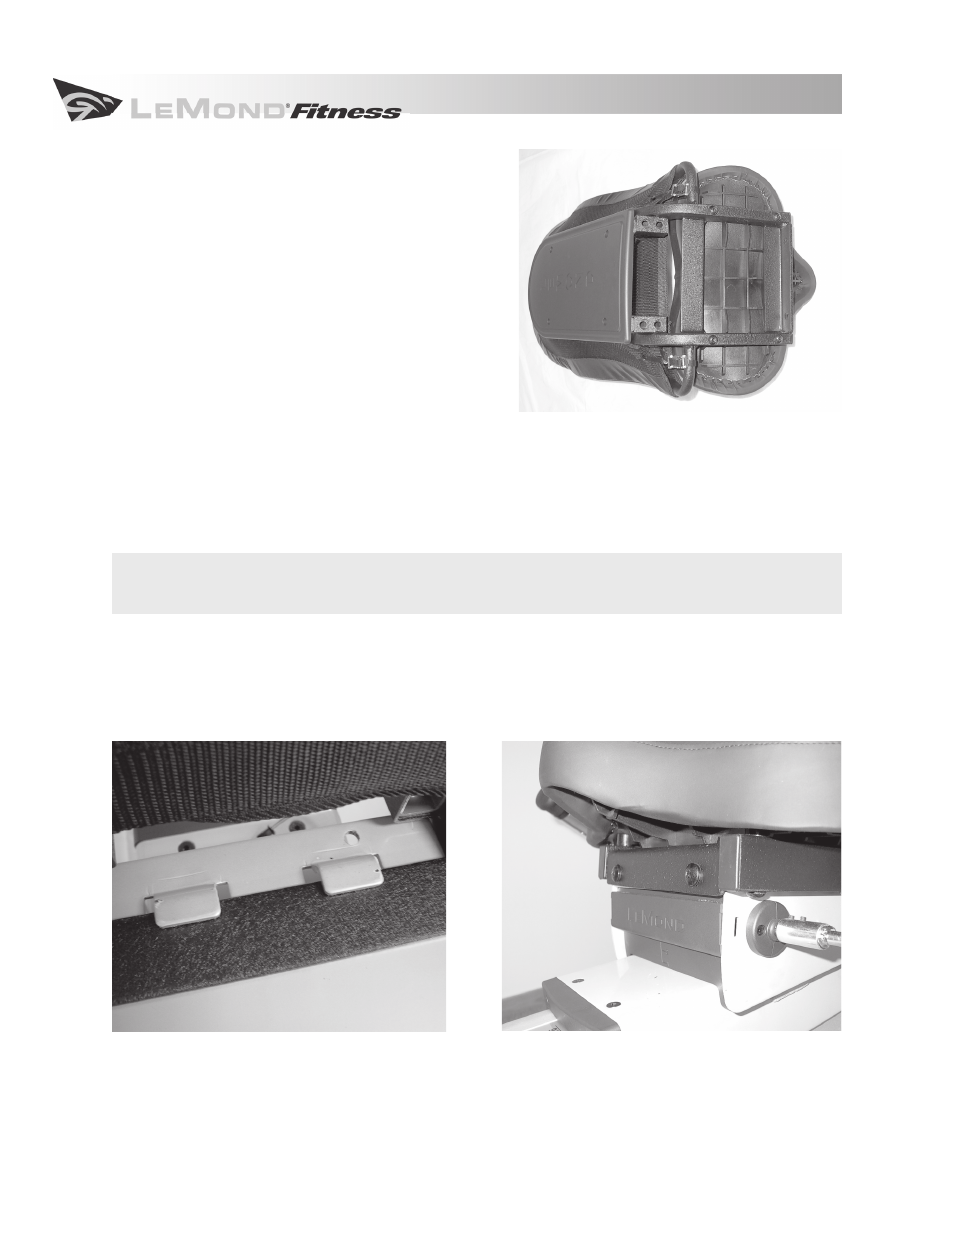
1. Locate the two tabs that are on the top surface of the seat carrier which is located on the seat
track of the body.
2. Located under the seat is a bar that runs the width of the seat. Hook the tabs of the seat carrier
over the bar on the seat assembly. (A)
CAUTION: Be careful not to pinch the wiring for the contact heart rate grips when attaching
the seat assembly to the seat carrier.
3. Lower the seat assembly over the seat carrier and align the holes at the front of the seat assem-
bly with those on the seat carrier.
(B)
4. Secure the seat assembly to the seat carrier by sliding (2) flat washers and (2) star washers onto
each of (2) M8x20 screws and tighten with the 6mm hex wrench.
3 ASSEMBLY AND INSTALLATION INSTRUCTIONS
A
B