Introduction, Selecting mounting location, Installing hardware – RISCO Group LightSYS Ver 2.xx User Manual
Page 5: Main unit — bus connection
Introduction
Thank you for purchasing the LightSYS™ 2 hybrid security system, offering Smartphone App
control and communication flexibility as well as a choice of wired, 2-way wireless, or RISCO Bus
detectors. This simple setup procedure guide covers all common LightSYS installation and
programming steps (based on factory default settings) required in order to set up a working system.
For more comprehensive instructions, refer to the LightSYS2 Installation and Programming Manual
(5IN2048).
Selecting Mounting Location
Decide where to position your LightSYS control panel. A central location is often the best place,
making wiring to expanders and accessories easier. It is advisable to prepare a plan of
expander/accessory physical locations in advance of the installation, as this will determine which
type of expander is required at each location.
The control panel location should:
•
Be in a dry place near an AC power supply
•
Have access to the routing of cables for the system from detection devices
•
Have access to the customer’s phone lines/IP network
•
(In case you installed GSM / GPRS module before mounting the system into the desired
position)
Ensure a good signal of the GSM network (Advisable to have a level of at least 4 out of 5).
Installing Hardware
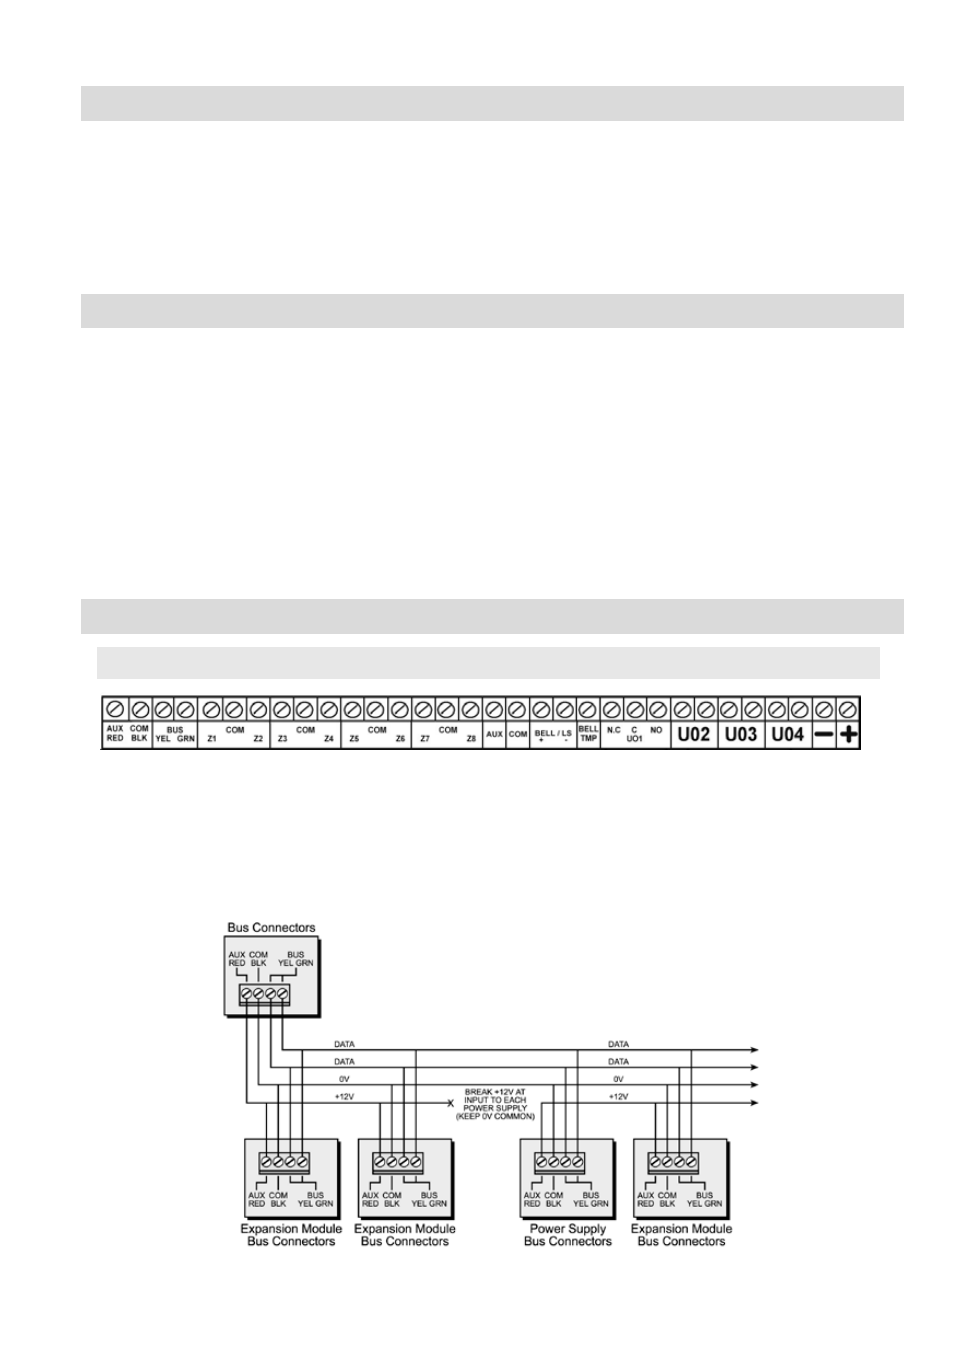
Main Unit — BUS Connection
The set of four terminals on the left of the terminal block represent the expansion bus. These
terminals support the connection of keypads and expansion modules. The connections are terminal-
to-terminal with color-coded wires, as follows:
AUX RED: +12V DC power
BUS YEL: Yellow data
COM BLK: 0V common
BUS GRN: Green data
Connect any/all keypads and expanders/accessories necessary for the installation using the bus
connections.
LightSYS Quick Installer Guide
5