Erasing a drawn line, Nchanging the eraser size – Sharp PN-60TW3 User Manual
Page 26
26
E
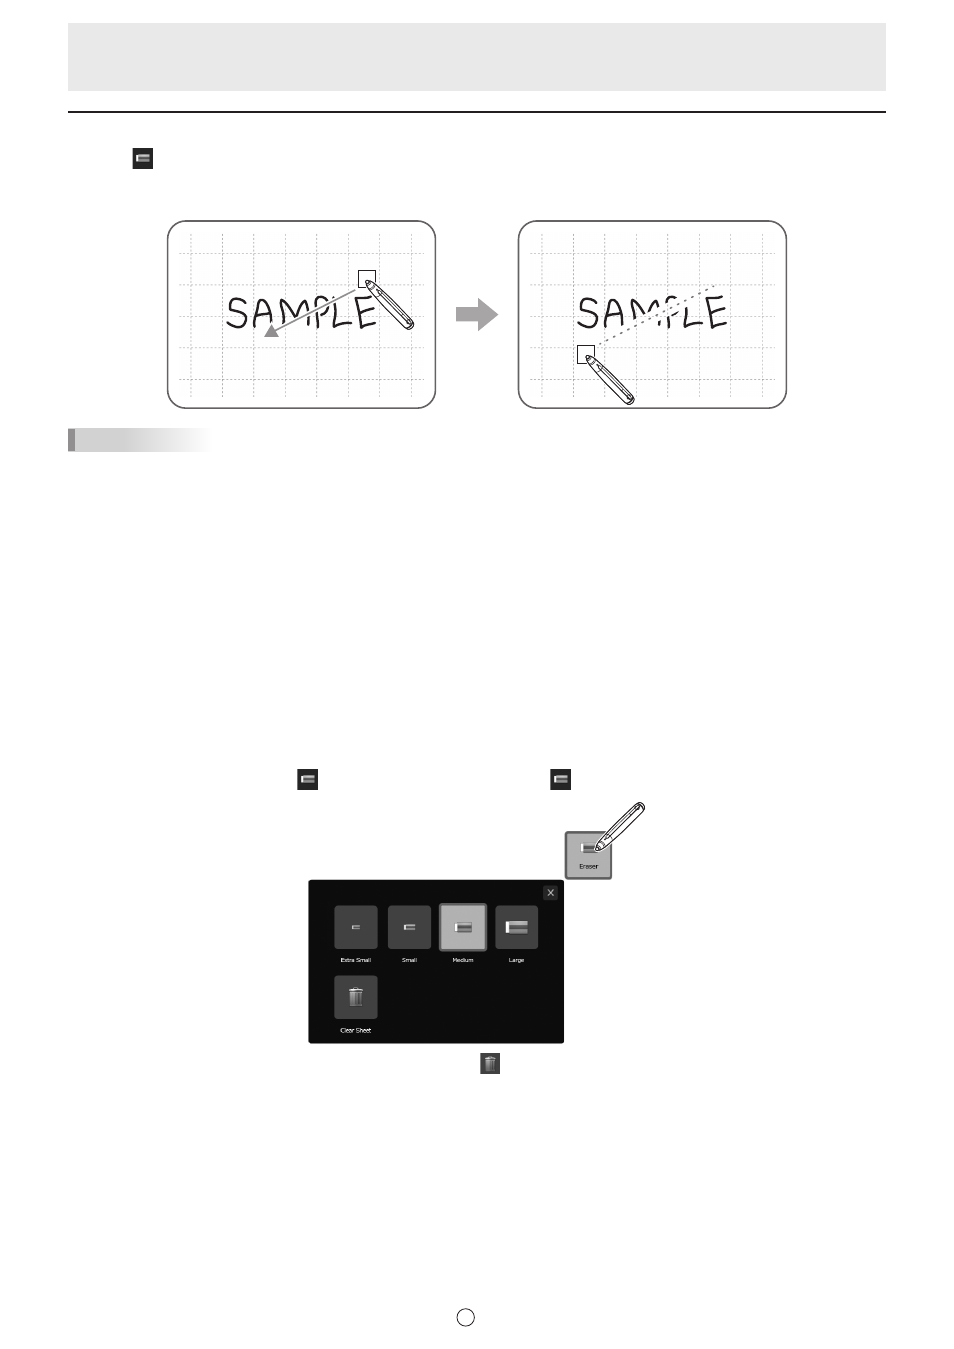
Erasing a drawn line
1. Touch
“Eraser” in the menu.
2. With the pen touching the screen, move the pen.
The part you move over is erased.
TIPS
• You can switch through “Pen 1” to “Pen 3” and “Eraser” by repeatedly pressing Function Button 2 of a 2 button pen.
To change functions using Function Button 2, select the touch panel driver “Properties”, and set “Function Button 2” to “Pen
Software Link” on the “Operation Setting” tab.
When using 3 button pen, you can switch through “Pen 1” to “Pen 3” and “Eraser” by repeatedly pressing Function Button. To
use this function, set “Pen Software Link” to any function button on “Function Buttons” on “Advanced” in Touch Pen Utility.
• The eraser function can erase only the objects drawn with the pen function. You cannot use the “Eraser” button to erase
pasted images. You cannot use it either to erase the edges of a line to make the line thinner. Even if you erase the edges
only, the entire width of the line will be erased.
• An object drawn with the pen function cannot be erased if it is part of a group.
• If “Automatically Find Eraser” is set (page 49) and “Pen 1” to “Pen 3” or “Eraser” is selected on the PN-L series/PN-C series,
you can erase with the eraser.
Touch the screen with the eraser, and after the cursor changes to the eraser, move the eraser.
In this case, the eraser size of the eraser is the area of the screen that is touched.
n
Changing the eraser size
The size of the eraser can be changed in the “Eraser” settings menu.
To display the settings menu, touch
“Eraser” to select it, and then touch
“Eraser” again.
To delete all objects from the sheet currently being edited, touch
“Clear Sheet”.
When the confirmation dialog box appears, touch “Yes”.