Ricoh fi-8040 Desktop Scanner User Manual
Page 82
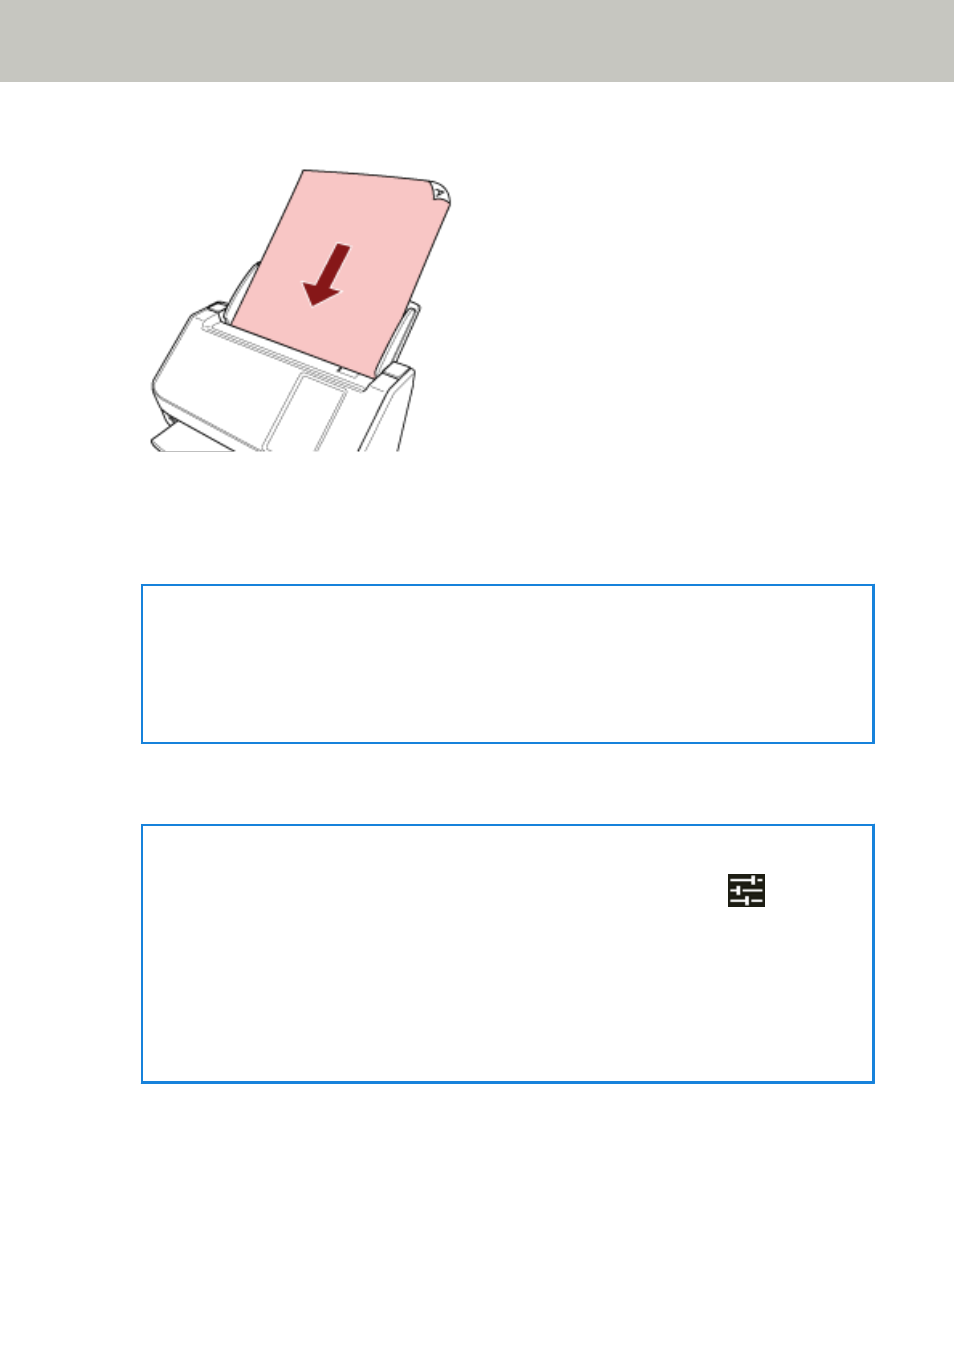
Load the document face-down in the ADF paper chute (feeder).
How to Load Documents (page 88)
.
4
On the touch screen, press the [Perform Job] button.
5
Select the job to be processed from the [Select Job] screen.
HINT
●
When adding, changing, or deleting jobs, refer to
Adding/Changing/Deleting a Job (page
.
●
If no job is registered, the screen to confirm whether to add a job is displayed. Press the [Yes]
button to add a job.
6
In the [Ready to scan] screen, press the [Scan] button.
Scanning starts.
HINT
●
If you want to change the scan settings temporarily for just this time, press
to change
the settings.
For details about the scan settings, refer to
●
When [Continue scanning] is enabled in the scan settings, the [Scan] button appears on the
[Ready to scan] screen after scanning is complete.
To continue scanning documents, load the documents in the ADF paper chute (feeder) and
press the [Scan] button.
7
When the [Complete Scan] button appears after scanning, press the button.
How to Perform a Basic Scan
82