K. instrument calibration (refer to figure 15), Instrument calibration – Casella CEL CEL-62X User Manual
Page 19
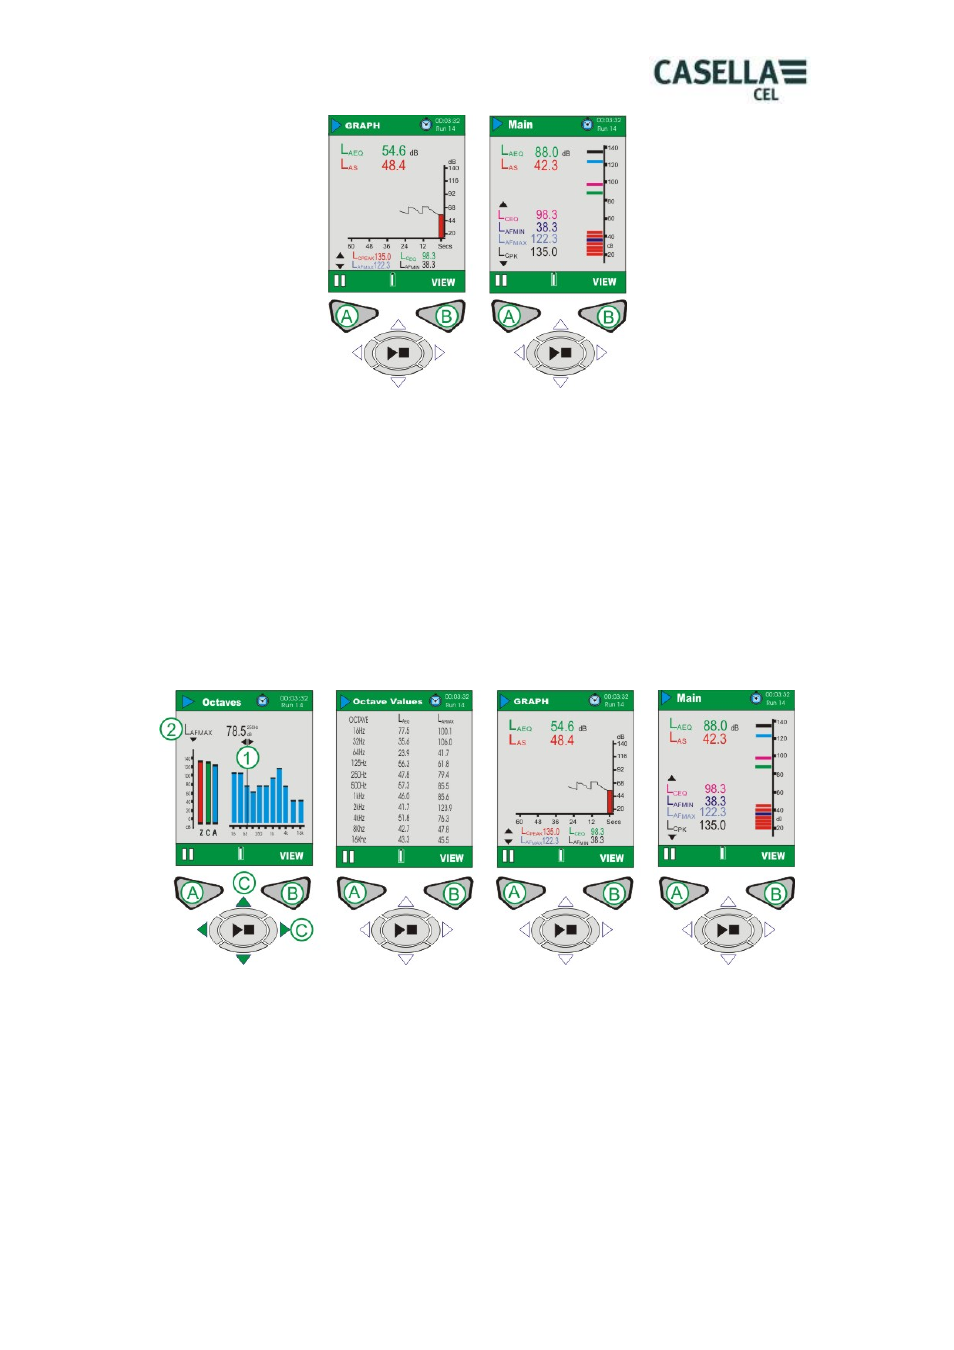
Figure 13 CEL-62XA Run Screens
CEL-62XB & CEL-62XC (Refer to Figure 14).
The CEL-62XB and CEL-62XC provides two additional octave screens shown in
Figure 14. Use the View key (B) to toggle the four available screens. Use the left/right
cursor keys (C) to move across the frequency bands (1) when in graphical view. Use
up/down cursor keys (C) to toggle between LMAX and LEQ parameters (2).
Each graph bar represents an octave band measured in Hz or kHz. To view a table
of the octave values, press View (B).
On CEL-62XC models, use the up/down cursors (C) when viewing numerical table to
alter the 1/3 octave frequencies viewed.
Figure 14 CEL-62XB & C Main Run Screens
K. INSTRUMENT CALIBRATION (Refer to Figure 15)
Note: The Instrument must be at a STOP screen before the Acoustic Calibrator is
fitted.
For calibrator reference level adjustment refer to Section G.
Calibrations should be performed before and after measurements. Fit the acoustic
calibrator over the removable microphone and push it home. Switch the calibrator on
using ON/OFF Key (1). The Instrument detects the signal and automatically activates
the calibration screen (yellow bars). Press (B) to begin calibration. The instrument will
be calibrated and the word PASSED displayed. A ‘calibration change’ value is shown
at the bottom of the screen. This identifies the change since the previous calibration.
Casella CEL Limited
19