TabletKiosk Sahara NetSlate a230T User Manual
Page 69
54
Chapter Name 05: Securing Your Sahara NetSlate
If you followed the steps in the BIOS Settings section earlier
in this chapter, the TPM MC should show the status of the
TPM as “on” but “not owned”. If the TMP MC shows that you
don’t have a compatible TPM or that it is not on, you either
skipped the steps above or didn’t successfully save the
settings in the BIOS.
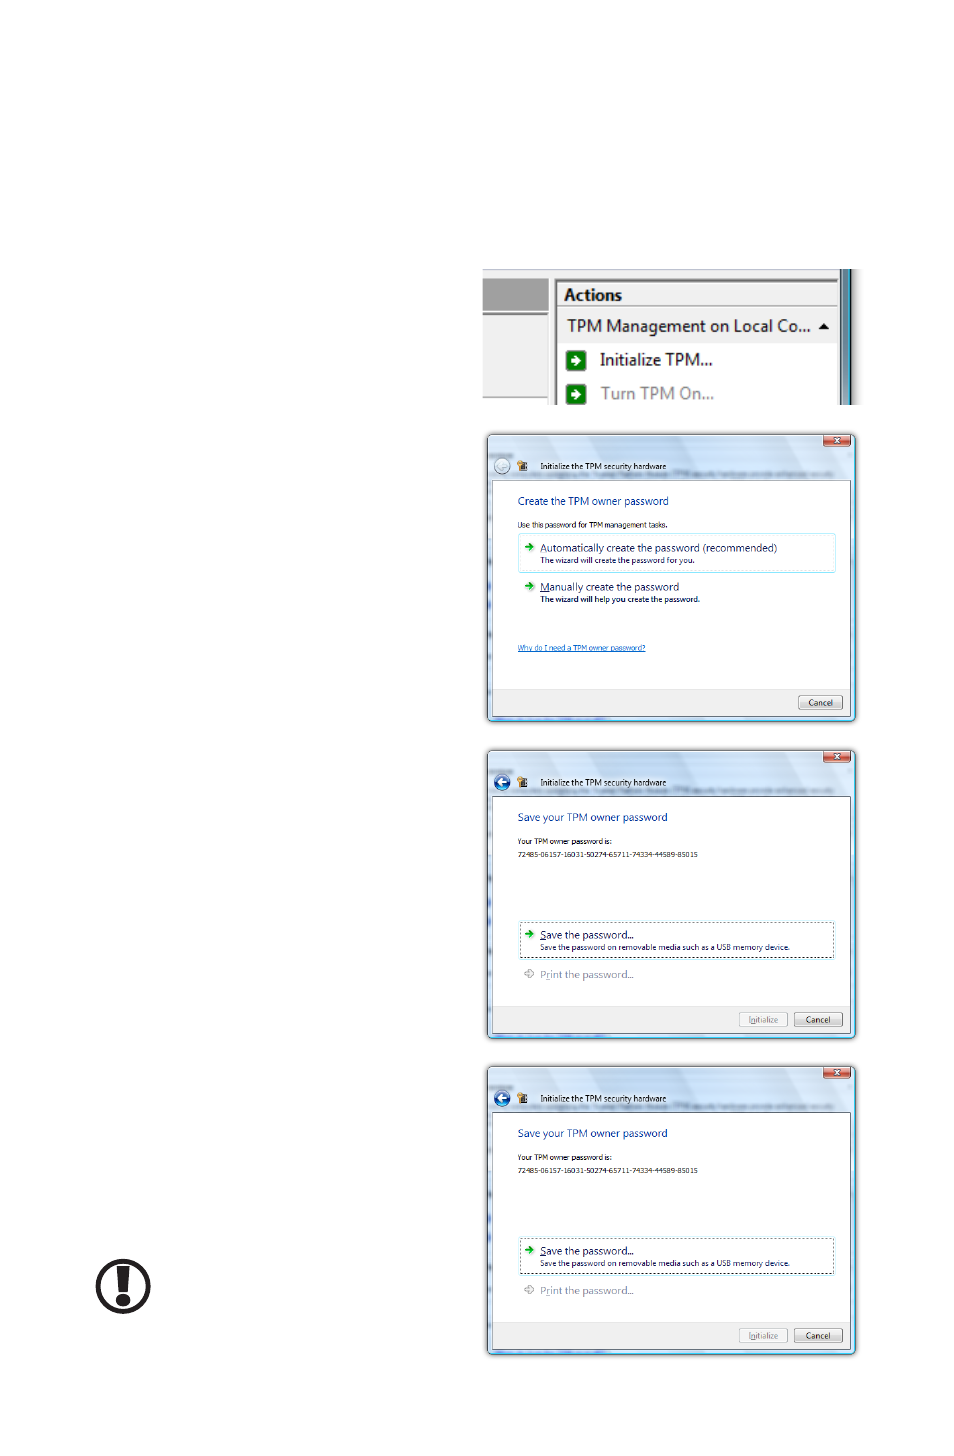
3. In the “Actions” column on
the right side panel of the
TPM MC, tap on “Initialize
TPM...”.
4. On the “Create the
TPM owner password”
page, tap “Automati-
cally create the password
(recommended)” to have
Windows generate your
password automatically,
or “Manually create the
password” to input your
own.
5. After your password has
been created or entered,
tap “Save the password”
to save a .tpm password
file you can use to make
changes to the TPM set-
tings in the future.
6. In the “Save As” dialog
box, select a location
to save the password,
and then tap “Save”. The
password file is saved as
computer_name.tpm
.
IMPORTANT: It is highly recom-
mend that you save the TPM
owner password to removable
media.