Adobe After Effects CS4 User Manual
Page 254
248
USING AFTER EFFECTS CS4
Animation and keyframes
Last updated 12/21/2009
When you apply time-remapping to a layer containing audio and video, the audio and video remain synchronized.
You can remap audio files to gradually decrease or increase the pitch, play audio backward, or create a warbled or
scratchy sound. Still-image layers cannot be time-remapped.
You can remap time in either the Layer panel or the Graph Editor. Remapping video in one panel displays the results
in both. Each provides a different view of the layer duration:
•
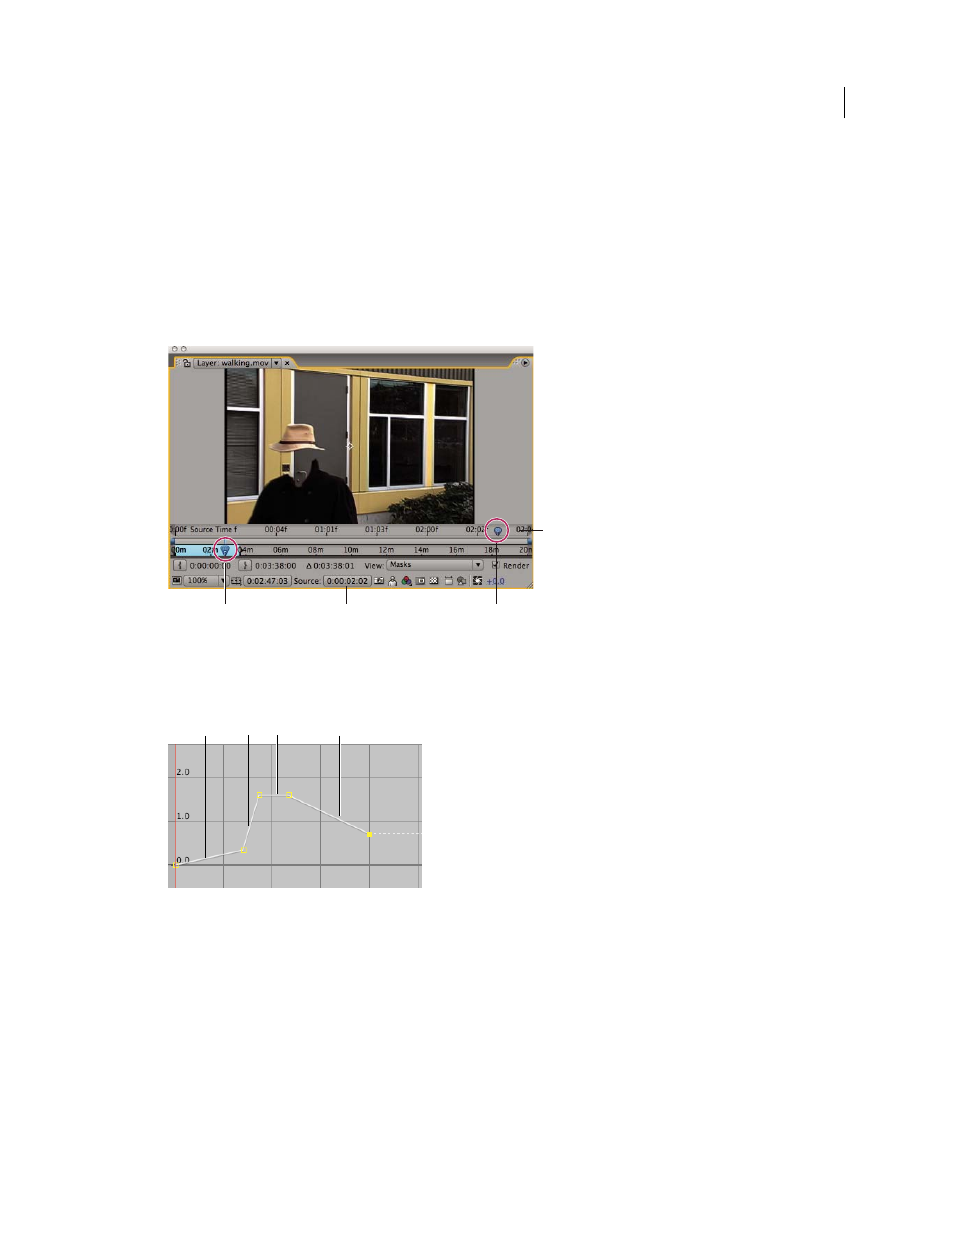
The Layer panel provides a visual reference of the frames you change, as well as the frame number. The panel
displays the current-time indicator and a remap-time marker, which you move to select the frame you want to play
at the current time.
Layer panel for time remapping
A. Current-time indicator B. Time-remap value C. Remap-time marker D. Navigator bar
•
The Graph Editor provides a view of the changes you specify over time by marking your changes with keyframes
and a graph like the one displayed for other layer properties.
Time-remapping graph
A. No change B. Fast motion C. Freeze frame D. Backward motion
When remapping time in the Graph Editor, use the values represented in the Time Remap graph to determine and
control which frame of the movie plays at which point in time. Each Time Remap keyframe has a time value associated
with it that corresponds to a specific frame in the layer; this value is represented vertically on the Time Remap value
graph. When you enable time remapping for a layer, After Effects adds a Time Remap keyframe at the start and end
points of the layer. These initial Time Remap keyframes have vertical time values equal to their horizontal position on
the timeline.
A
B
C
D
C
D
B
A