Argox Ethernet printer User Manual
Page 34
Advertising
Ethernet Printer Technical Manual November 10, 2010
34
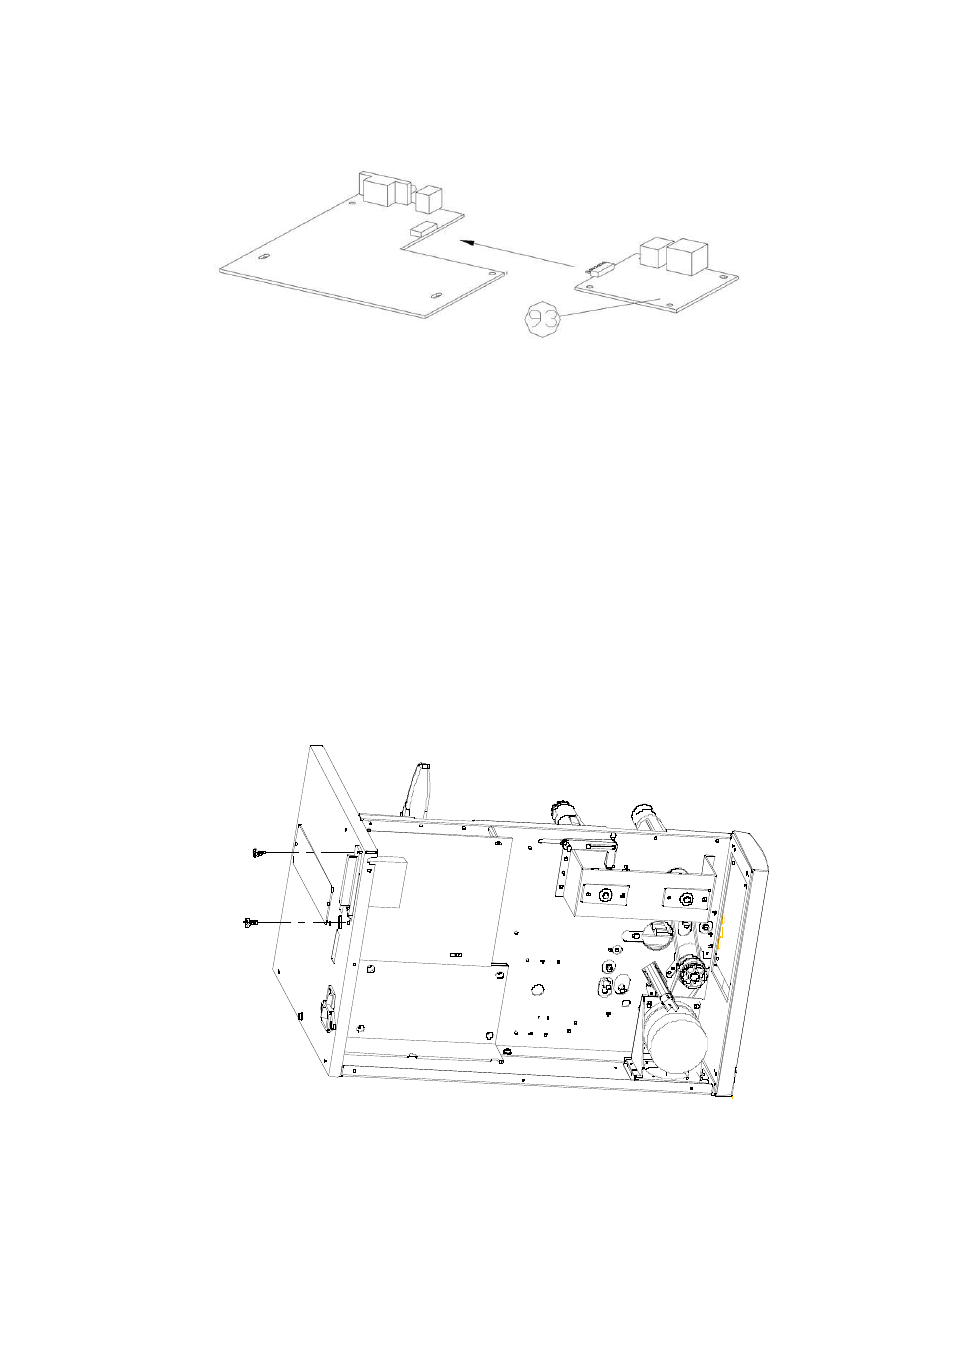
8. Pull out the Ethernet card (93) from the main board, and then insert the new Ethernet card (93) to
main board as shown in Fig. 10.1.4.
Figure 10.1.4
9. Secure the 4 screws (B) to fix the main board.
10. Secure the 4 screws to fix the “Printer Chassis” (30) to the bottom (39).
11. Secure the 2 screws (I) to the printer bottom.
12. Press and click “Power Switch” on the switch hole located on the “Middle Cover” (27).
10.2 X-2300E/X-3200E Ethernet Card Replacement
1. Switch off the power and disconnect the AC power cord.
2. Open the left side cover of the printer.
3. Remove the 2 screws on the centronics (Fig. 10.2.1).
Figure 10.2.1
Advertising