Argox Ethernet printer User Manual
Page 37
Advertising
Ethernet Printer Technical Manual November 10, 2010
37
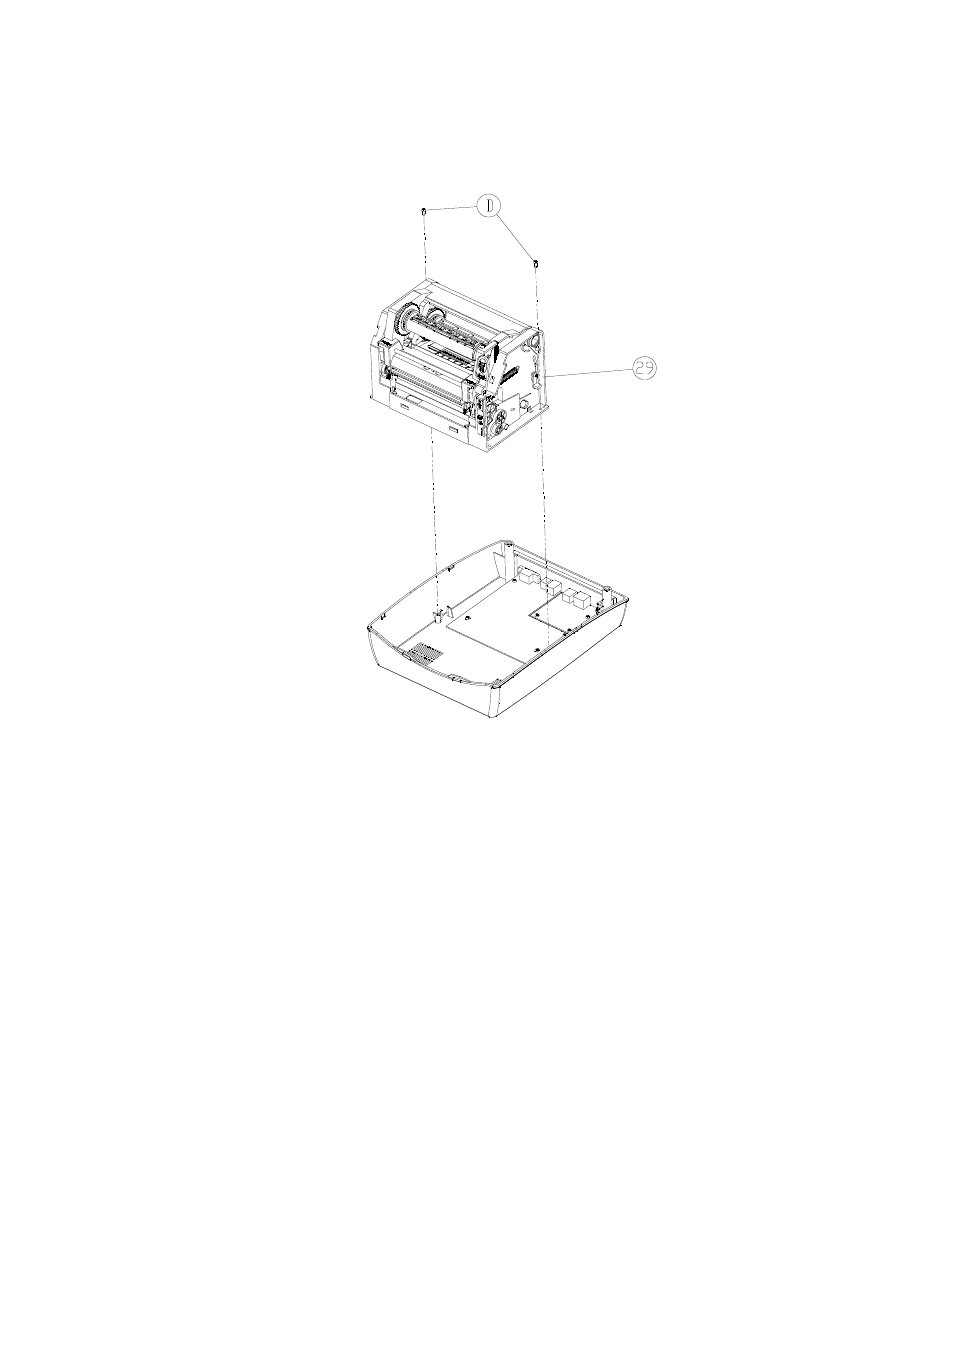
5. Remove the 2 screws (D).
6. Unplug all the connectors that are connected to the main board. Then remove the “Printer
Chassis” (29) as shown in Fig. 10.3.2.
.
Figure 10.3.2
7. Remove the 8 screws (D) which fix the main board (69) from the bottom (71). Then remove the
defected main board as shown in Fig. 10.3.3.
Advertising