Viewing the embroidering screen – Baby Lock Spirit (BLPY) Instruction and Reference Guide User Manual
Page 75
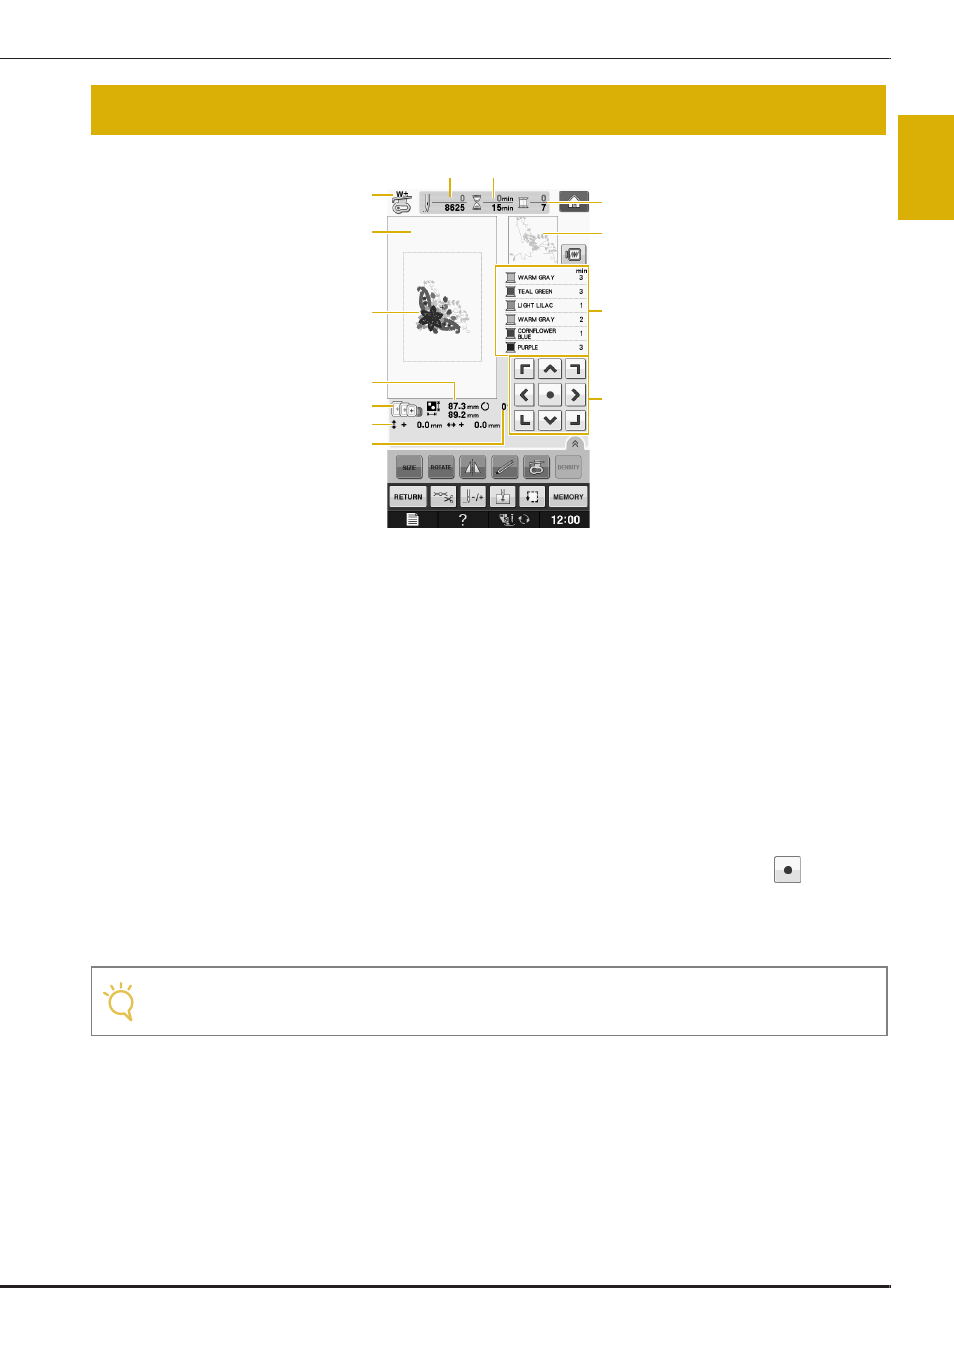
VIEWING THE EMBROIDERING SCREEN
Em
br
oide
ry
Embroidering E-9
E
1
a Shows the presser foot code.
Attach embroidery foot “W+” for most embroidery projects. When the foot presser symbol is displayed on the
screen, you are able to sew.
b Shows the boundary for embroidering with the extra large frame (30 cm
× 18 cm (approx. 12 inches × 7 inches)).
c Shows a preview of the selected pattern.
d Shows the size of the selected pattern.
e Shows the embroidery frames that can be used for the selected pattern. Be sure to use the proper frame (see page
E-13).
f Shows how far the sewing position is from the center (when you move the sewing position).
g Shows the degree of rotation of the pattern.
h Shows how many stitches are in the selected pattern and how many stitches have been sewn so far.
i Shows the time necessary to sew the pattern, and the time already spent sewing the pattern (not including time for
changing and automatically trimming the thread).
j Shows the number of colors in the selected pattern, and the number of the color currently being sewn.
k Shows the part of the embroidery that will be sewn with the first thread color.
l Shows the order for thread color changes and the embroidering time for each thread color.
m Press an arrow key to move the pattern in the direction shown by the arrow. (Press the Center key
to return the
pattern to the center of the embroidery area.)
*
The displayed time is the approximate time that will be required. The actual embroidering time may be longer than the
displayed time, depending on the embroidery frame that is used. In addition, the amount of time required to change
thread colors is not included.
VIEWING THE EMBROIDERING SCREEN
Note
• There is an explanation of additional key functions on the next page.
b
l
a
c
e
f
j
k
m
h
i
g
d