Attaching patches or emblems to shirt sleeves, Sewing s-39 – Baby Lock Aventura (BLMAV) Instruction and Reference Guide User Manual
Page 115
Attaching Patches or Emblems to Shirt Sleeves
Sewing S-39
U
T
IL
ITY S
T
IT
CH
ES
S
Use these stitch patterns to attach patches or emblems to
pant legs, shirt sleeves, etc.
• Using the table below, refer to “Using the utility
stitch tables in the “Sewing” section” in the “Basic
operations” section.
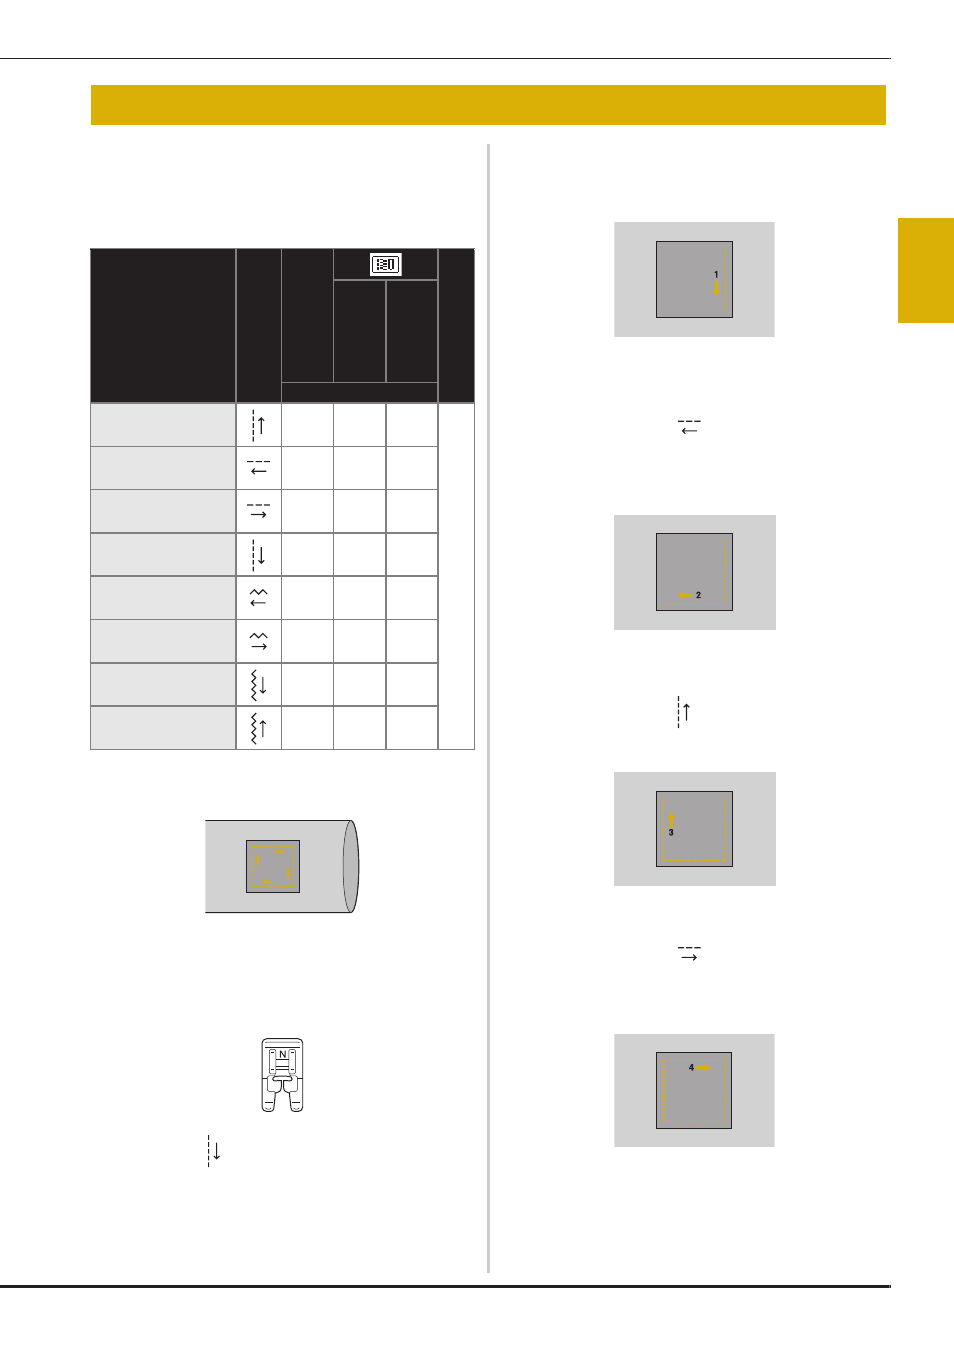
Insert the tubular piece of fabric onto the free-arm, and then
sew in the order shown in the illustration.
a
Remove the flat bed attachment.
b
Attach monogramming foot “N”.
c
Select stitch .
d
Lower the needle into the fabric at the beginning of the
stitching, and then start sewing.
Lower the needle at the upper-right corner.
→ The fabric is fed toward the back of the machine, as
usual.
e
After you have sewn to the corner, stop the machine,
and then select stitch
.
f
Start sewing.
→ The fabric is fed to the right.
g
After you have sewn to the corner, stop the machine,
and then select stitch .
h
Start sewing.
→ The fabric is fed forward.
i
After you have sewn to the corner, stop the machine,
and then select stitch
.
j
Start sewing.
→ The fabric is fed to the left.
Attaching Patches or Emblems to Shirt Sleeves
Stitch name
Stitch
BLM
A
V
P
re
s
se
r f
oot
BL
M
S
P
/BLM
L
R
BL
210A
Stitch number
Reverse
(Straight stitch)
5-01
92
—
N
Sideways to left
(Straight stitch)
5-02
93
—
Sideways to right
(Straight stitch)
5-03
94
—
Forward
(Straight stitch)
5-04
95
—
Sideways to left
(Zigzag stitch)
5-05
96
—
Sideways to right
(Zigzag stitch)
5-06
97
—
Forward
(Zigzag stitch)
5-07
98
—
Reverse
(Zigzag stitch)
5-08
99
—
1
3
4
2