Quick setup – IHSE USA R434-91 Series SDLink Rackmount Hubs User Manual
Page 7
Quick Setup
5
1. Quick
Setup
This section briefly describes how to install your KVM extender system and
optimize the video signals. Unless you are an experienced user, we recommend
that you follow the full procedures described in the rest of this manual. Refer to
the command summary on the next page when following this procedure.
.
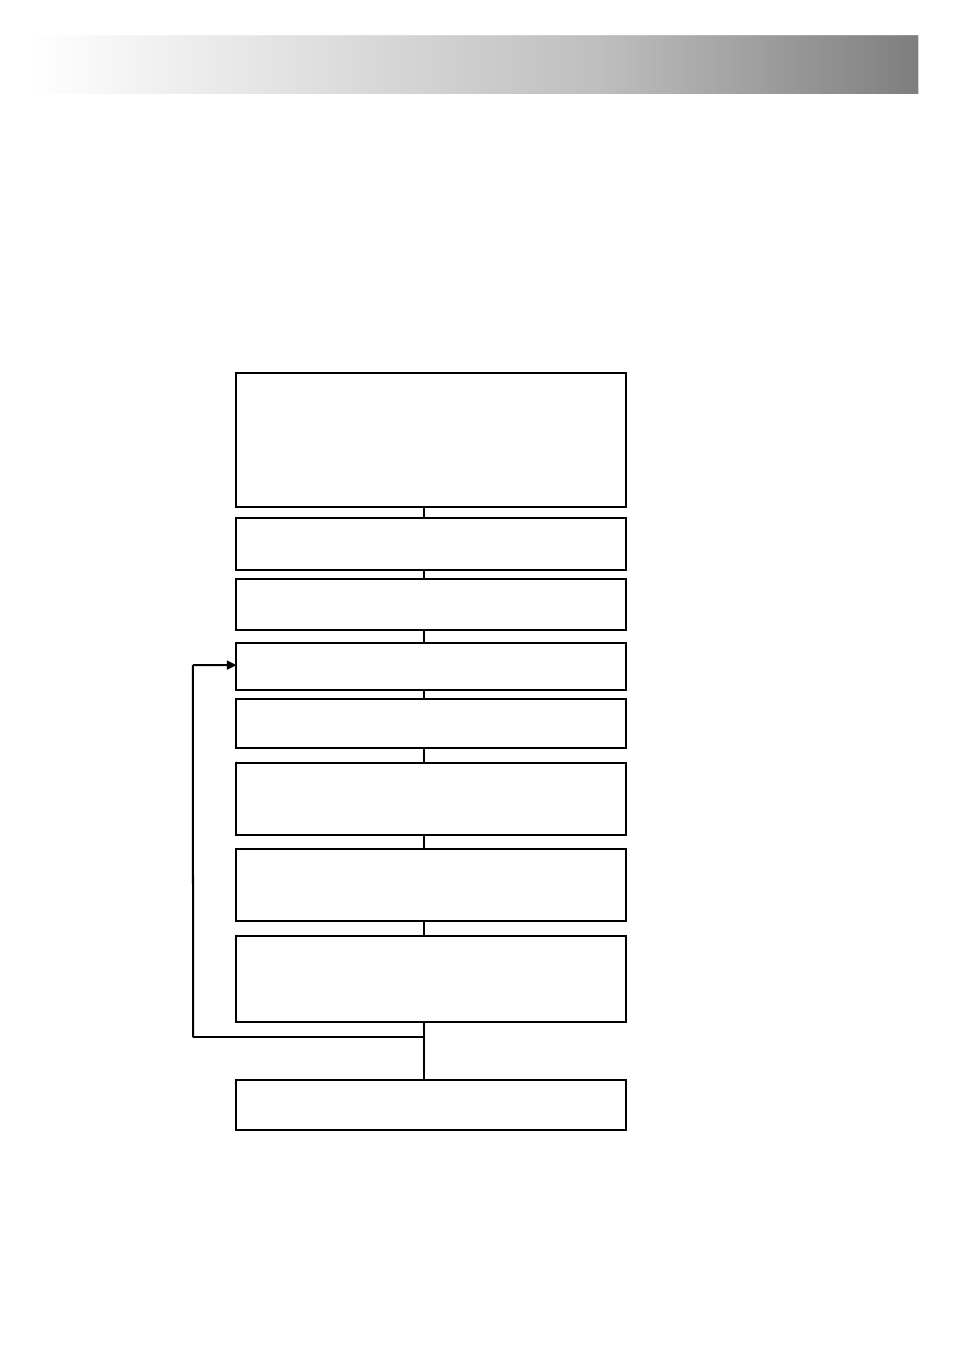
Install system
2. Connect Remote Unit to KVM and audio/serial
devices (if present).
3. Connect Local Unit or Extender hub to CPU.
4. Connect Remote and Local Units with compatible
CATx Interconnect cable.
5. Power up system.
Any Problems? See
Installation and
Troubleshooting sections.
View Test Card
http://testcard.kvmextender.info
Enter Command Mode on Remote Unit
<Left Control> + <Left Shift> + <F10>
Choose video channel
<1>, <2>, <3>, <4> or <0> (all)
Apply Assisted EQ
Next:
<Left Control> + <Page Up>
Previous:
<Left Control> + <Page Down>
Reset channel
<Left Control> + <Home>
Correct Skew
Adjust the individual color delays until the test card’s
RGB vertical lines are aligned.
Fine tune LF and HF EQ
Reduce smearing and loss of sharpness.
TFT Users: Set to auto-adjust, or if you are an advanced
user, manually adjust the monitor’s clock and phase.
Exit Command Mode
<ESC>
More channels?
Yes
No
Provides useful image for
adjusting video.
Obtain approx. EQ
setting. See page 28.
All adjustments apply to
selected channel.
See page 28.
See page 29 and, for a
detailed discussion of skew
correction, see Appendix D.
Optimize video quality.
See page 30.