Installation and operating instructions – Louroe Electronics DG-12II User Manual
Page 24
PAGE 21 of 28
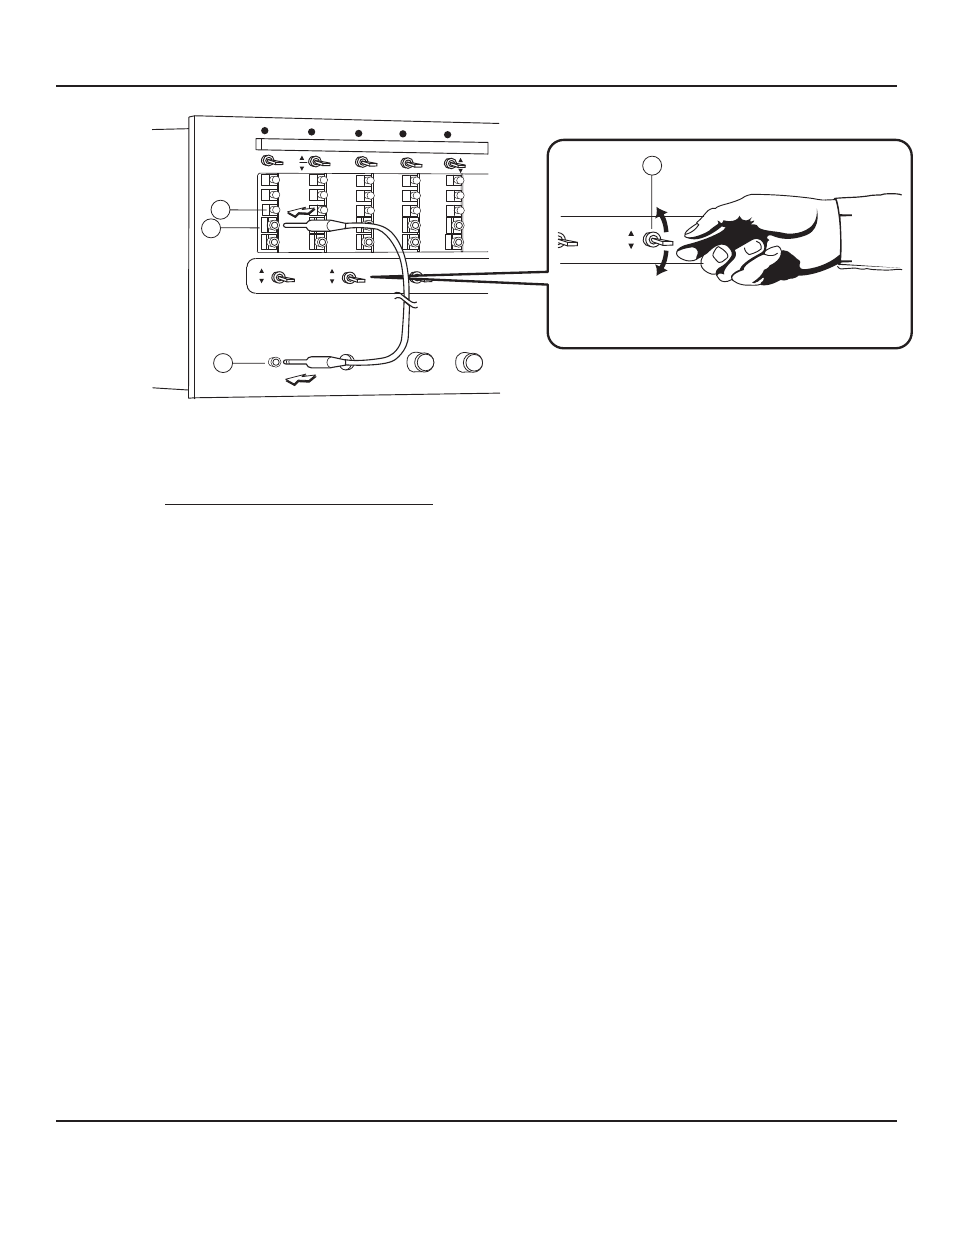
Fig. 16 Setting the audio threshold sensitivity
OPERATION AND TEST (cont.):
12). Set the audio threshold as follows:
a.
Connect the cable with a 3.5mm mono plug on both ends (supplied) between the
Audio Alarm Input Jack[6] and Audio Alarm Output Jack[22]. See Fig. 16.
b.
The Audio Level Indicator[17] contains 10 level segments, 7 green and 3 red
that luminate and move up and down the scale, depending upon the amount of
alarm signal coming from the Audio Alarm Output Jack[22]. The closer the
green segment moves up to the red area, the more sensitive the unit becomes,
the further the green segments are from the red area, the less sensitive it
becomes. In setting audio threshold, the lumination should not go past the last
green segment. If it enters the red area, then the threshold sensitivity is too high.
When the last red segments is illuminated and remains lit for the duration of the
predetermined time delay (from 0.1 to 3.2 seconds) the unit goes into alarm.
c.
Flip the Threshold Sensitivity Switch[7] DOWN to decrease the sensitivity, and
UP to increase sensitivity.
d.
Push and release quickly the Day Sensitivity Setting Pushbutton[21] once or
twice while observing the Audio Level Indicator[17]. If the audio level does not
pass the last green segment, the setting is near correct but an actual check is
necessary. Another person is needed in the remote area to generate some noise
to trigger the unit. The noise could be any loud sound such as a shout. If the unit
does not go into alarm after a loud sound is generated, flip the Threshold
Sensitivity Switch[7] upwards to increase the sensitivity.
e.
Push once and release quickly the Day Sensitivity Setting Pushbutton[21].
Again generate a loud noise to trigger the alarm. These miniature pushbutton
switches are very sensitive. If you hold this switch for about a second long, it will
go to the next step. These switches can be pushed up to a maximum of 32 times.
Additional pushes beyond 32 have no effect on the switch.
7
21
22
6
INCREASE
DECREASE
INCREASE
DECREASE
DG_12II_6/11
LOUROE ELECTRONICS 6 9 5 5 VA L J E A N AVENUE, VAN NUYS, CA 91406
TEL (818) 994-6498
FAX
994-6458
website: www.louroe.com e-mail: [email protected]
(818)
®
INSTALLATION AND OPERATING INSTRUCTIONS