MacroSystem Arabesk 5 User Manual
Page 14
14
or move them. The mouse pointer changes its form, to show
you which function is triggered by the left trackball button.
Depending on the speed you selected in the System Settings,
i.e. Slow, Normal or Fast, you may have difficulties picking but-
tons or texts. This is why the “Button Size/Move Area” setting
allows you to adjust the so-called move area. You can select
“fine”, “normal” or “rough”.
Menu Format Select the video format for the DVD menu. You
can choose between 4:3 and 16:9.
Apply button attributes to all Arabesk 5 gives you the pos-
sibility to design each button individually, but you can also set
the program to apply the changes you make to one button
to all other buttons. This has the advantage that changes are
easier to make, plus, you can change a whole array of buttons
without having to manually change each and every one.
The following options exist:
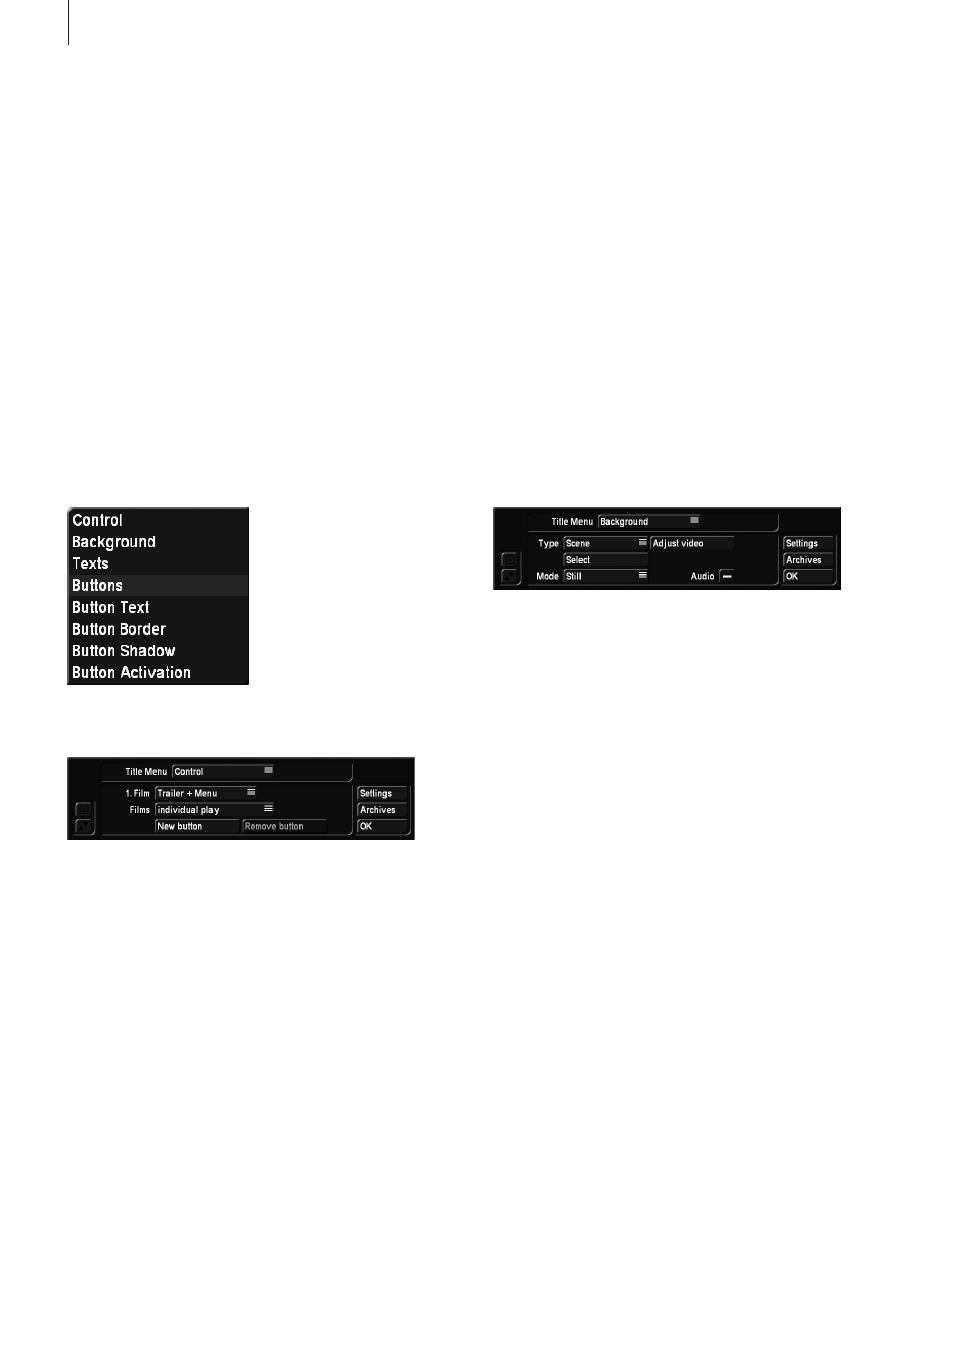
Control This is where settings are defined that will be active
later when the burned DVD is being played.
The “1. Film” setting is used to determine whether the first
movie should be played automatically or should be listed in
the menu. If you select “in menu”, the menu will be shown
when the disk has been inserted, and the first movie will not be
played automatically. If you select “Trailer only”, the first movie
will be played automatically after inserting the DVD. After this,
the menu will appear, but the first movie will not be listed. This
means that it is not possible to play the first movie again, from
the menu. The “Trailer + Menu” setting will play the first movie
immediately, but will then display the menu including the
movie, allowing it to be selected again.
“Films”: Here, you can define the playback mode for the films
added to your DVD.
“individual play”: After playing a movie, the menu will be dis-
played again.
“Play successively”: Plays all films on the DVD in a row and
then returns to the main menu.
“repeated play”: This stops the player from returning to the
main menu and instead plays the first film again once the last
one is finished.
“New button”: Select a button/film. Use “New button” to cre-
ate and edit an additional button for this movie. This way, you
could create a button that immediately plays the film and an-
other that switches over to the chapter menu. The new button
is always added to the middle of the menu and either copies
the attributes of a previously created button or of pre-defined
button from the Image Pool. Please note that this is only about
adding new buttons. Buttons for the selection of predefined
chapters or navigation arrows for a page change are automati-
cally created and do not need to be created anew.
“Remove button”: This deletes a button you have added.
Note: If you want to create a different design for an extra but-
ton, make sure to deactivate “Apply button attributes to all”.
Background This function makes it possible to create and
modify the disk menu background.
The “Type” button is used to choose between a color, a
sample or a scene. When you have selected the background
type, the background will reappear, taking into account the
setting last selected, or you will be presented immediately with
the selection panel for backgrounds. You can also make later
changes using the Select button. Use the Select button to
access the color box, the Image Pool or the project and scene
selection (depending on the setting selected in Type). If you
have selected Scene, you will be able to select a project in the
“Project selection” Window of which the scene bin will appear
after clicking on OK. Select the scene you want from the bin.
The first image of the scene will be used. If this is not to your
liking, it is possible to trim the scene in the edit menu until you
reach the image you want.
The Mode button offers a choice between Still and Moving
images, which makes it possible to select a fixed or a moving
background scene. This button is only available if you have
selected a scene as your background. The length for mov-
ing background scenes is limited to one minute. It speaks for
itself that you can also select a scene with a longer duration.
However, it will be shortened to one minute. The menu will be
played in an endless loop. When selecting a moving scene,
you will also be able to select the original sound or to leave the
scene silent.
Note: You can only have a button with a moving sequence if
you do indeed select a moving scene (scene sequence) in this
menu. The maximum duration of the sequence on the button
depends on the background scene you select here. Again, the
maximum length is 60 seconds. If you selected an individual
page design, containing only one page with a moving image, it