MacroSystem Arabesk 5 User Manual
Page 8
8
Chapter marks You can choose if the film is to place chapter
marks automatically “every 5 minutes” or “every 10 minutes”.
If you do not want any automatic chapter marks, you should
select “none”. To make your choice, place a tick in the right
box. Only one option is possible at a time. The available set-
tings depend very much on the length of the project: placing
marks every 5 or 10 minutes is not possible in a 3-minute film.
With this option, the chapter marks will be set even if you do
not wish to use a chapter menu for your DVD.
If your movie is shorter than 5 minutes, this setting will be
skipped, since there are no option for a short movie. In that
case, you will be shown the item “Film >XYZ<” immediately.
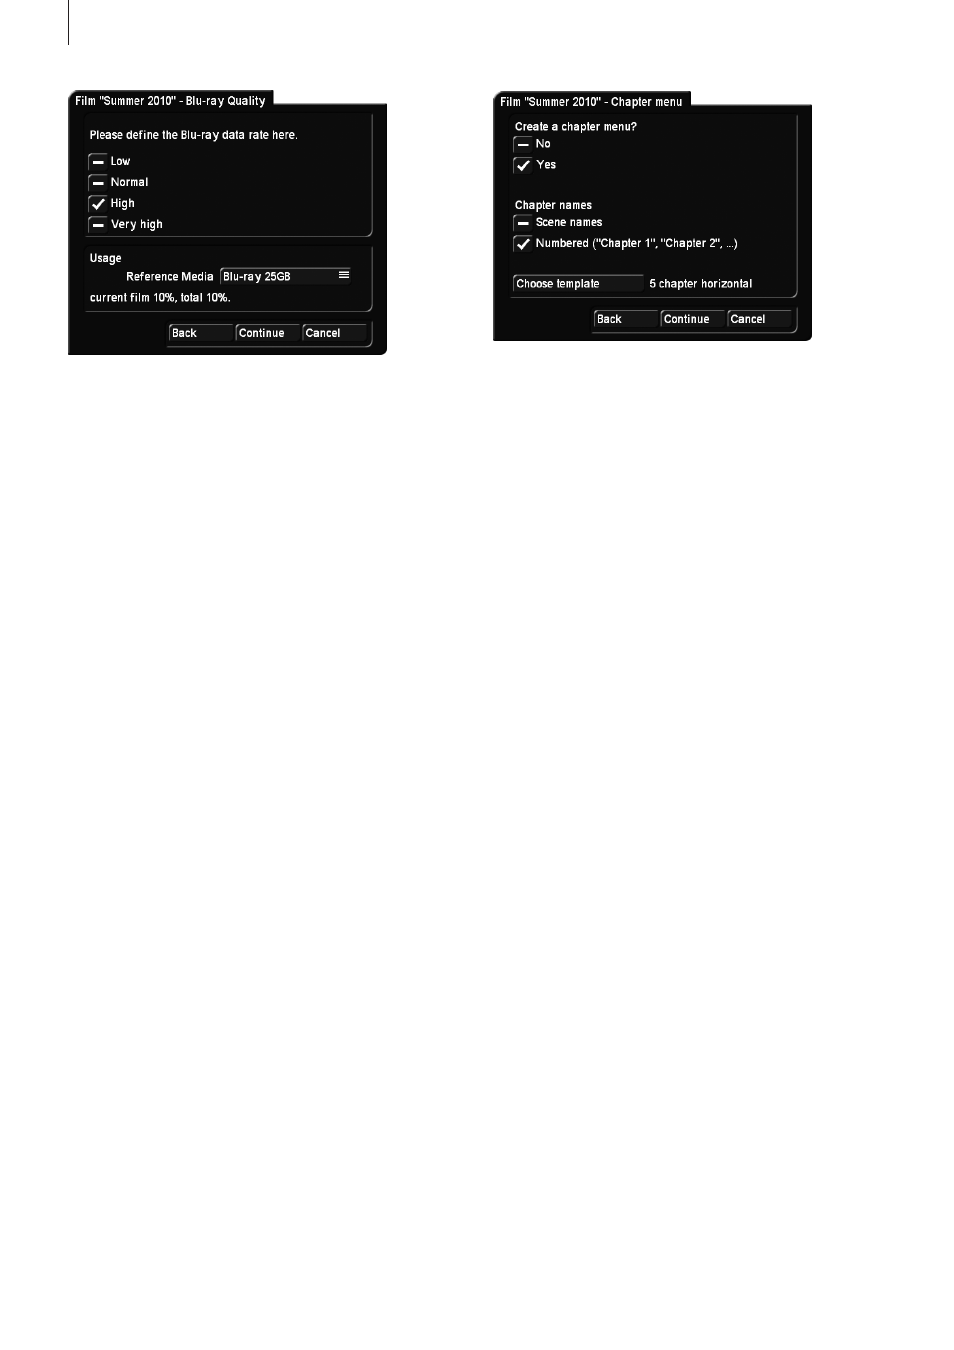
Chapter menu If you choose to use automatic chapter marks,
the Assistant will ask you if you wish to incorporate a chapter
menu on your disk. If you select No, navigation will still be pos-
sible using the DVD player‘s control, but there will be no visual
selection.
If you wish to create a chapter menu, you should place a
check mark in the Yes check box. You can now decide wheth-
er you want to give the chapters the names of the scenes
played at the start of the chapter, or if the chapters are simply
to be numbered. The chapter stamps are generated automati-
cally according to the interval set. You do not have any other
influence in the Assistant, but you can adapt the chapters
manually later.
At this point, you have to select a design template, otherwise
the button Continue will remain ghosted. Use the “Choose
template” button to enter the archives and choose your design
template.
The list of chapter presets is set up in products groups. If you
have already created your own templates, or if there are ad-
ditional products installed, use the Product button to choose
a group. In addition, the templates are categorized into aspect
ratio types. Thus, you can choose either 4:3 or 16:9 types. You
will then see a list of available templates at the bottom left. If
the list is empty, change the settings for “Type” and “Product”.
On the right side, you will see a small preview of the currently
selected template.
Button menu In order to create the main menu, you should
choose a thumbnail to represent the current movie in the
menu. If you don‘t, the program will automatically select a
frame from the start of the film and display that in the Blu-ray
menu or DVD menu.
To choose a button image, you should click on “Select but-
ton”. To select an image, you can now go to any position in
the current movie. Click on the “Position” button to use the
trackball to set the corresponding image position in the movie.
Film >XYZ< With the aid of the Assistant, you have now pre-
pared a movie to be burned on a disk. To add a new film, go
back to the project list and use the Assistant once more. You
should only quit the Assistant when you do not want to add
additional movies. Once closed, the Assistant can no longer be
used to add additional movies. This can only be done manu-
ally, later, using the main menu, on the condition that you have
not created the disk at the end of the Assistant.
Before you exit the Assistant, you can use the Back button to
return to previous pages and make changes. This way, you
can remove a film by going through the Assistant in reverse
order.
Disk menu If you don‘t need to add more films, you should
use the Continue button to enter the design screen for the
main menu. Usually, you will want to create a menu if you are
adding several movies, and you might want not to create a
menu if you are burning a single movie on the disk.
In that case, select No. Further changes are no longer possible
and the disk will start with your first film. This setting does not
support additional films. If your medium carries more than one
movie, you may want to create a menu. You can then decide if
the disk menu appears first, or if the disk starts by playing the
first movie. Should you want to play a short introduction before
the main menu, you can do this by playing the first movie im-
mediately.
Menu design If you are creating a main menu, you should en-
ter the title (name) for your menu here. You must also choose
a menu type from the available design templates. The Con-
tinue button will remain ghosted until you do so. You can also
select a 4:3 or 16:9 display for your menu, but it is possible to