2 add film – MacroSystem Arabesk 5 User Manual
Page 9
9
Arabesk 5 User manual
change this option later in the actual design selection.
The menu template should now contain the number of movies
you have added previously. If you have more or less mov-
ies than the template shows, the look of the menu is going to
change accordingly.
Menu design - background Select a background picture for
your disk menu. If you want to keep the template background
and no other, tick the “like template” box. Tick the second
box if you wish to choose your own pattern from the Image
Pool. Tick the third box to use a still frame from a scene, or the
fourth if you want to use a moving scene with sound for the
disk menu background.
To choose a pattern or scene, you must make the selection
using the “Select Pattern/Scene” function. Select the desired
background and click Continue to go on. Arabesk 5 offers two
products wherein you can select from the provided back-
grounds. Go in the Image Pool to “DVD background” to select
backgrounds that have been optimized for DVD menus. If you
choose the “Blu-ray background” product, you will be able to
select from different HD masks.
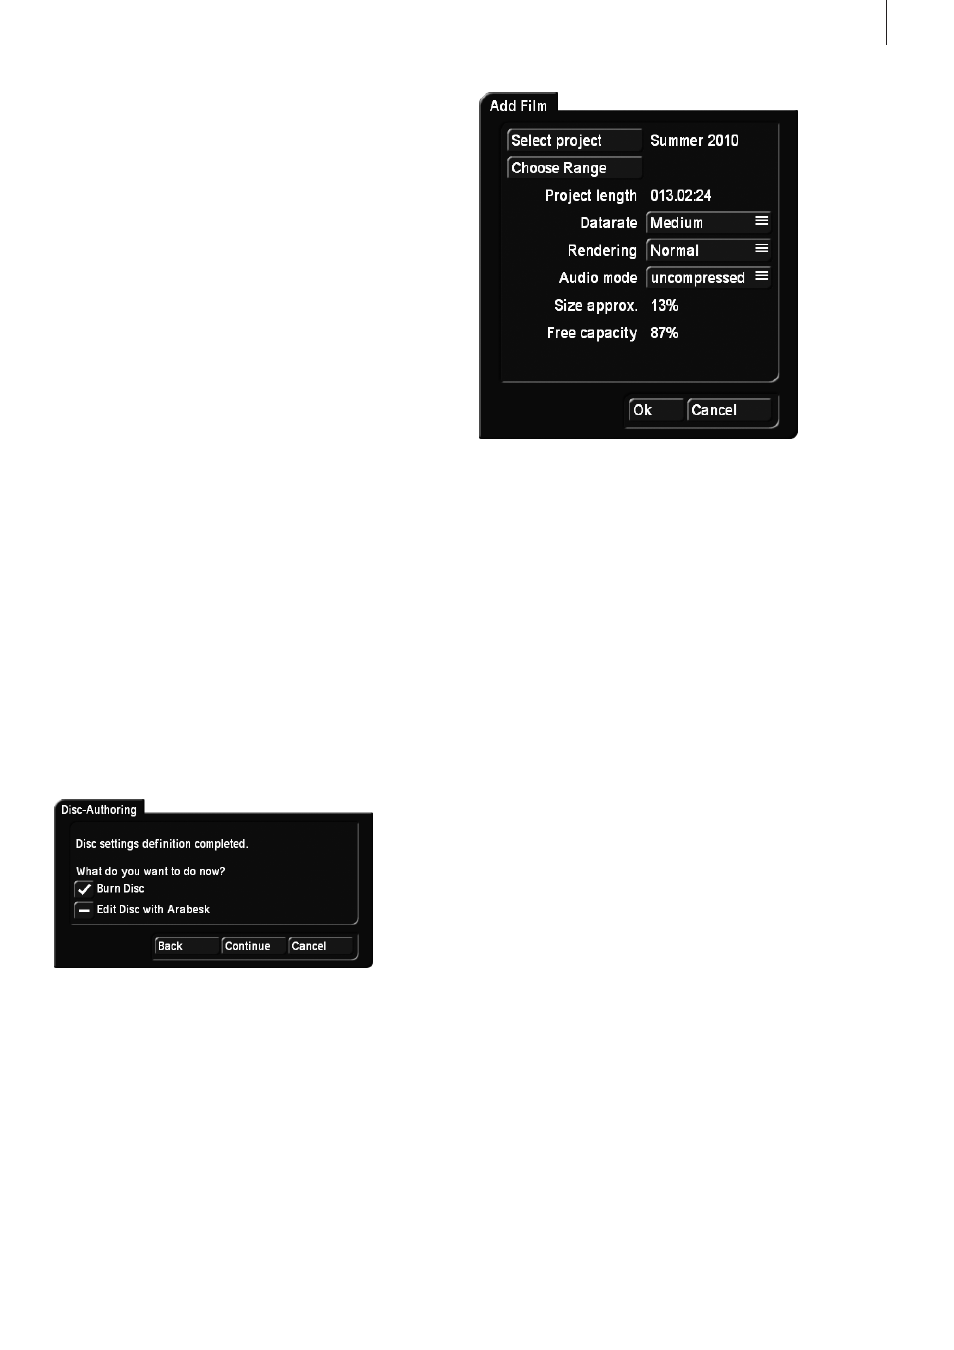
Disc-Authoring At this stage of the Assistant, all necessary
settings for creating a DVD have been made. You can now de-
cide if you want to make manual changes or choose different
films, or if you want to start burning the DVD right now. Select
“Burn DVD” and all necessary and final rendering will be done,
followed by the burning process. You can insert an empty me-
dium at this stage if you do not wish to wait and instead want
to start burning immediately after rendering is done. If you still
need to make more in-depth modifications (that go beyond the
Assistant) to the menu, change over to the manual design and
thus return to the main menu of Arabesk.
3.2 Add film
Here it is also necessary to indicate in the settings what type
of disk you want to create before you start putting it together.
This is where you set the desired result and the reference me-
dium. This will determine further settings options and the type
of disk rendering.
Click on the “Add Film” button to open a window with several
functions:
Select project The project can now be selected. Click on the
“Select project” button to activate the project selection you al-
ready know from the project settings and where you can select
the desired project or movie. You will see that the project from
which you have started Arabesk 5 will already be active.
If you want to use another movie, you should click on “Select
project”.
Note: Only projects that have been marked with a white dot
contain footage.
When you select the project that you want to insert, a trimming
menu will appear automatically. This can be used to define the
range of the film that should be taken into account. Trim your
movie in the IN and OUT ranges. For example, a leader or a
black fade at the start of the movie can be cut out for produc-
tion. It is also possible to split a long movie in two parts, where
the start is trimmed away from the first part and the end is
trimmed away from the second part.
Note: To trim a movie for a DVD, switch to the corresponding
project in Bogart, and then go to Finish to define the range of
the movie before adding it in Arabesk.
Choose Range The “Choose Range” button is only available
for a Blu-ray production. This makes it possible to trim the
range of the movie once again, just as it was possible immedi-
ately after selecting the movie.
Project length This field displays the length of the project that
is being added.
Datarate Use Datarate to set the image quality of the movie.
You can choose between Low (14 Mbps), Medium (18 Mbps),
High (24 Mbps) and Very High (32 Mbps).
The image quality is exclusively determined by the data rate
(also the compression rate). A better image quality requires
more storage capacity. High or maximum quality will therefore