MacroSystem Columbus User Manual
Page 25
24
25
which do not mark out the position of any port.
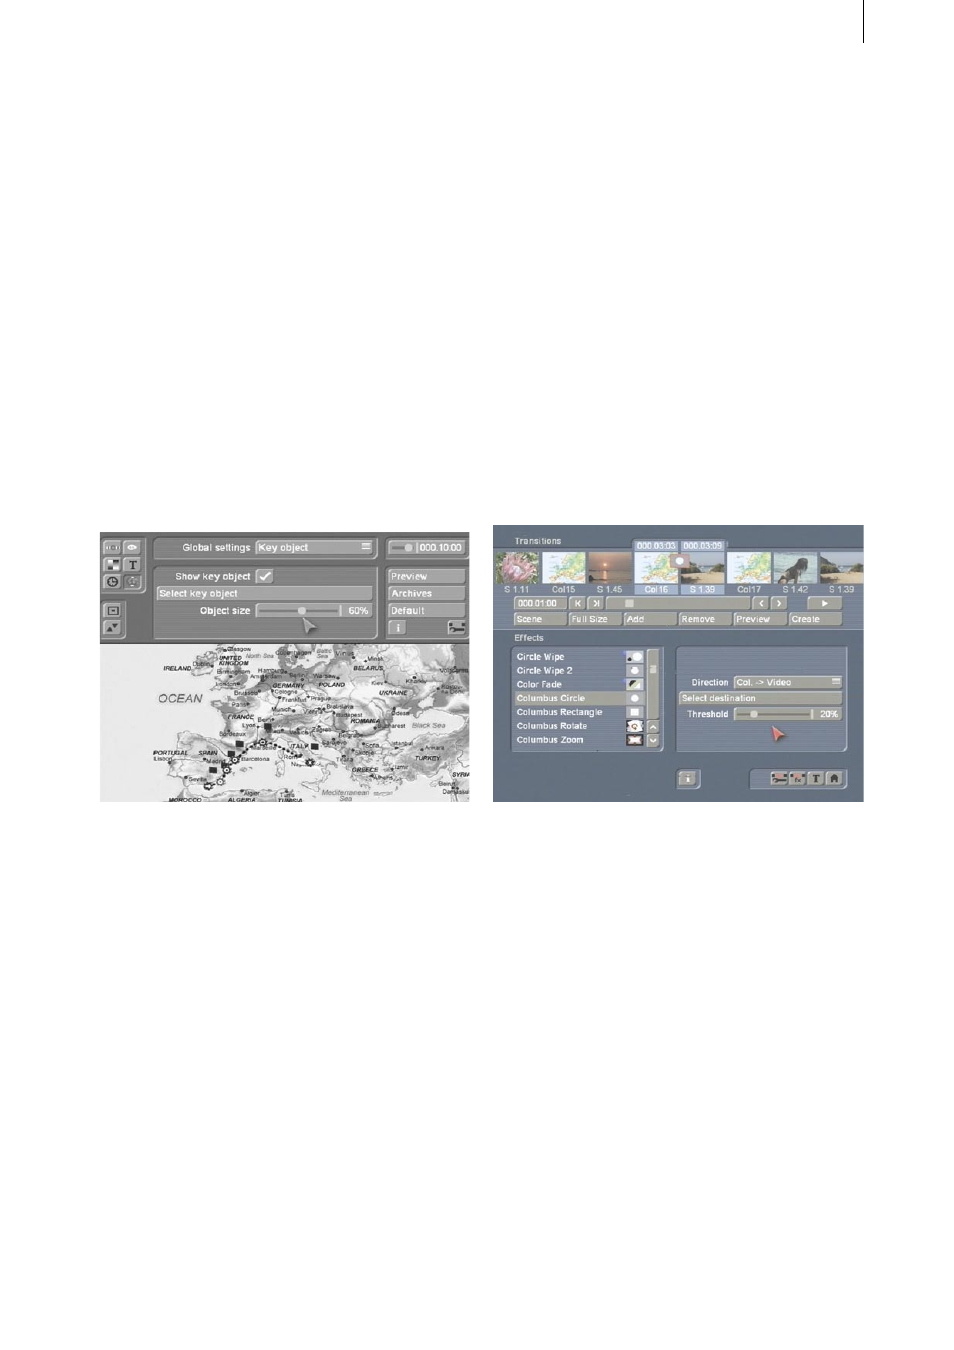
You can then label the key points with more
detail by assigning objects to them. Activate a
key point (you can tell the key points apart from
the waypoints by the symbols that are displayed
within the colored points – see Chapter 2.1), then
open the “Global settings” menu and set the
selection switch to “Key object”. Next activate
the “Show key object” function and click on
the “Select key object” button. Now choose a
suitable object, e.g. a flag (3D object) and select
a suitable color. Then, if necessary, adjust the
“Object size”. Since the “Global settings” menu
only makes global changes, you will see that the
settings that you have just configured are ap-
plied to all the key points (including the starting
and finishing points).
When the route is then calculated, please make
sure that the “Split at key points” function in the
“Special” window is set to “Yes”!
After the calculations are complete, you will see
several scenes in the scene bin each displaying
a part of your route. If you now place the indi-
vidual scenes one after another in the story-
board they will make up the entire cruise route.
However, you also have video footage for each
stopover that you want to insert at each key
point as soon as the ship arrives there.
That is why the route must be available split up
into several scenes so that you can insert the
video footage after the scene in which the ship
reaches the key point. To ensure that the transi-
tion from the route scene to the video footage
remains smooth, you must fade the scenes into
one another using a transition effect.
To do so, open the “Transition” menu and
select the two scenes that you want to fade into
one another. You can of course use any transi-
tion effect that you want here but Columbus
also provides its own special transition effects
(Columbus Rotate, Columbus Circle, Colum-
bus Rectangle, Columbus Zoom) that are also
included in other effects packages in a similar
form. The difference is that these effects have
been specially adapted for the Columbus so that
the starting or finishing point of each effect can
be positioned precisely at any point in the scene.
So if you want to fade from your route into the
video, open the transitions menu, select an ef-
fect like “Columbus Circle” and insert it. Since
you want to fade from Columbus into a video,
set the “Direction“ to ”Col. -> Video“.
Next click on the “Select destination” button so
that you see your video picture and then, using
the “Position“ button, you can set the position
for the point at which the video scene should
start fading in. In this case, select the point on
the map that your head object (i.e. the ship)
is currently heading towards and at which the
pause time will start.
If necessary, now set the “Threshold” for the
video fade-in.
Set the effect length to 1 second. This ensures
that the effect is not too short and that the video
scene is not faded in too early but that it only
starts appearing when the object (ship) comes to
a halt at the key point.