MacroSystem Columbus User Manual
Page 8
8
9
Setting points
To set a new point, position the trackball pointer
at the required position on the line and click on
the left trackball button. A new waypoint (green)
appears.
Activating points
You can activate an inactive point (red) by click-
ing on it. It changes color (green) but its position
remains unchanged.
Repositioning points
You can reposition all the points on the map dis-
play. You can “pick up” an active point (green),
which as a result changes blue. Whilst you are
repositioning the point by rolling the trackball,
the curves automatically change shape to suit
the new position. Clicking again causes the point
to be “dropped” at the new position. Clicking on
the right button cancels the repositioning opera-
tion.
Deleting points
You can delete an active point (green) by clicking
the right trackball button. To do so, the trackball
pointer must be positioned directly over the
point.
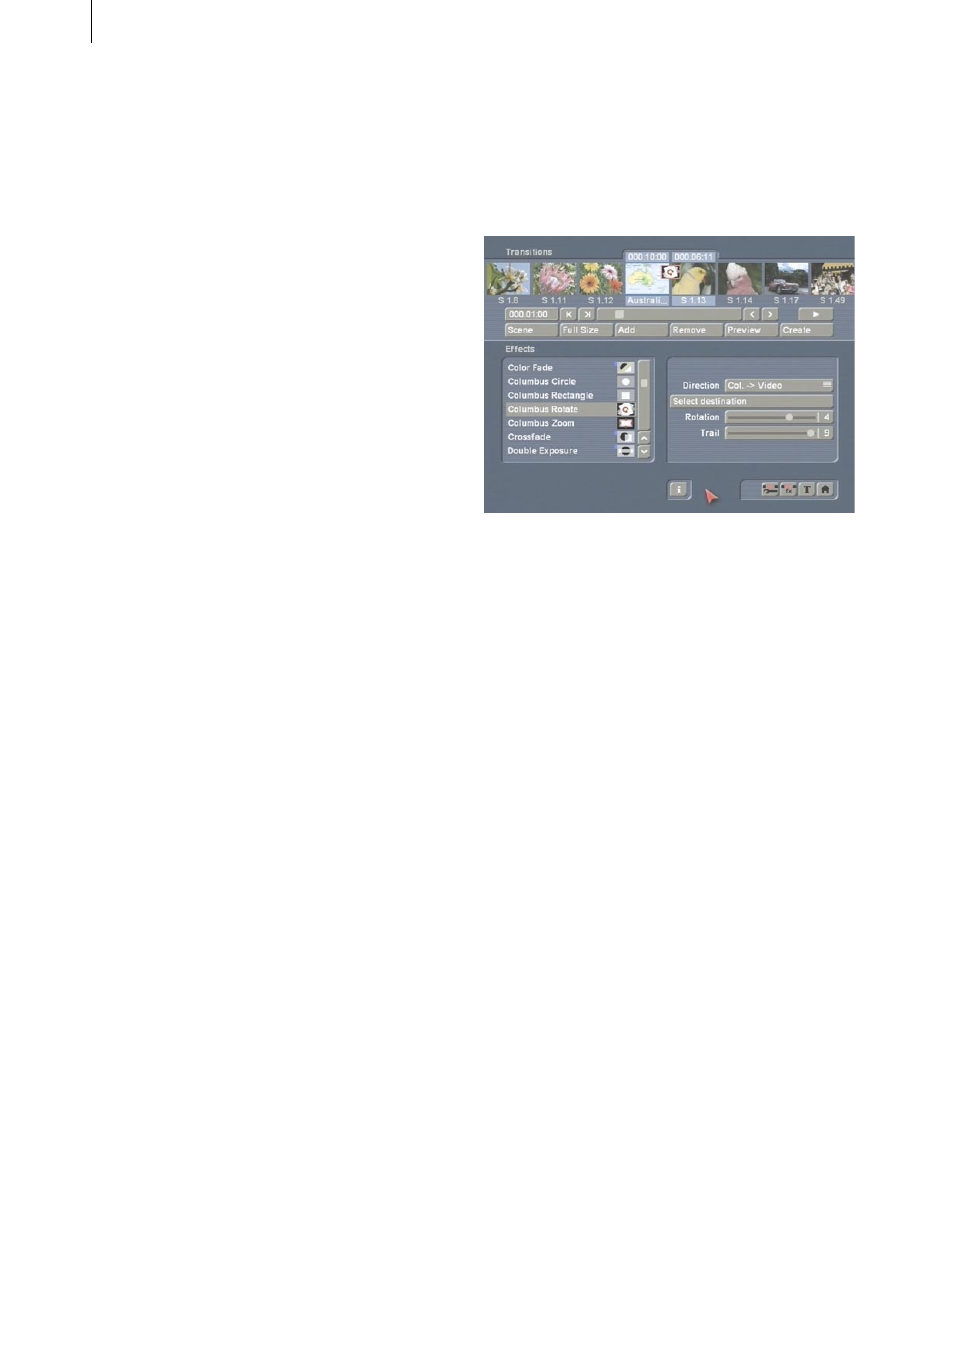
2.2 Transition effects
In the Transition Effects menu, you have the op-
tion of inserting various fade effects to enhance
the way the map display fades into the video
scene (and back again). To create these transi-
tions, you must set the pause time in the soft-
ware at the set key points to a value greater than
0, and then set the “Split at key points” effect
option to “Yes” in the “Special” window before
the calculations are carried out. This causes the
sections that are generated during the calcula-
tion process to be saved separately in the scene
bin so that they can be joined to the video
scenes using the effects.
These effects therefore allow you to switch
back and forth between the map display and
the normal film footage at various key points
along your journey. You can of course also do
this without using these effects or by using any
other transition effects – the Columbus effects,
however, give you the advantage of being able
to generate a very precise fade effect.
The available effects are Rotate, Circle, Rect-
angle and a Zoom.
All the effects naturally also have additional
effects options with which you can create your
own custom fades: first of all, select the “Direc-
tion” of the fade. “Col. -> Video” fades from the
map scene (left in the storyboard) to the video
scene (right in the storyboard). The “Video ->
Col.” option on the other hand fades from the
video (left) back to the map (right).
You can use the “Select destination” button to
select the required point at which you want the
video scene fade-in to start. Depending on the
setting of the “Direction” button, the map image
will always be displayed whilst this is taking
place. The “Position” function allows you to
position the small marker over the center of the
symbol that represents the key point that you
require. If you do not see the map display here,
please check the setting of the “Direction” but-
ton. You cannot activate the “Size” function.
The additional settings depend on the effect be-
ing used:
The “Columbus Rotation” effect provides you
with the “Rotation” option (which allows you to
specify the number of scene rotations) and the
“Trail” option (which generates trails of “ghost
images” behind the rotation that continuously
become more or less transparent).
The “Columbus Circle” and “Columbus Rect-
angle” effects provide you with the “Threshold”