Trimmer – MBM Corporation STITCHFOLD Trimmer User Manual
Page 16
16
Trimmer
UPPER KNIFE REMOVAL & INSTALLATION:
CAUTION: Changing knives can be very dan-
gerous unless safety precautions are observed
and extreme care is taken when handling
knives
Keep handling of unprotected knives to
an absolute minimum.
Warn people of any unprotected knife.
Knife changing is a ONE PERSON OP-
ERATION. Having more than one per-
son trying to change knives invites acci-
dents.
1. Use the "Knife Change" rocker switch to move
the knife bar to the bottom of it's stroke.
2. Turn off power and unplug power cord.
3. Remove bottom cover of infeed table.
4. Remove front upper cover and the lower bar
that the front upper cover attaches to.
5. Remove the left and right side covers.
6. Remove the four screws and nuts holding the
top infeed table's conveyor bracket to the infeed
table.
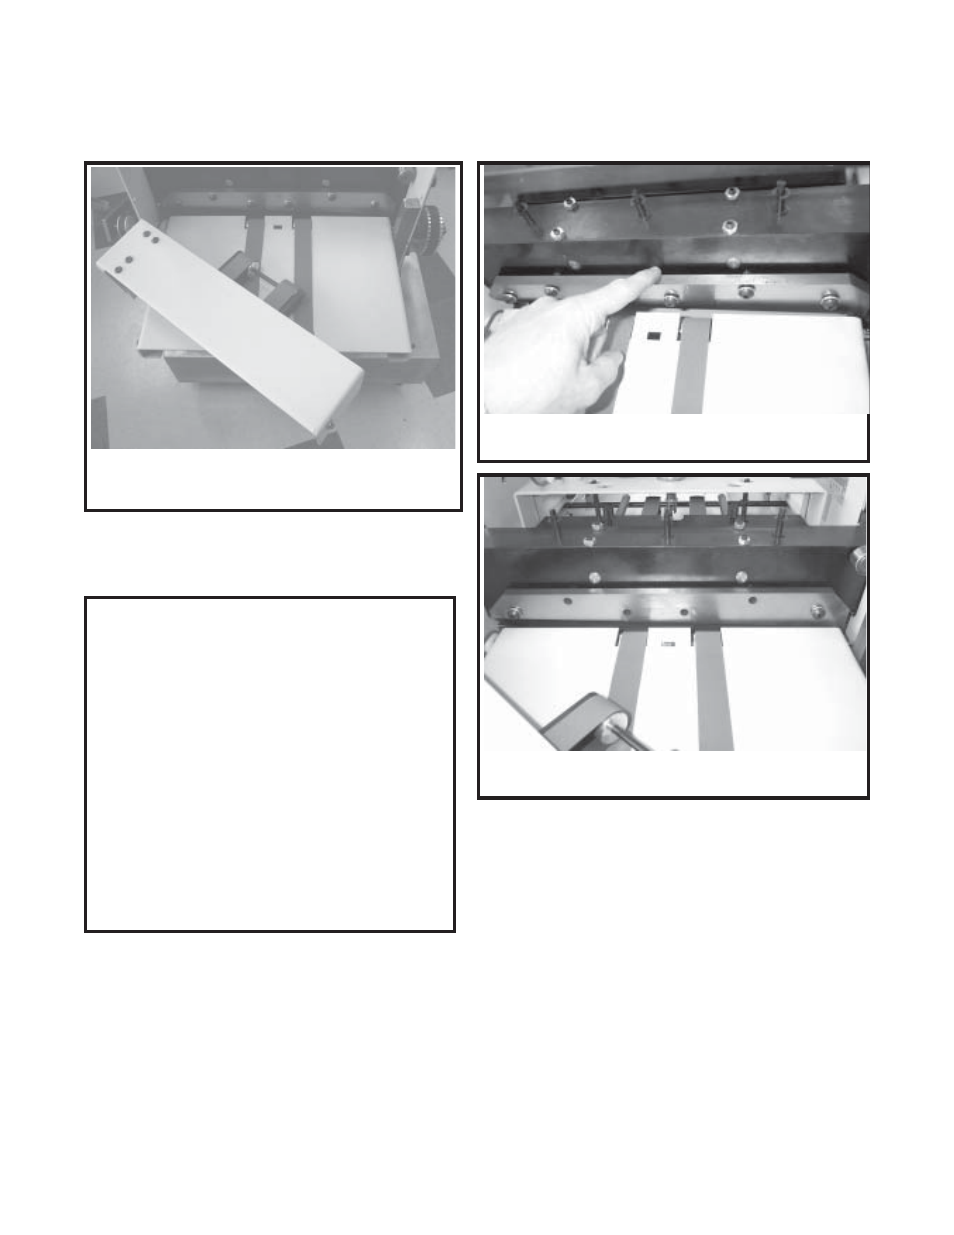
7. Carefully lift the right side of the upper infeed
conveyor bracket off the infeed table. Swing
it out and lay it on the infeed table (fig 23).
NOTE: Be sure the round belt does not come
off pulleys and be sure the separating finger
stays between belts where they cross or the
infeed table conveyors wil not operate prop-
erly when reassembled.
8. Loosen, BUT DO NOT REMOVE, all upper
knife screws so that the upper knife can be
slid away from the knife bar on the screws
about 1/8 inch (fig 24).
9. Remove only the four middle knife screws so
that the two end screws remaining are holding
the knife about 1/8 inch away from the knife
bar (fig 25).
KNIFE REMOVAL & INSTALLATION
(Fig 23)
(Fig 25)
(Fig 24)