MBM Corporation STITCHFOLD Trimmer User Manual
Page 17
17
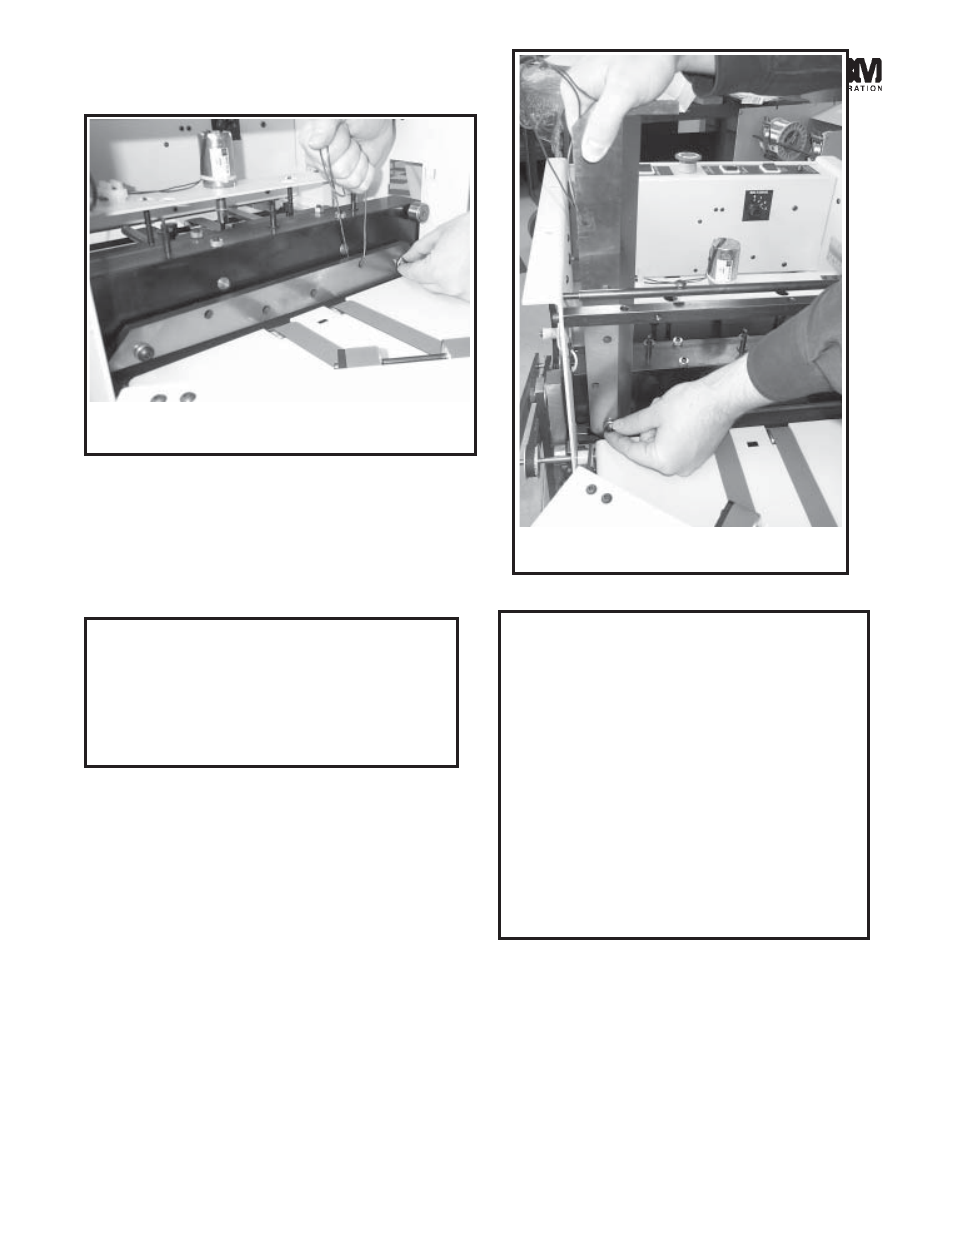
10. Insert a strong length of wire through the top
right screw hole in the knife. Pull the wire
through and securely tie the wire ends to make
a strong secure handle that will be used to lift
that end of the knife when the right screw is
removed (fig 26).
DANGER
NEVER PUT HAND OR FINGERS
BELOW KNIFE WHEN REMOVING
OR INSTALLING. SEVERE LAC-
ERATIONS OR DISMEMBERMENT
COULD RESULT.
11. Hold securely onto the wire handle and re-
move the right knife screw.
12. Use both hands to swing knife up, while piv-
oting on remaining lower left hand knife screw.
13. While holding knife securely with one hand,
remove last knife screw, and remove knife
from trimmer (fig 27).
14. Put blade in the scabbard immediately and
secure the knife retaining screws.
15. Reverse this procedure to install upper knife.
LOWER KNIFE REMOVAL:
THE UPPER KNIFE MUST BE REMOVED (per
steps 1-13 of Upper Knife Removal page 16 & 17)
BEFORE THE LOWER KNIFE IS REMOVED.
CAUTION: Changing knives can be very dan-
gerous unless safety precautions are observed
and extreme care is taken when handling
knives
Keep handling of unprotected knives to
an absolute minimum.
Warn people of any unprotected knife.
Knife changing is a ONE PERSON OP-
ERATION. Having more than one per-
son trying to change knives invites acci-
dents.
1. Once the upper knife is removed, cycle the knife
bar back up to the top of it's stroke by manually
releasing the trim clutch and turning the large
pulley on the clutch clockwise (fig 28) until the
knife bar is all the way up.
2. Loosen the five screws securing the lower
knife (fig 29).
3. Remove the lower knife.
(Fig 26)
(Fig 27)