Trimmer – MBM Corporation STITCHFOLD Trimmer User Manual
Page 18
18
Trimmer
LOWER KNIFE INSTALLATION &
ADUSTMENT:
THE UPPER KNIFE MUST BE REMOVED (per
steps 1-13 of Upper Knife Removal pages 16-17)
BEFORE THE LOWER KNIFE IS INSTALLED.
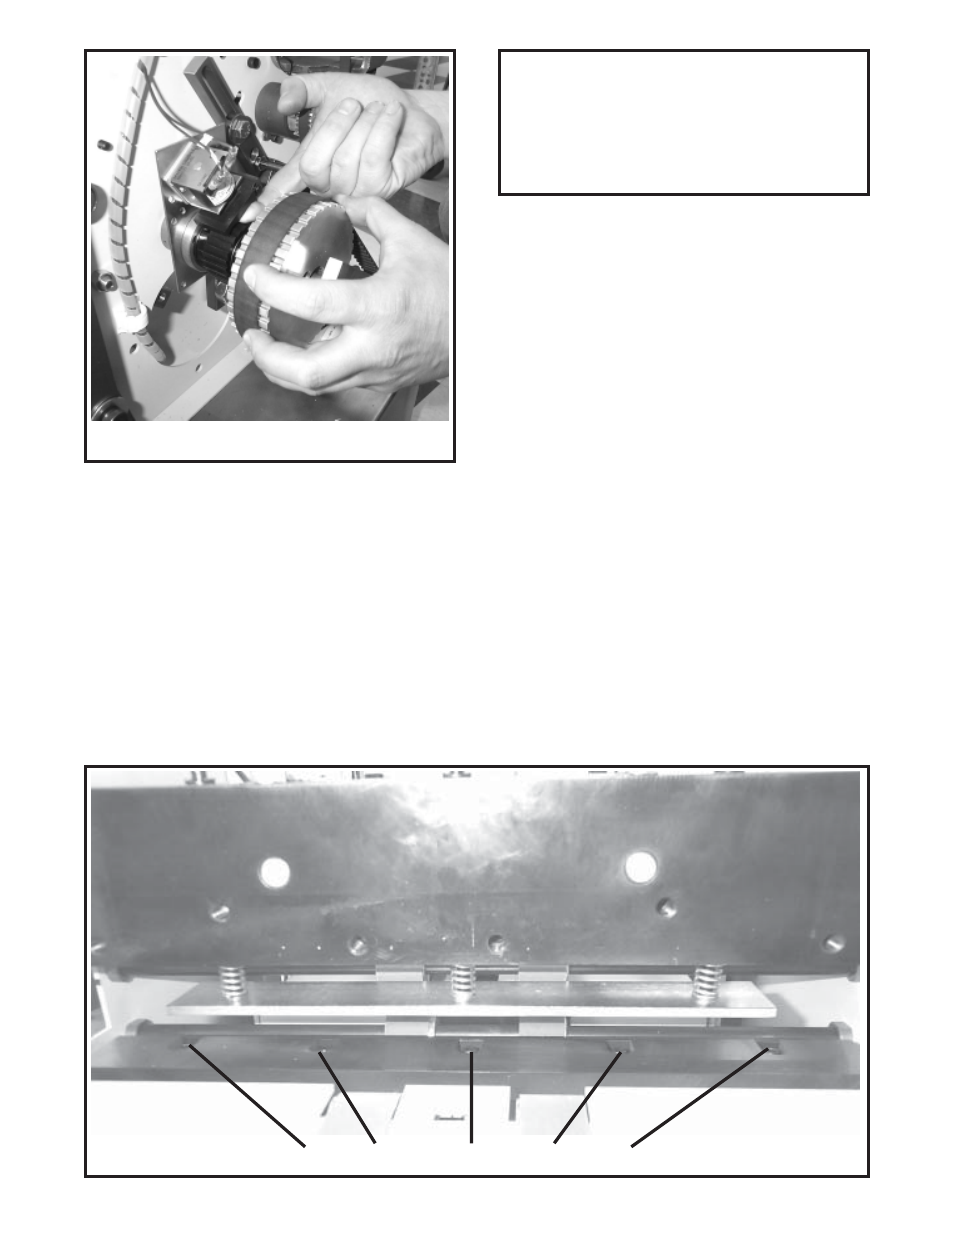
1. Once the upper knife is removed, cycle the
knife bar back up to the top of it's stroke by
manually releasing the trim clutch and turning
the large pulley on the clutch clockwise (fig 28)
until the knife bar is all the way up.
2. If installing a new or different lower knife, the set
screws which push the lower knife forward
against the upper knife, must be turned out so
that the lower knife will not be in the way of the
upper knife cycling down.
3. Install the five lower knife flat washers and
screws, but do not fully tighten because the
lower knife must be free to move during the
next steps of installation/adjustments.
4. Manually cycle the knife bar (similar to step
one ) to the bottom of it's stroke. Install and
secure the upper knife per upper knife re-
moval & installation procedure page 16 & 17
5. Push lower knife firmly against the upper knife.
Turn the lower knife adjustment set screws
gently against the lower knife and secure with
the nuts. Manually release the trim clutch
and turn pulley until knife bar is at top of
stroke.
6. Tighten the lower knife securing screws. DO
NOT PLACE FINGERS OR HAND BELOW
UPPER KNIVE.
Lower Knife Securing Screws
(Fig 28)
(Fig 29)
WARNING
TURNING THE CLUTCH PULLEY
COUNTER CLOCKWISE AND/OR THE
KNIFE PULL DOWN DRIVE SHAFT IN
REVERSE WILL DAMAGE THE CLUTCH.