Connecting the projector to a computer, Connecting to a computer, Connecting the thumbscrew cables – Sim2 MICO 50 User Manual
Page 49: Plug and play” function
English
MiCO 50
11
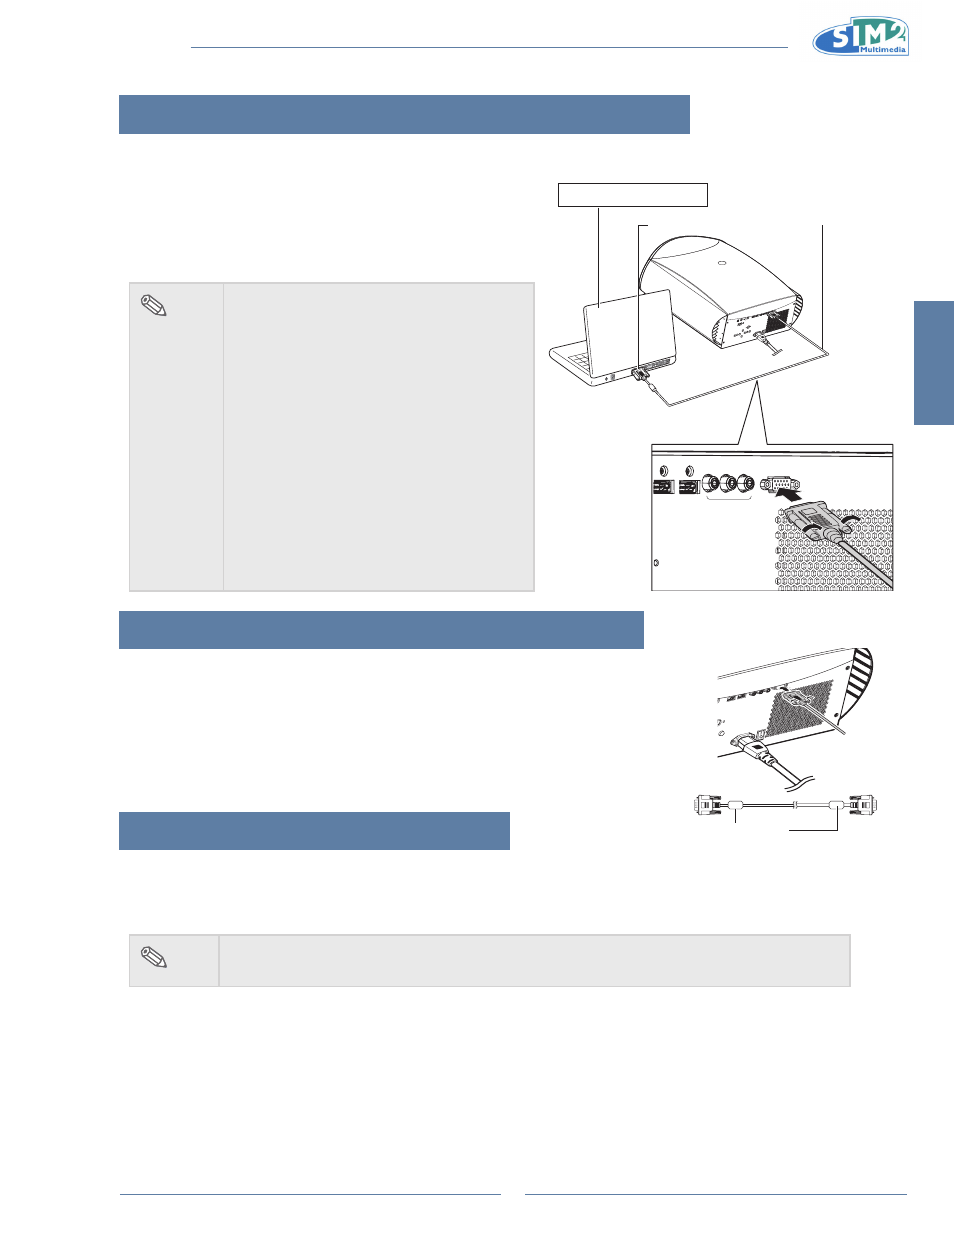
Connecting the Projector to a Computer
Connecting to a Computer
Connect the projector to the computer using the hD 15-pin
VgA to VgA cable.
Secure the connectors by tightening the thumbscrews.
•
note
See page 29 “Computer Compatibility
•
Chart” for a list of computer signals
compatible with the projector. Use with
computer signals other than those listed
may cause some functions not to work.
A Macintosh adaptor may be required for
•
use with some Macintosh computers.
Contact your nearest Authorized Service
Center or Dealer.
Depending on the computer you are
•
using, an image may not be projected
unless the signal output setting of the
computer is switched to the external
output. Refer to the computer operation
manual for switching the computer signal
output settings.
Connecting the Thumbscrew Cables
Connect the thumbscrew cable making sure that it fits correctly into the
n
terminal. Then, firmly secure the connectors by tightening the screws on
both sides of the plug.
Do not remove the ferrite core attached to the HD 15-pin VGA cable.
n
“Plug and Play” Function
This projector is compatible with VESA-standard DDC 1/DDC 2B. The projector and a VESA DDC compatible
n
computer will communicate their setting requirements, allowing for quick and easy setup.
Before using the “Plug and Play” function, be sure to turn on the projector first and the connected computer last.
n
note
The DDC “Plug and Play” function of this projector operates only when used in conjunction
•
with a VESA DDC compatible computer.
GRAPHICS RGB
HDMI 1
HDMI 2
COMPONENT
Pr
Pb
Y
To VGA output terminal
notebook Computer
HD 15-pin VGA to VGA cable
(sold separately)
Ferrite core