Step 6. install the lamps – SoundTraxx DSD-150/DSX Owners Manual User Manual
Page 11
Digital Sound Decoder Owner's Manual
11
the speaker outline onto the tender deck and using a jeweler’s saw, cut out a circular opening about 1/16" inside the
outline marks. Remove all sharp edges and burrs. The speaker is then disguised by covering the opening with a
acoustically transparent coal load. The coal load can be fabricated by contouring a piece of fine screen mesh or
polyurethane foam to represent a coal load and then covering it with a thin layer of scale coal cemented in place with
a thin wash of diluted white glue.
Plastic tenders often have a molded coal load already in place. Unfortunately, the inside surface of such tenders are
contoured to match the coal load and do not provide a flat mounting surface for the speaker. In such cases, the
modeler has two options. The first is to cut out and remove the coal load entirely and replace it with a flat sheet of
0.060" or thicker styrene and then proceed as described above for the flat decked tenders.
Alternatively, a sub-deck can be fabricated from 0.060" sheet styrene such that it fits below the coal load tightly
against the tender sides. Cut a large circular opening appropriate for the speaker diameter into the styrene sheet and
then glue the sub-deck to the inside of the tender shell. Perforate the coal load by drilling a series of small holes (use
a #50-#60 drill) at random angles between the coal “nuggets”. This way, the sound will be allowed to escape yet the
speaker remains relatively invisible regardless of viewing angle.
The more realistic tenders will have fuel bunkers that prototypically extend to the tender floor. For larger tenders with
such a feature, the speaker is best mounted on the tender floor. For smaller tenders, the slope sheet and interior
walls will not only interfere with the speaker, but the decoder as well and it will usually be necessary to remove and
replace them with sheet brass or styrene to create a flat decked tender.
Tender Floor Modifications
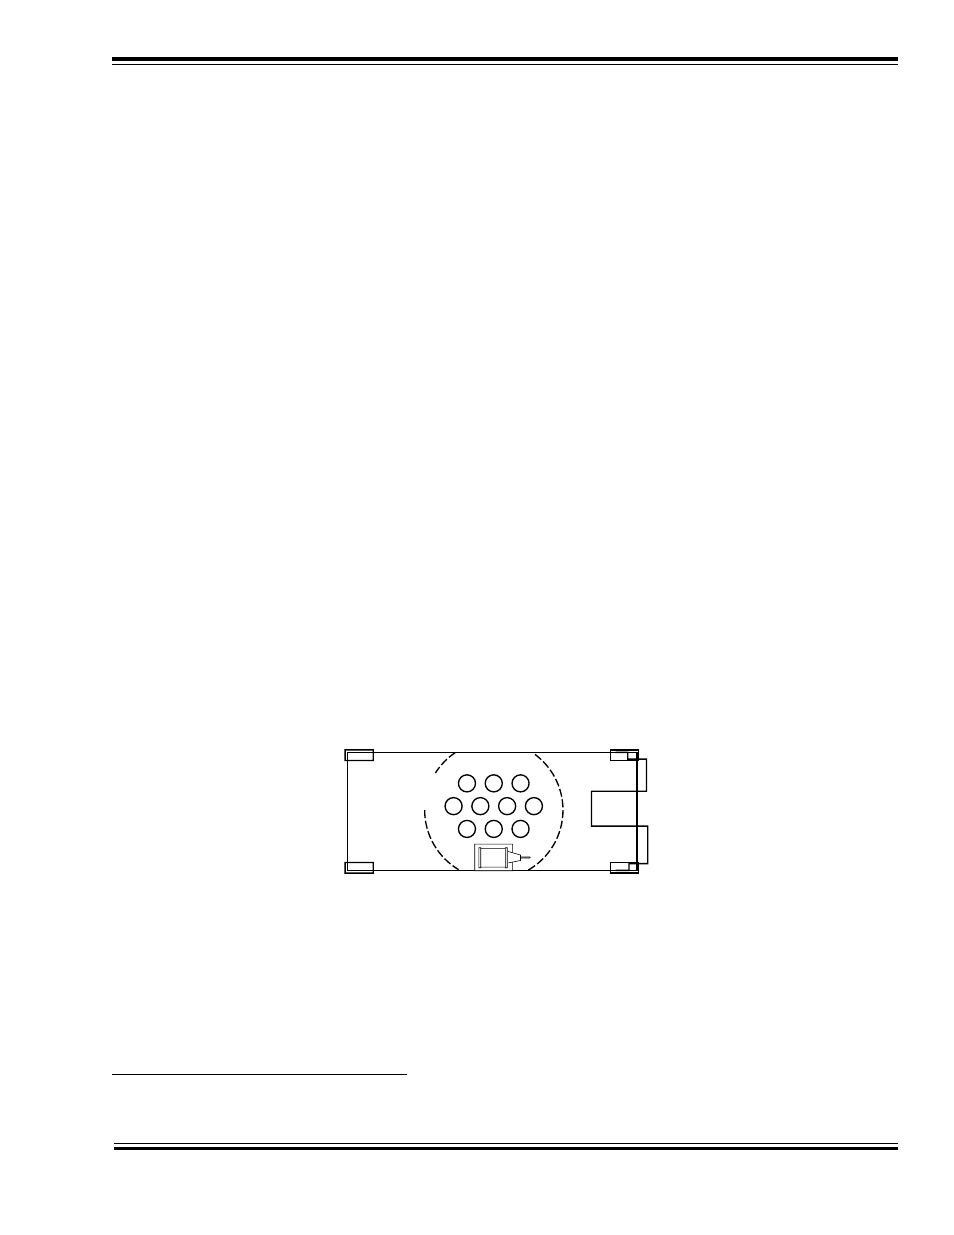
If you are mounting the speaker to the tender floor, first determine the exact speaker location within the tender and
verify that there is adequate clearance between the tender body and speaker magnet. Use a marker or scribe to note
the location of the speaker on the tender floor and then drill three rows of holes (see Figure 5) in the pattern shown
to provide an opening for the sound to escape. A drill approximately .250" is a good size. Space the holes as best you
can, taking into consideration the tender underbody detail. Although the spacing is not critical, you should attempt to
provide at least this much of an opening. If necessary, use more holes of a smaller diameter. Keep all the holes within
the expected cone area of the speaker. Take care not to place holes at the outer edge of the speaker assembly itself.
Once you have drilled your holes, remove all burrs and uneven edges. Makes sure there are no metal burrs or edges
projecting up - the speaker floor should be smooth, with nothing to physically interfere with the speaker’s ability to lay
completely flat on the tender floor, such as solder joints, screw bosses, and mounting studs.
Figure 5 - Tender Floor Modifications
Secure the Speaker in Place
Once body work is complete and the speaker has been fitted in place, it must be secured tightly to the enclosure. For
the best sound, an airtight seal is needed around the speaker edge and we have found the best way to hold the
speaker in place is to use silicone RTV - it provides the airtight seal needed and unlike epoxy or other hard glues,
allows the speaker to be readily removed in the future. Be careful that you don’t get any RTV onto the speaker cone
itself as this will severely distort the sound quality!
Step 6. Install the Lamps
Headlights, Backup Lights and Mars Lights
Drill out the headlight castings to accept any lights you intend to use, including the tender backup light. If you are
using Throttle Up!’s 1.5V, 1.3mm microbulbs, P.N. 810022, a #53 twist drill makes a perfect hole. If you are using the
Speaker
Cone Area