Step 3, Step 4 – Space Ray PTS Series Single Stage User Manual
Page 29
Form 43343330
-28-
Aug 2012
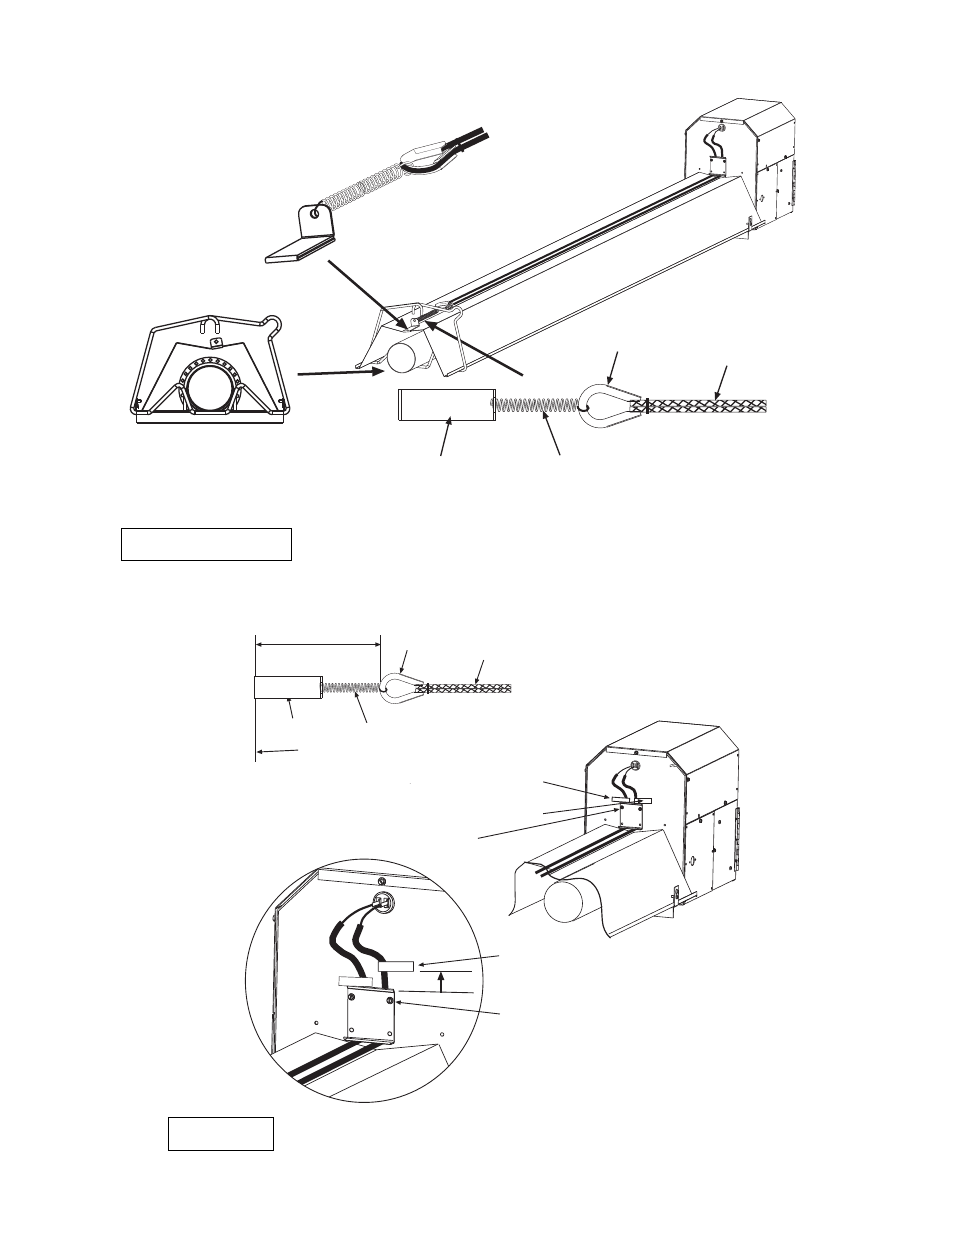
3.
Hold the spring retainer clamp and pull the TISS
TISS
TISS
TISS wire assembly to end of reflector at overlap joint. Slide
spring retainer clamp over end of reflector as shown.
End View
Spring
Retainer Clamp
Spring
Thimble
Wire & Sleeving
Assembly
TISS Wire Assembly
(complete with spring and
spring retainer clamp)
PN 44176000
Step 3
4.
After attachment of the TISS
TISS
TISS
TISS, check to make sure that there is sufficient tension on the wire. Follow the
Follow the
Follow the
Follow the
diagram below to increase or decrease the tension as necessary.
diagram below to increase or decrease the tension as necessary.
diagram below to increase or decrease the tension as necessary.
diagram below to increase or decrease the tension as necessary.
Spring
Retainer Clamp
3. Mark the other end of the sleeve with tape or
other marker. Use the top of the retainer as a
reference.
4. Loosen screws.
2. Tape one end of the sleeve to the burner box
or use a marker.
5. Pull one end of the sleeve and wire inside until
the marker is raised by the total adjusment length.
ie. if the extension is 10 then pull through 1 to
increase the exension to 11.
Spring
Thimble
Wire & Sleeving
Assembly
11 extension
If the extension is less than 11 follow the
instruction below to increase the extension.
1. Measure the extension of the spring from the end of the reflector to the thimble as shown below.
Reflector End
6. Tighten screws.
7. Check extension using the method in step 1.
Step 4