Archgard 10-1800P User Manual
Page 16
Chalet 1800
16
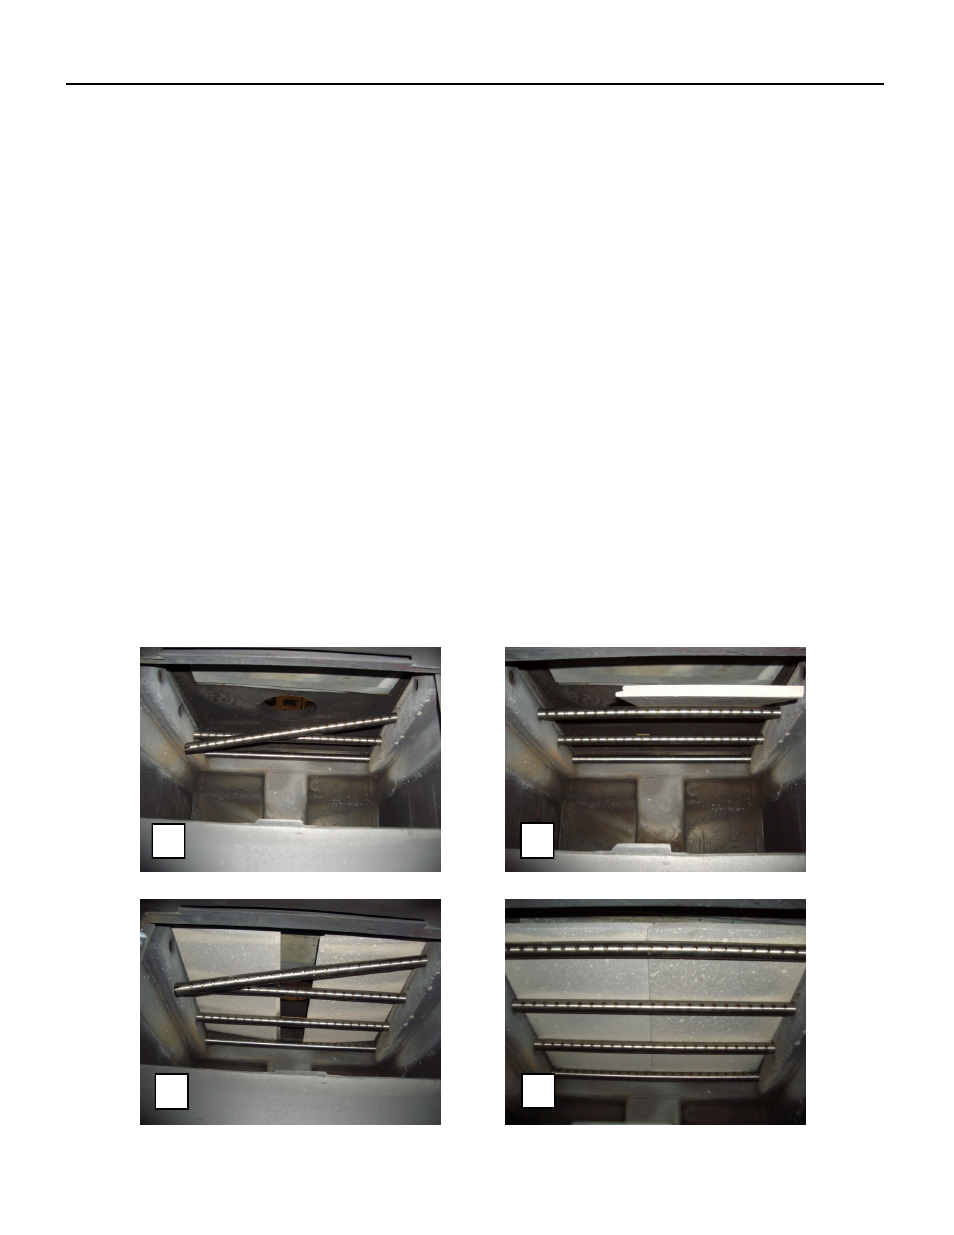
The Air Tubes in the Archgard Chalet 1800 come already assembled with the baffle plates installed. If for
some reason they need to be installed, the following guidelines must be adhered to.
1) Open the Archgard Freestanding Chalet 1800 door.
2) Slide the tube into the right hand side hole, as far as possible and then bring it back into the hole on
the left hand side lining up the “relief or notch” cut into the tube on that side until it locks into position. If
the tube will not slide in easily, simply use a pair of vise grips or pliers and tap it into place with a ham-
mer. A tighter fit will ensure the tube will not move when the unit is burning. NOTE: The holes in the
two back tubes are larger than the holes in the two front tubes. The left hand side of the tubes
have little “notches” or “reliefs” cut into them that mate with the left hand side of the stove that
align the air hole for proper combustion. (Photo 1)
3) Continue to install the other three tubes in the same manner.
4) Before installing the final air tube, slide the a lightweight baffle plate over the air tubes (leaving the
step joint in the middle) from the front and then push it to the back and over to side of the stove as far
as it can go. Do the same with the other lightweight baffle plate ensuring that the step in the middle will
overlap the previous lightweight baffle plate. (Photo 2)
5) When both lightweight baffle plate are in, install the fourth secondary air tube. (Photo 3)
6) After the secondary air tube is installed, reach in and pull the two halves of the lightweight baffle
plates, overlapping them and making sure they are pushed back as far as they can go. (Photo 4)
Handle the ceramic baffle plates with care as they are fragile.
AIR TUBE INSTALLATION
1
2
3
4