Channel branding hard drives installation – Grass Valley Maestro Master Control Installation v.2.4.0 User Manual
Page 330
330
MAESTRO — Installation and Service Manual
Section 9 — Channel Branding Hardware Installation
Channel Branding Hard Drives Installation
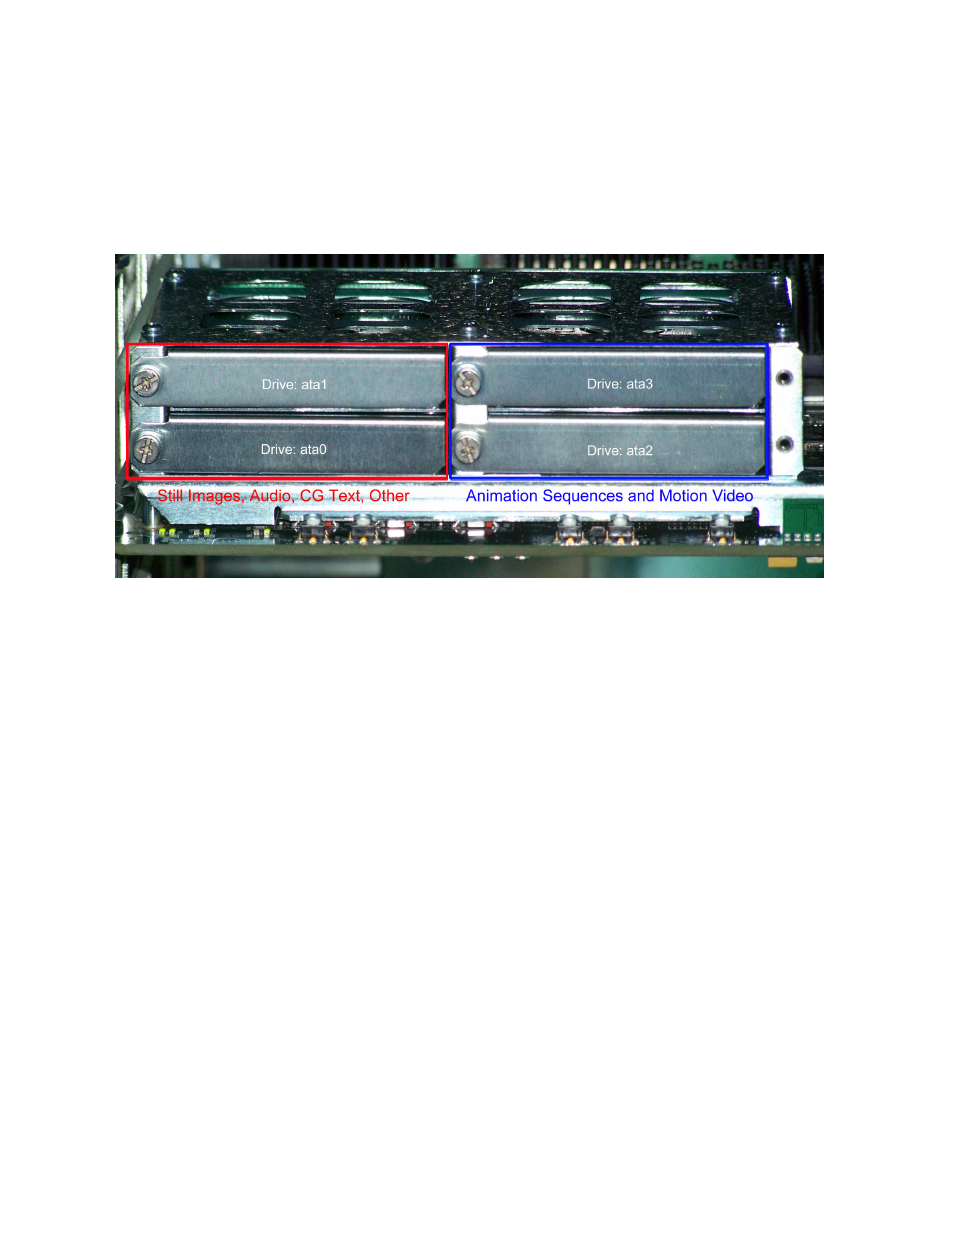
Channel Branding storage is provided by one or more hard disk drives. As
illustrated in
, up to four 2.5 inch (6.35 cm) drives can be
mounted on each Maestro channel processor board.
Figure 227. Channel Branding Disk Drives Installed
There are two separate PCI busses, each of which can support one (1) or
two (2) hard disk drives. The first PCI bus supports storage and playback
of still images, audio and CG text. The second PCI bus supports storage for
animation sequences and motion video.
Maestro Enhanced Channel Branding version 1.7 and newer, supports still
images, audio, CG text, text crawls, animation sequences and motion
video. When installing disk drives for the basic Channel Branding, the first
drive must be installed in the lower left position that is labeled “Drive:
ata0” in
. If a second drive is installed to support the basic
Channel Branding, it should be installed in the upper left position labeled
“Drive: ata1.” “Drive: ata2” should be installed in the lower right position
and “Drive: ata3” should be installed in the upper right position.
shows the hardware used in mounting the Channel Branding
disk drive in the drive cage.
Note
If the hard disk drive was received from Grass Valley, the drive sled will
already be mounted on the drive. In this case, proceed directly to