Retrotec DucTester 200 Series Residential Applications User Manual
Page 80
Page 80 of 91
©Retrotec Inc. 2015
PCB assembly as the one that has “Control” printed on the mounting plate. We will refer to the Power
PCB assembly as the one with the power switch on it, and has “Mains Power” printed on it.
Attach a one foot length of tube to the "Ref B (Fan)" port on the Fan Top. Try sucking on the
tube; you should hear a whistling sound from inside the fan as air is drawn into the two pickup
points (see Figure 5 and Figure 4).
Do the same thing with the tube attached to the "B" port. If no sound is heard from the port,
than the pressure tube(s) under the Fan Top are blocked. If both tubes are clear, there is no
need to continue. Blowing air through the tube connector can remove a water drop if that was
causing the blockage.
Caution:
Unplug the power cable before performing the following.
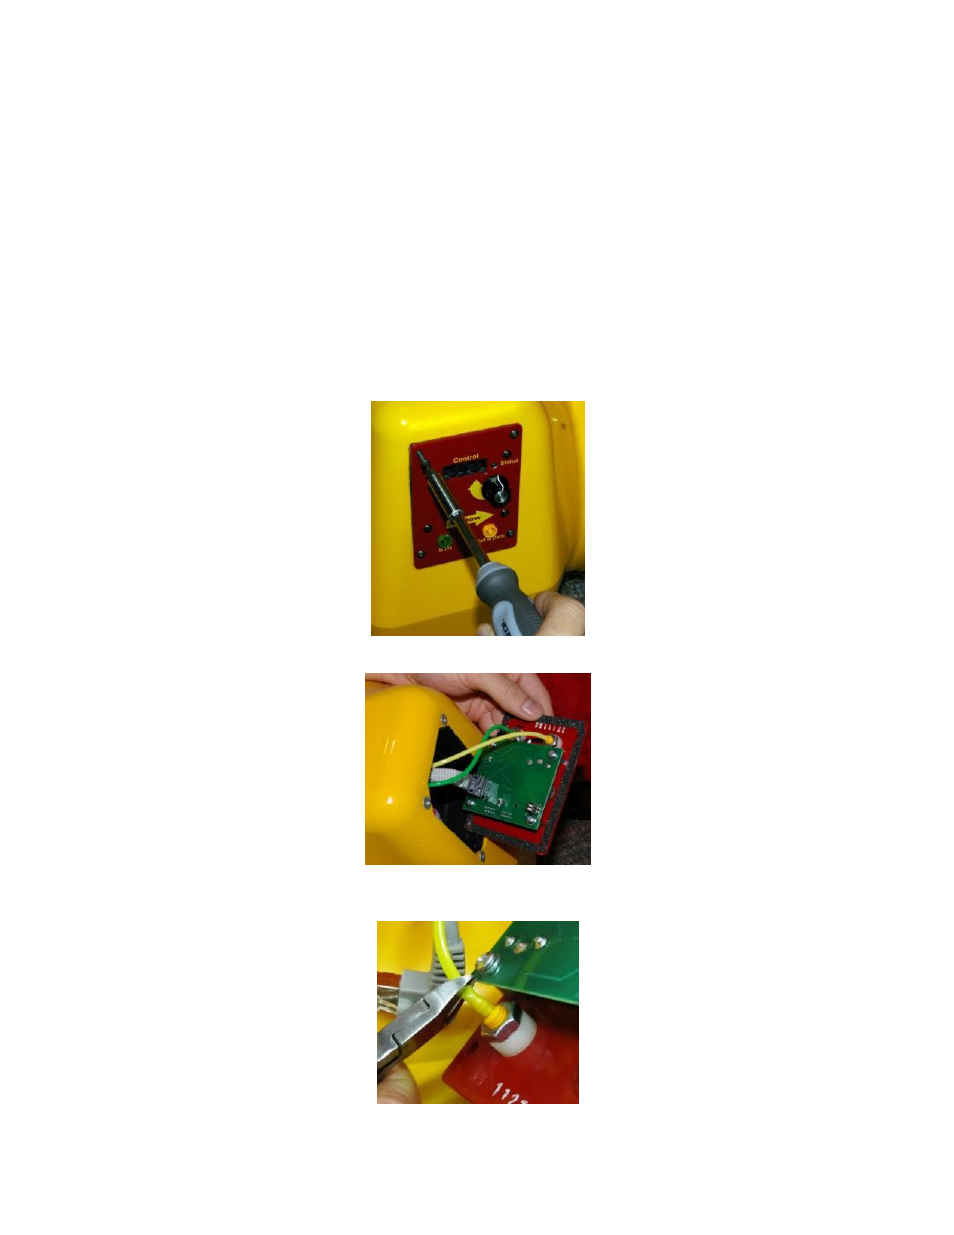
To fix a Fan Top pressure tube (on the Control PCB assembly)
1. Remove the Control PCB assembly, by removing the four hex head screws on the corners, using the
3/32” hex (Allen) key. The Control PCB assembly is the one that says “Control” on the mounting
plate.
2. Gently lift the assembly away from the fan, exposing the tubes and wires beneath.
3. If the yellow or green tubes are blocked or kinked, replace that section of tube. To replace the tubes,
first snip the end off.