Importing a still image from a usb flash drive, Assigning still images to channels 7 and 8, Supported still-image formats and resolutions – Roland 6-Channel HD Video Switcher with Audio Mixer & PTZ Camera Control (1 RU) User Manual
Page 20: Importing a still image, Video operations
20
Video Operations
Note, however, that when HDCP is switched from off to on,
the still image is reloaded from where it’s saved in memory,
and so the still image might take some time to display.
Importing a Still Image from a USB Flash Drive
This imports into the unit a still image saved on a USB flash drive.
Supported still-image formats and resolutions
Still-image file formats that can be imported are as follows.
Explanation
Format
Bitmap (.bmp), 24-bit color, uncompressed
Resolution
In conformity with system format (p. 12)
File name
No more than 8 single-byte alphanumeric
characters
Be sure to append the “.bmp” file extension.
Importing a still image
NOTE
5
All video input stops while a still image is being imported
from a USB flash drive.
5
Large-size still-image files might take some time to import.
5
When you’re using a USB flash drive for the first time, be sure
to format it on the XS-62S (p. 35).
5
Depending on the USB flash drive, recognition of the flash
drive might take some time.
1.
Save the still image in the root directory of the USB
flash drive.
2.
Connect the USB flash drive containing the saved
still image to the USB MEMORY port.
3.
Select the [MENU] button
0
“USB MEMORY”
0
“LOAD STILL IMAGE.”
4.
Use the [VALUE] knob to select “STILL IMAGE1”
or “STILL IMAGE2” as the memory where the still
image is saved.
A “ ” symbol is displayed for memory where a still image is already
saved.
5.
Press the [VALUE] knob.
The USB LOAD screen appears. The names of the files on the USB
flash drive are displayed on this screen.
6.
Select the still image file you want to import, then
press the [VALUE] knob.
A confirmation message appears.
If you want to cancel the operation, press the [EXIT] button.
7.
Use the [VALUE] knob to select “YES,” then press the
[VALUE] knob.
The still image is imported into the unit.
8.
Press the [MENU] button to quit the menu.
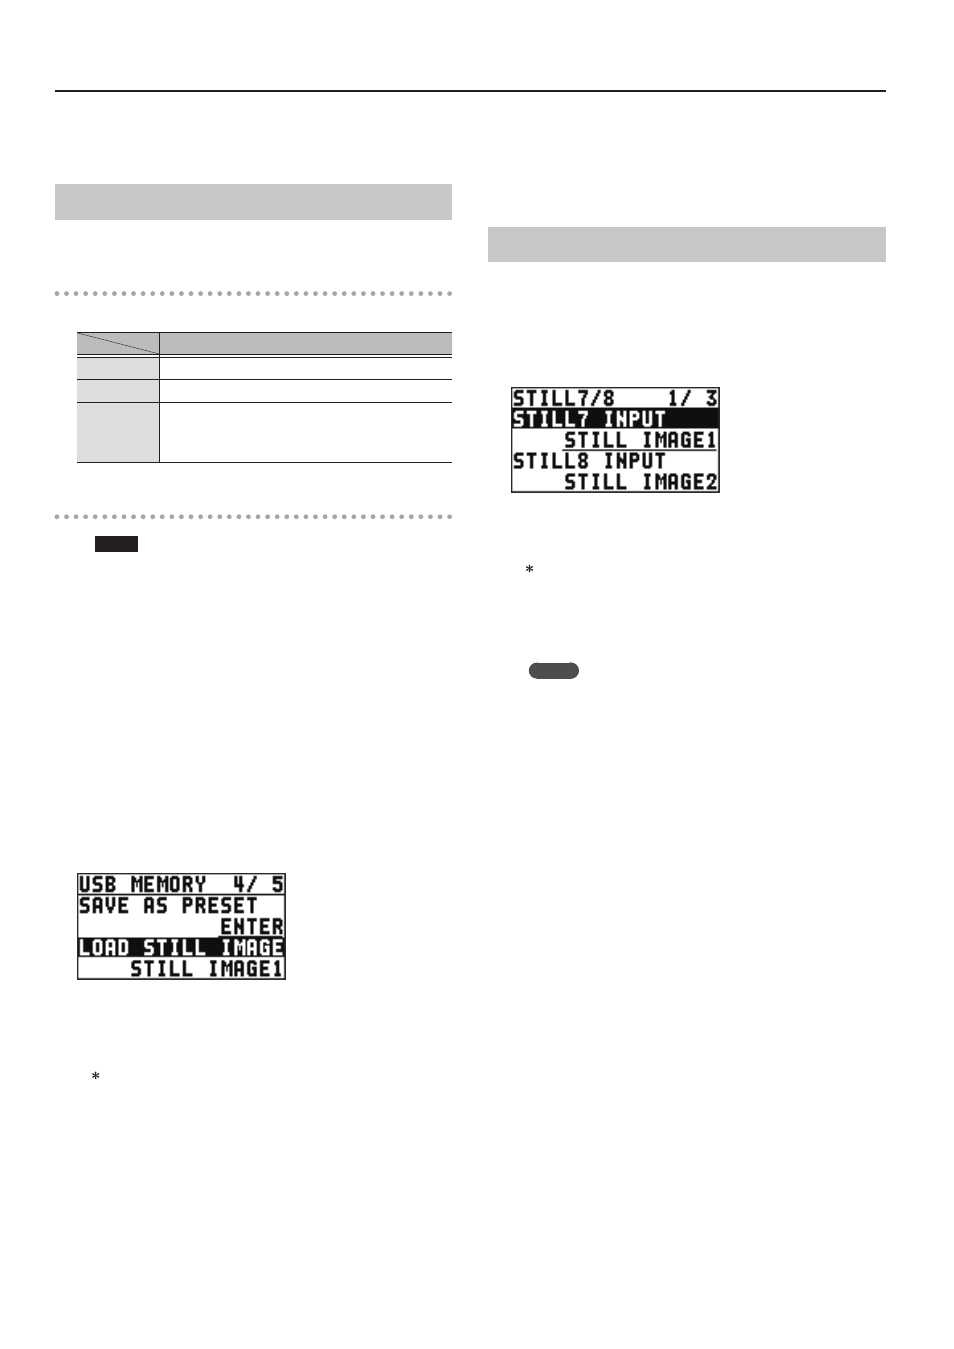
Assigning Still Images to Channels 7 and 8
This takes a still image that has been captured or imported from a
USB flash drive, and assigns it to channel 7 or 8.
1.
Select the [MENU] button
0
“VIDEO INPUT”
0
“STILL 7/8”
0
“STILL 7 INPUT” or “STILL 8 INPUT.”
2.
Use the [VALUE] knob to select the memory where
the still image is saved.
A “ ” symbol is displayed for memory where a still image is already
saved.
3.
Press the [VALUE] knob to apply the setting.
4.
Press the [MENU] button to quit the menu.
MEMO
Assigning a Monochrome Picture (Background Color)
You can also assign a monochrome picture (background
color) to channel 7 or 8.
In step 2, set “STILL 7 INPUT” or “STILL 8 INPUT” to
“BACKGROUND.” Also, use “BACK COLOR” to specify the
background color.
* The background-color setting is shared by channels 7 and 8.