Panoramic printer, How to assign a “pano printer – DNP DS-Tmini Kiosk Order Terminal User Manual
Page 139
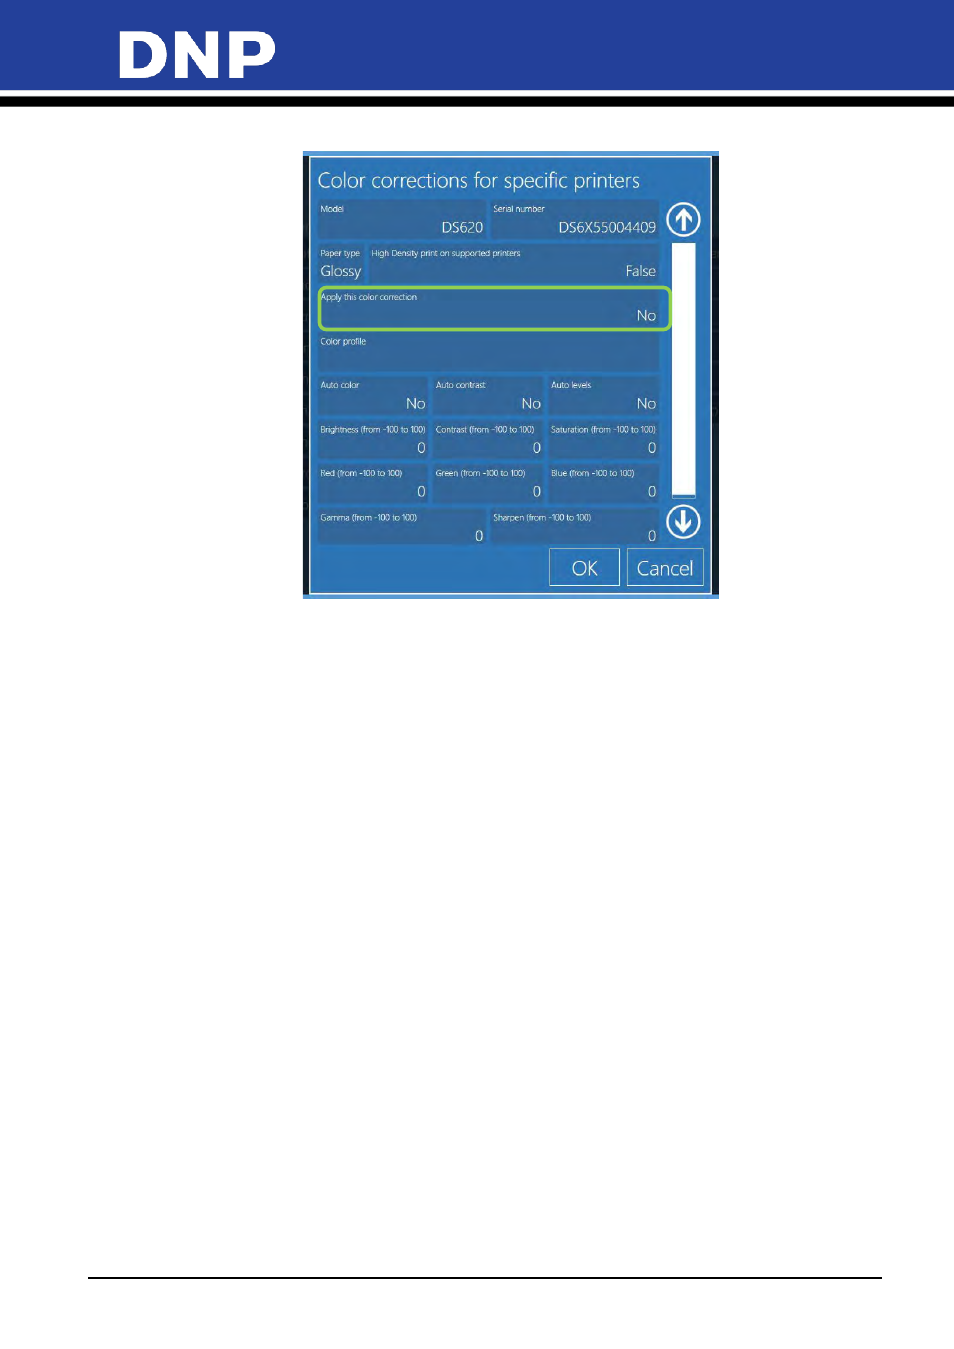
Photo Editing Software User Manual
139
4.
Press the
Edit
button. The
Color Corrections for Specific Printers
box will appear.
Description of the screen settings:
•
High Density Mode on Supported Printers
: If set to True, high density mode is used when printing
(currently available for DS820 printers only).
•
Apply This Color Correction
: If enabled, color correction is applied to anything printed using this
printer and this color profile.
•
Color Profile
: Opens a browse window so you can select your preferred color profile for this printer
and this finish type.
•
Auto Color
: Automatically correct color and density for prints used with this printer and finish type.
•
Auto Contrast
: Automatically corrects contrast for images printed with this printer and finish type.
•
Auto Levels
: Autmatically corrects color levels in images printed with this printer and finish type.
•
Brightness, Contrast, Saturation, Red, Green, Blue, Gamma, Sharpen Controls
: Adjust each channel
as needed to make fine adjustments to the printer channel outputs. Set the value to 0 if no correction
needs to be applied.
Panoramic Printer:
When two printers of DS 620 or DS 820 are connected with Snap Lab system, the PES provides the possibility
to assign a “Panoramic Printer” where panoramic prints printed on the assigned printer.
How to assign a “Pano Printer”?
1.
Ensure that the system has been connected with two (2) printers, a DS620 and/or a DS820.
2.
The printers must be turned ON.
3.
From the Admin screen, click the
Settings
button.