Freestanding optional equipment (continued) – Avalon Firestyles 796-1990 to 1993 User Manual
Page 12
Page 12
FREESTANDING OPTIONAL EQUIPMENT (Continued)
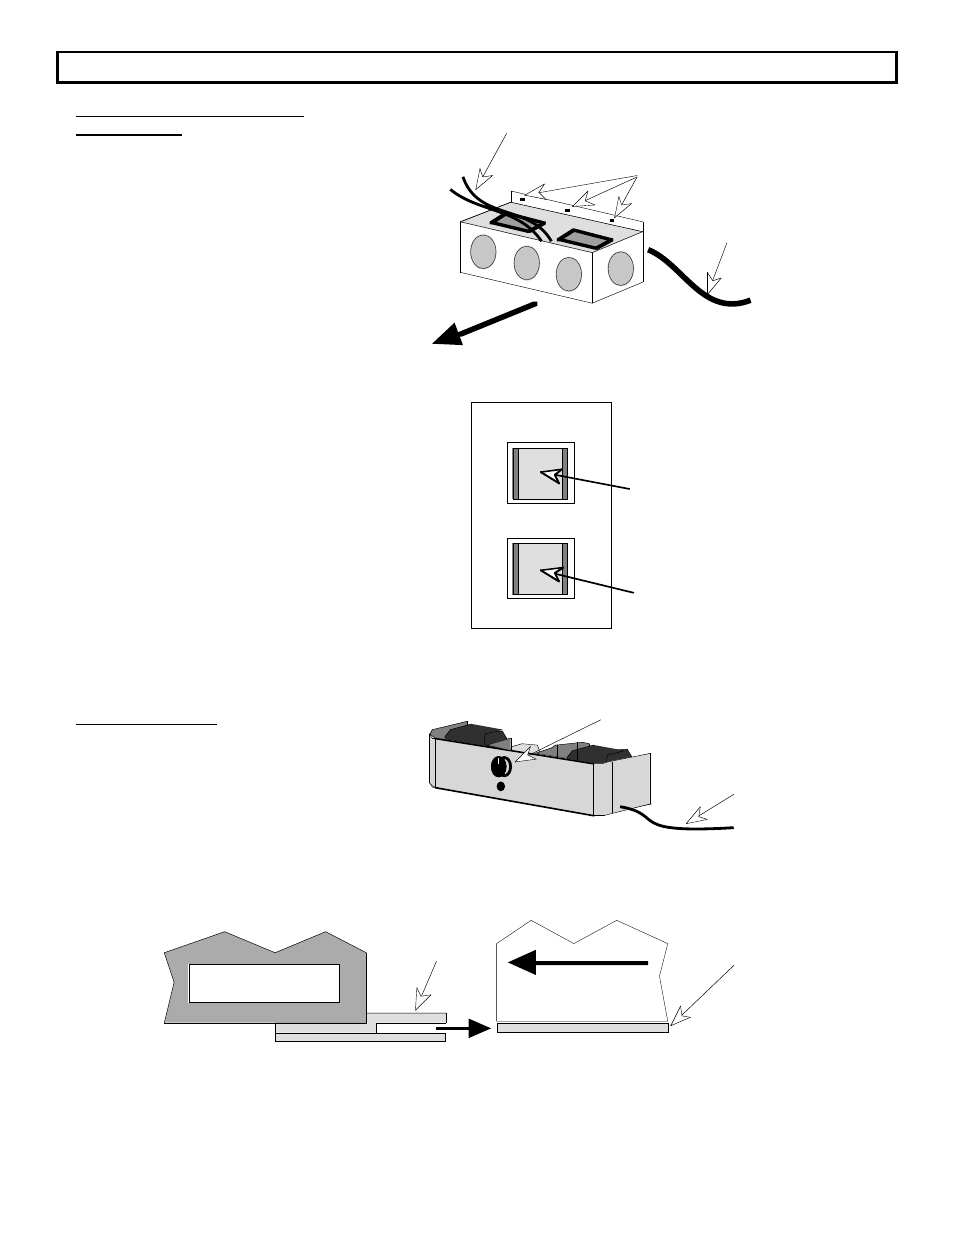
6. Universal Blower, Rear
(Continued)
3.
Place the blower box near the bottom
rear of the stove and push any slack
wire into the blower box so that when
the blower box is attached the excess
wire will not contact the stove.
4.
Attach the blower box to the bottom
rear of the stove with the three screws
provided. Push the blower box up
against the stove while tightening the
screws.
The two yellow wires
attach to the thermodisk.
Three holes for attaching the blower
box to the back of the stove
Power Cord
(exits from back
of blower box)
FRONT
UNIVERSAL REAR BLOWER OPERATION
The blower controls are located on the switch box
that is connected by a cord to the blower. There
are two rocker switches that determine the speed
and mode (automatic or manual) of the blower.
The two speeds are RUN (slower) and STARTUP
(faster). The two modes are AUTO (the
thermodisk controls the switch and the
temperature of the firebox will determine when the
blower starts or stops) and MAN (manual Ð the
blower will run on the speed setting selected).
The blower should be switched "OFF" for
approximately 30 minutes after each reload of the
stove. This is to allow the stove to reach
operating temperature.
Speed Control Rocker Switch
(If OFF is selected, the blower
will always be off, even if on
automatic)
Mode Rocker Switch (If OFF
is selected, the blower will
always be off, no matter what
the speed setting is at)
RUN OFF STARTUP
AUTO OFF MAN
7. Blower, Front
The front blower is designed to improve your
appliance's natural convection by pushing
heated air through the convection chamber
and out of the vents along the top.
Blower Control Knob
Power
Cord
1.
Carefully slide the blower assembly underneath the ashlip so that the two clips on the lower back
edge of the blower assembly slide over the front edge of the sheet metal under the appliance. You
should be able to feel the blower assembly snap into place as you slide it in. This is all the assembly
needed to attach the blower assembly.
Rear of Blower
Assembly (Side View)
Sheet Metal
Below Ashlip
Clip (One on
each side)
Avalon Stove
or Insert
FRONT OF STOVE
2.
Plug in the blower and test its operation. It should blow air out of the vents on top of the appliance.
The blower is turned off by turning it all the way counter-clockwise. Each click clockwise will increase
the speed of the blower.