Insert optional equipment (continued) – Avalon Firestyles 796-1990 to 1993 User Manual
Page 29
Page 29
INSERT OPTIONAL EQUIPMENT (Continued)
1. Surround Panels (Continued)
1.
Remove the two button plugs from each side of the insert with a screwdriver.
2.
Using a 5/16" nutdriver or large screwdriver, screw the thread-cutting screws into the four holes
exposed by removing the button plugs. The holes are now pre-threaded, remove the screws.
3.
Place one of the side panels against the side of the insert, lining up the slots in the panel with the
threaded holes in the side of the insert. Attach the panel with the thread-cutting screws, leaving the
screws loose enough to adjust the side panel. Repeat for the other side.
4.
FOLLOW THE SET OF INSTRUCTIONS FOR THE MODEL BEING INSTALLED:
MODEL:
FOLLOW
INSTRUCTIONS:
996 Flush Top Flue
4A
996 Extended 45
o
Flue
4B
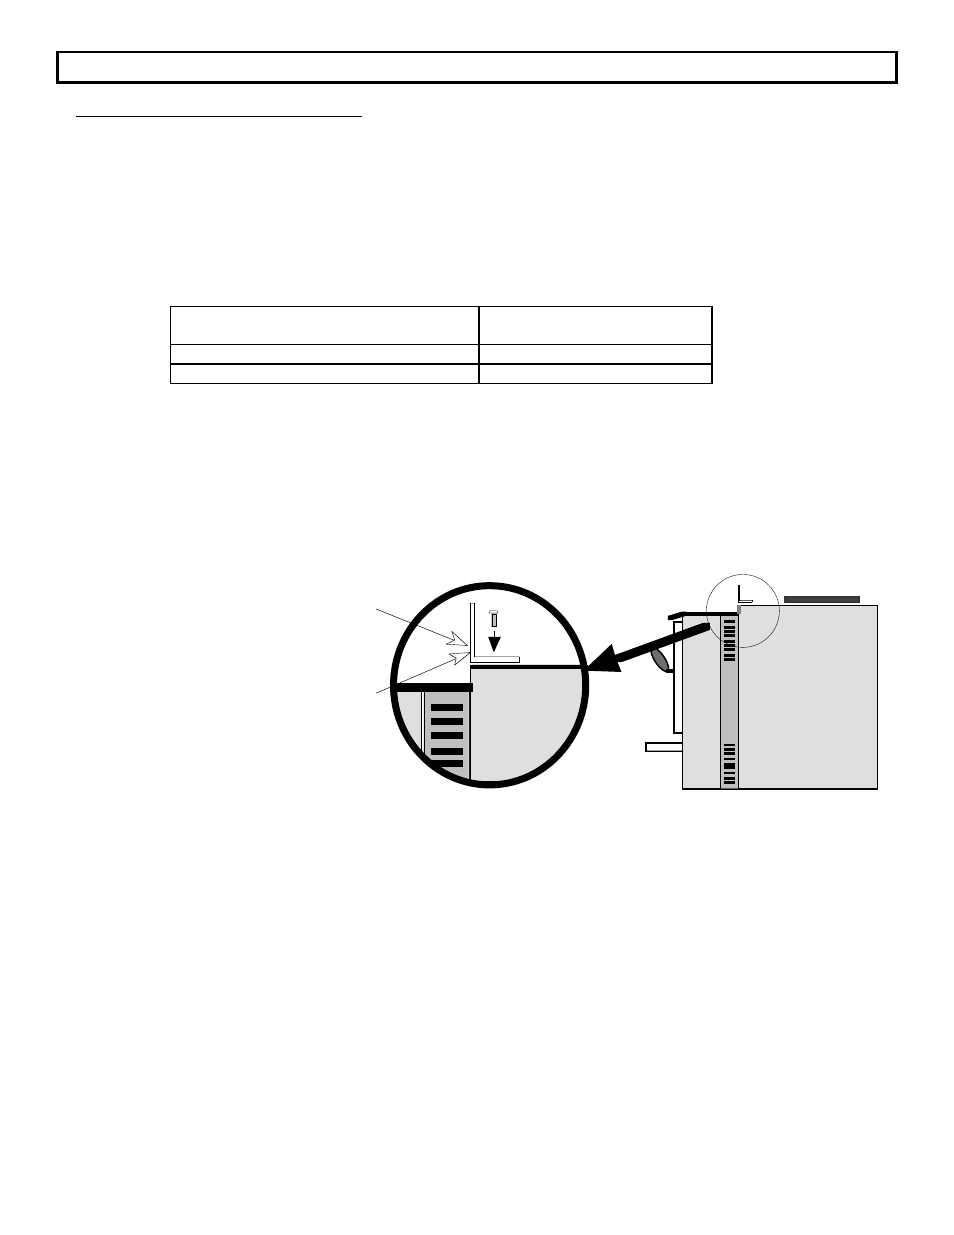
4A.
The top mounting angle is designed to stabilize the top panel on the 996 Flush Top Flue
model. Center the mounting angle on the insert with the side that has only three holes in it
facing down. The mounting angle should be flush with the top edge of the top panel on the
insert (see the illustration below). Mark the locations on the insert where the center of the
holes in the mounting angle rest. Remove the mounting angle and drill 11/64" holes where
the marks were placed. Drill only enough to penetrate one layer of metal. Using a 5/16"
nutdriver or large screwdriver, screw the thread-cutting screws into these two holes. The
holes are now pre-threaded, remove the screws. Place the mounting angle back over these
holes and attach it to the insert with the two thread-cutting screws.
Mounting Angle
should be flush
with the edge of
the top panel
Mounting Angle
4B.
The top mounting angle is not used on the 996 Extended 45
o
Flue model. Instead, the brass
trim that runs along the top of the insert must be removed to allow the top panels to slide over
the mounting flange.
5.
Slide the top panel onto the offset on top of the side panels. The top panel must also slide over the
mounting flange (or mounting angle on top flue models) that is on the insert. The top panel has four
joggle clips that hold the top panel in place against the insert and the side panels. The best way to
insert the top panel is to hold it at an angle and insert one side first and gradually lower it until the
opposite side is inserted. Adjust the top panel so its edges are flush with the side edges of the side
panels.
6.
Adjust the position of the side panels so they are: 1) flush with the bottom of the insert; 2) both the
same distance back from the front of the insert; 3) perpendicular to the floor.