Chime settings enabling/disabling zone buttons, Chime settings, Enabling/disabling zone buttons – Cloud Electronics PM12 User Manual
Page 23
PM4/8/12/16 Installation and User Guide v2.2
23
Interface. If the PMs are being used in conjunction with other (third-party) paging
microphones using short-to-ground zone selection, announcement collisions can
occur even between high priority PMs and the third-party system.
Chime settings
The PM microphone contains four pre-announcement chimes. The selection of chime
is made by setting internal jumpers. It is also possible to disable the chime.
The selected chime sounds whenever the ‘TALK’ or ‘CALL ALL’ button is depressed,
and is automatically routed to the appropriate zones as well as played through the
internal speaker. The chime volume can be set by adjusting the pre-set control PR1
inside the microphone. Jumpers J1, J2 & J3 select which of the four available chimes is
active, and J5 disables or enables the chime facility. See page 32 for a diagram showing
jumper and level adjustment locations. Chime selection is per-microphone, and setting
the chime on a PM will not affect any other PMs on the network.
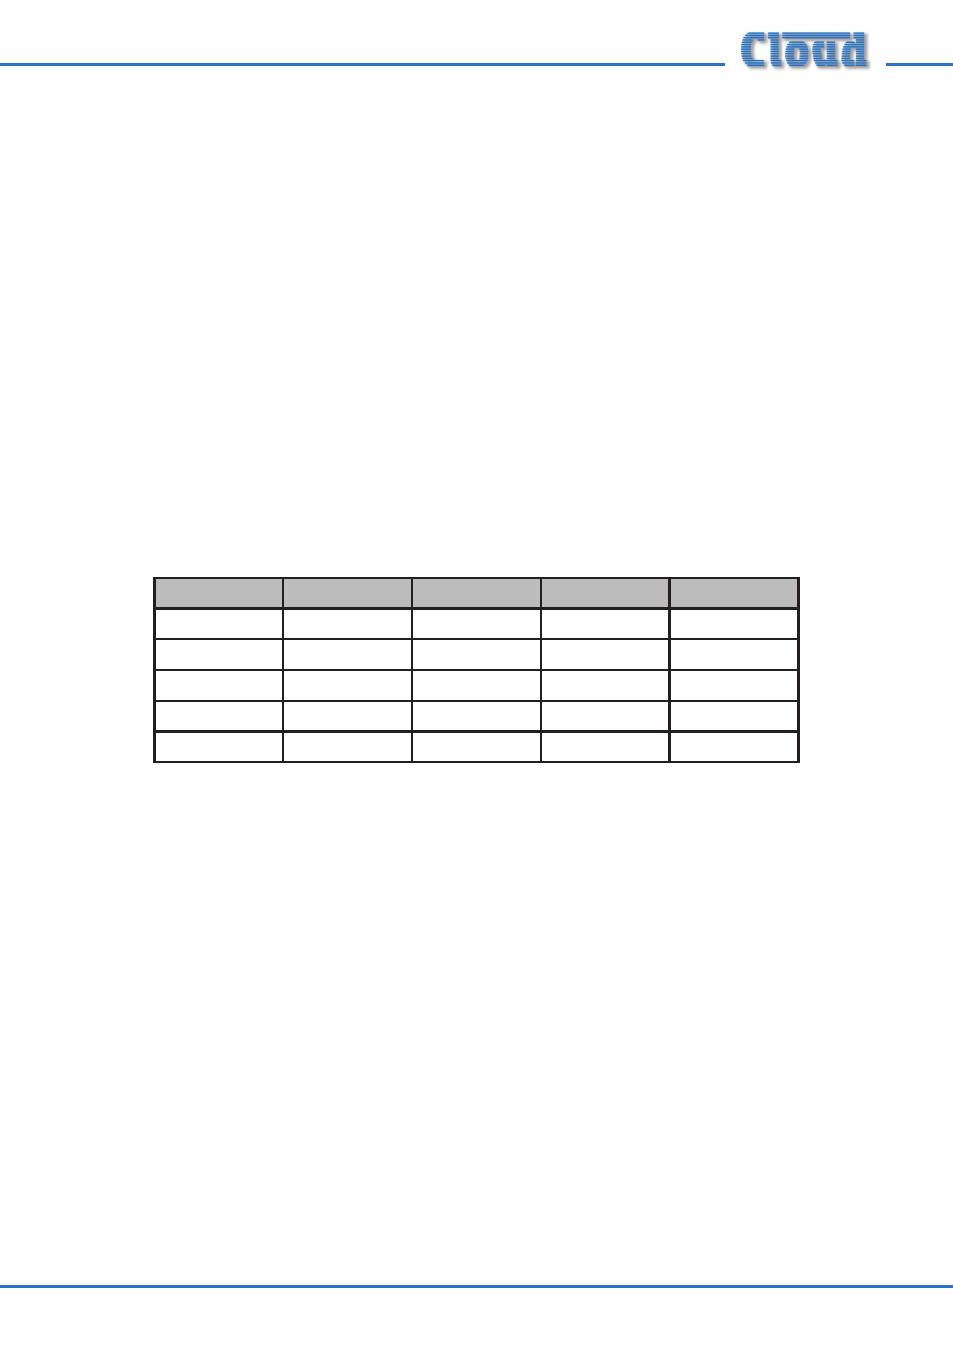
The table below gives the jumper settings for each chime.
Selection
J3
J2
J1
J5
No Chime
OFF
OFF
OFF
OFF
Chime 1
ANY
OFF
ON
ON
Chime 2
ANY
ON
OFF
ON
Chime 3
ANY
ON
ON
ON
Chime 4
ON
OFF
OFF
ON
Additionally, the internal speaker can be turned off, by setting jumper J6 to OFF.
Enabling/Disabling Zone buttons
It may occasionally be desired to restrict the zones which a microphone can access.
To permit this, zones may be disabled. Note that the disabling of zones is on a per-
unit basis, and other microphones in a multiple-PM system will still have free access.
To disable particular zones on a PM, proceed as follows:
1.
Set jumper J7 to ON, and power up the unit (thus performing an NVM
reset).
2.
Press and hold the CLEAR button.
3.
While holding CLEAR down, select the zones to be disabled by pressing the
appropriate ZONE buttons.
4.
The selected zone lights begin to flash, indicating that the microphone is
now in Disable Group Edit mode.