Regular maintenance check list, Grease fittings – DR Power Chipper User Manual
Page 18
18
DR
®
CHIPPER ATTACHMENT
Chapter 4: Maintaining The DR CHIPPER ATTACHMENT
For DR Field and Brush Mower maintenance, please refer to the Safety and Operating Instructions Manual that came with your
DR Field and Brush Mower.
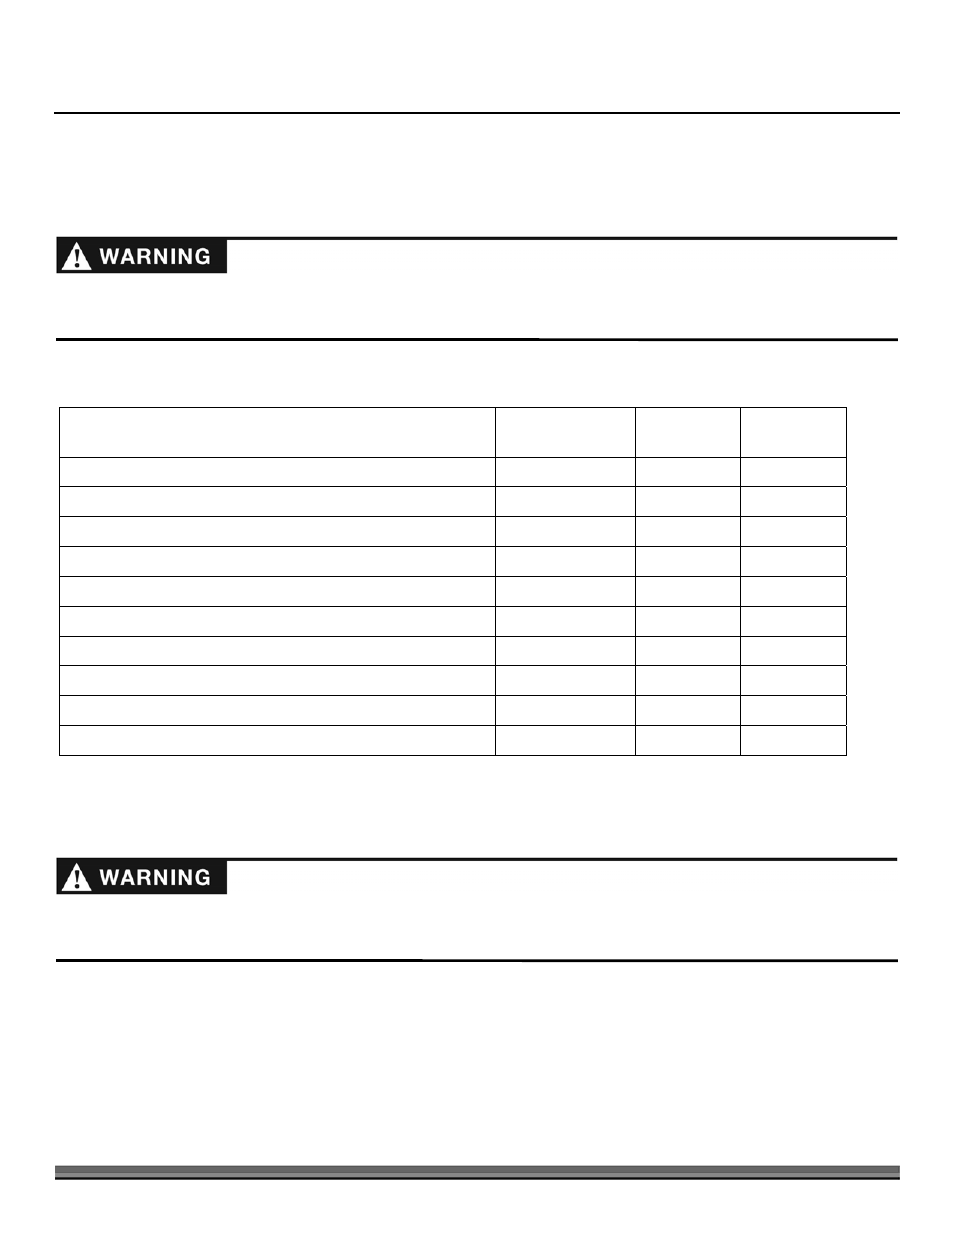
Regular Maintenance Check List
NOTE: Consider that the service intervals shown are the maximum under normal operating conditions. Increase frequencies under
extremely dirty or dusty conditions.
Procedure
Before Each Use
Every 8-10
Hours
Every 40
Hours
Check General Equipment Condition
▲
Check that the Flywheel turns freely (with a long stick only)
▲
Visually inspect Knife for damage
▲
Check Knife and Wear Plate for Sharpness
▲
Check Knife and Wear Plate Attachment Screws
▲
Check Flywheel Bearing Collar Set Screws
▲
Check Knife to Wear Plate Gap
▲
Lubricate Flywheel Bearings
▲
Check Belt Condition
▲
Replace Drive Belt
▲
Grease Fittings
Your DR CHIPPER ATTACHMENT was greased at the Factory. The operator needs to periodically lubricate the two Bearings of
the Chipper Assembly.
Tools and Supplies needed:
Flexible hose grease gun
Lithium grease
Clean cloth
5/32" Allen Wrench
Thread Lock (if needed)
1. Unscrew the Hand Knob and remove the Belt Guard.
Disengage the blade at the control panel of the Field and Brush Mower. Shut down the engine, wait for all moving parts to
come to a complete stop, remove spark plug wire keeping it away from the spark plug to prevent accidental starting, then
wait 5 minutes before performing maintenance procedures or inspection on the chipper.
Disengage the blade at the control panel of the Field and Brush Mower. Shut down the engine, wait for all moving parts to come
to a complete stop, remove spark plug wire keeping it away from the spark plug to prevent accidental starting, then wait 5 minutes
before performing maintenance procedures or inspection on the chipper.