DR Power Chipper User Manual
Page 19
CONTACT US AT www.DRpower.com 19
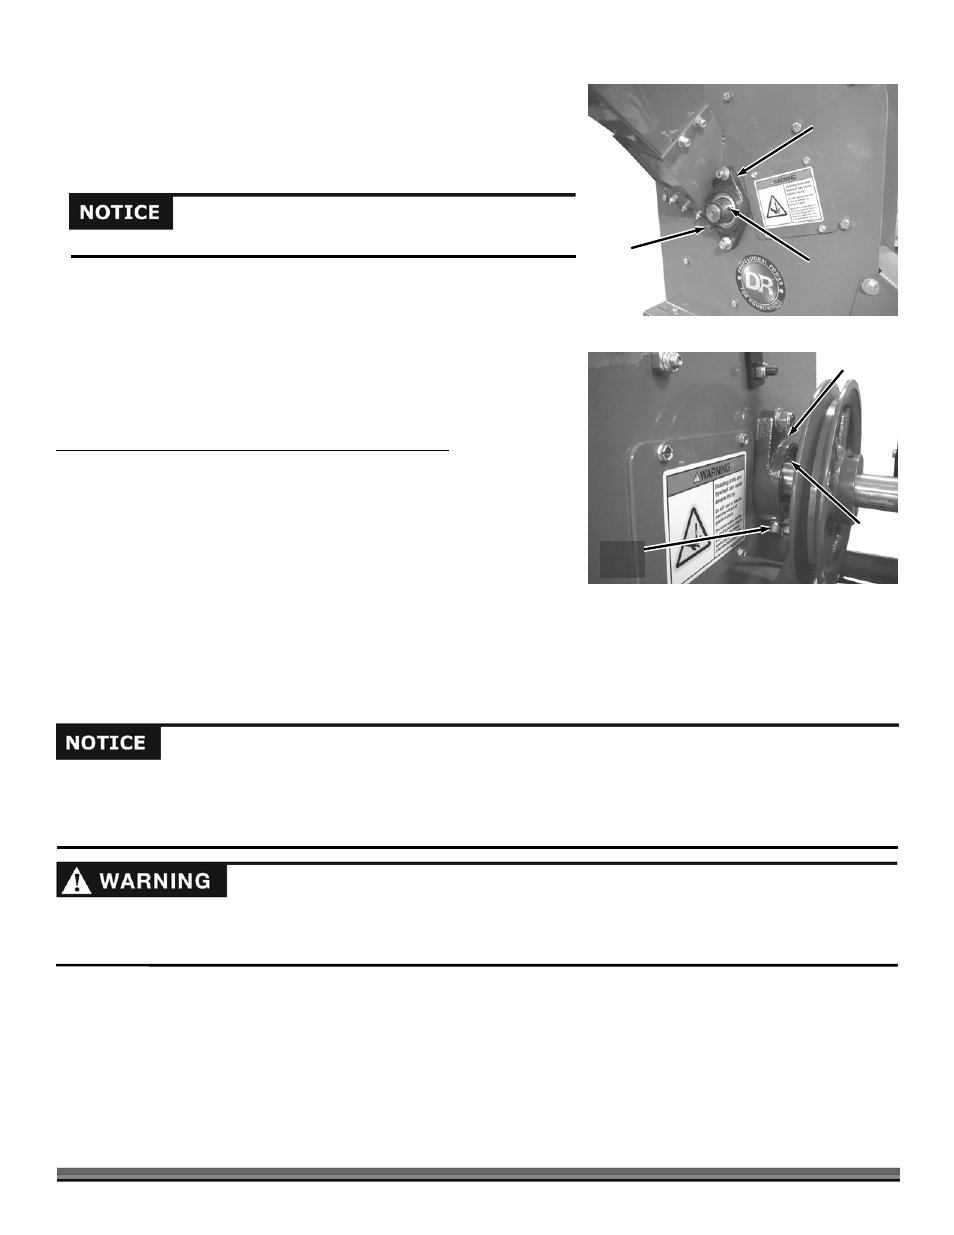
2. Wipe all dirt, etc., from the grease fittings with a clean cloth (Figure 32).
3. Apply no more than three pumps of quality general-purpose lithium grease
with a hand-pumped grease gun to each Bearing Grease Fitting, one on
either side of the Chipper Assembly.
4. Check the Set Screws for tightness. If they are not tight they should be
removed, apply Thread Lock
to the threads, then reinstall and tighten the
Set Screws.
5. Position the Belt Guard and secure with the Hand Knob.
Removing, Replacing and Adjusting the Chipper Knife and Wear
Plate
INSPECTING THE CHIPPER KNIFE AND WEAR PLATE
Routine inspection of the Chipper Knife and Wear Plate will ensure that your DR
CHIPPER ATTACHMENT is operating at full efficiency (see “Regular
Maintenance Checklist” at the beginning of this Chapter). Operating with a
worn or damaged Chipper Knife or Wear Plate will cause extreme stress and
vibration to the machine and make chipping difficult for the operator.
The Knife should be visually checked for damage before each use. The first
procedure (“Routine Visual inspection of the Chipper Knife”) describes a quick
way to check the Knife only through the Access Cover. The second procedure
(“Visual inspection of the Chipper Knife and Wear Plate”) is for a more detailed
look at the condition of the Knife and Wear Plate by removing the Hopper.
VISUAL INSPECTION OF THE CHIPPER KNIFE (before each use)
Tools Needed:
5/16" Wrench
Bearing
Front Chipper Bearing
Grease
Fitting
Set
Screw
Rear Chipper Bearing (under Belt Guard)
Figure 32
Grease
Fitting
Bearing
Set
Screw
Over lubrication can damage the bearings.
Routinely check the chipper knife for sharpness. Using a dull knife will decrease performance and cause excessive vibration
that will cause damage to the DR CHIPPER ATTACHMENT.
Routinely check the wear plate for a sharp square edge. Using a rounded or chipped wear plate will decrease performance
and cause excessive vibration that will cause damage to the DR CHIPPER ATTACHMENT.
Disengage the blade at the control panel of the Field and Brush Mower. Shut down the engine, wait for all moving parts to come
to a complete stop, remove spark plug wire keeping it away from the spark plug to prevent accidental starting, then wait 5 minutes
before performing maintenance procedures or inspection on the chipper.