DR Power Chipper User Manual
Page 22
22
DR
®
CHIPPER ATTACHMENT
Disengage the blade at the control panel of the Field and Brush Mower. Shut down the engine, wait for all moving parts to come
to a complete stop, remove spark plug wire keeping it away from the spark plug to prevent accidental starting, then wait 5 minutes
before performing maintenance procedures or inspection on the chipper.
Checking the Knife to Wear Plate Gap
Tools Needed:
Gap Gauge (provided with Chipper)
1. Remove the Hopper (See “Inspecting the Chipper Knife and Wear Plate” in
this Chapter).
NOTE: You may need to remove the Belt from the Chipper Pulley so the Flywheel is
allowed to turn freely for the next step.
2. Use a stick to rotate the Flywheel until the Knife is positioned next to the
Wear Plate.
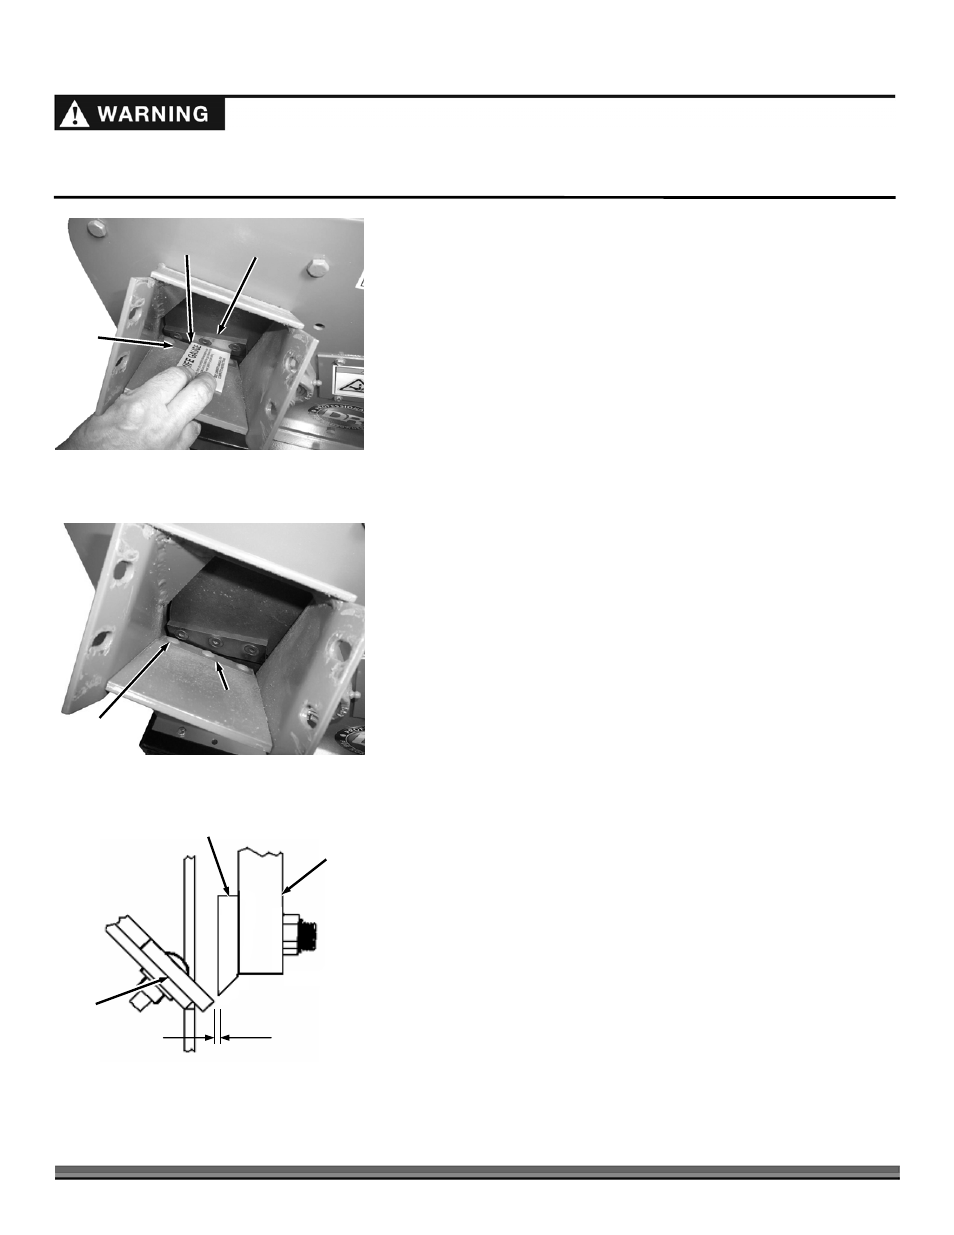
3. Slide the Knife Gap Gauge in between the Knife and Wear Plate to check the
clearance (Figure 39).
o
If the Knife Gauge slides freely, with no resistance and a lot of extra
space, the Wear plate must be adjusted.
o
If the Knife Gauge will not slide down between the Knife and Wear
Plate, the Wear Plate must be adjusted.
o
If the Knife Gauge slides in between the Knife and Wear Plate with
some resistance felt against them both or slides in between with
no noticeable space, then the Wear plate is properly adjusted.
4.
Install the Hopper when finished.
Adjusting the Knife to Wear Plate Gap
Tools Needed:
7/16" wrench
Gap Gauge (provided with Chipper)
1. To adjust the Wear Plate Gap, loosen the three Nuts on the Carriage Bolts
with a 7/16" wrench just enough so the Wear Plate will move but still have a
slight resistance. Now you can slide the Wear Plate up or down (in or out)
to achieve the correct gap setting (Figure 40 and 41).
2. Take the Gap Gauge and slide it between the Knife and Wear Plate (Figure
39). Adjust the Wear Plate against the Knife Gauge and tighten the outside
Locknut, check the gap, tighten the inside Locknut and then the center
Locknut.
3. Check the adjustment as described in the “Checking the Knife to Wear Plate
Gap” in the previous section.
4. Reinstall the Hopper when finished.
1/16" Gap
(thickness of
Gap Gauge)
Figure 41
Chipper
Knife
Wear
Plate
Flywheel
Knife Gap
Gauge
Figure 39
Knife
Wear
Plate
Figure 40
Wear
Plate
Carriage Bolt
and Locknut