Preparing the trimmer/mower for transport, Obstacles, Heavy growth – DR Power 3-Point Hitch (April 2015 - Present) User Manual
Page 16: Wet conditions, Slopes, Windrows, Firebreaks
16
DR
®
3-POINT HITCH TRIMMER/MOWER
Always disengage the PTO Shaft before lifting the Trimmer off the ground or
transporting the Trimmer to prevent injury or damage to the machine.
Preparing the Trimmer/Mower for Transport
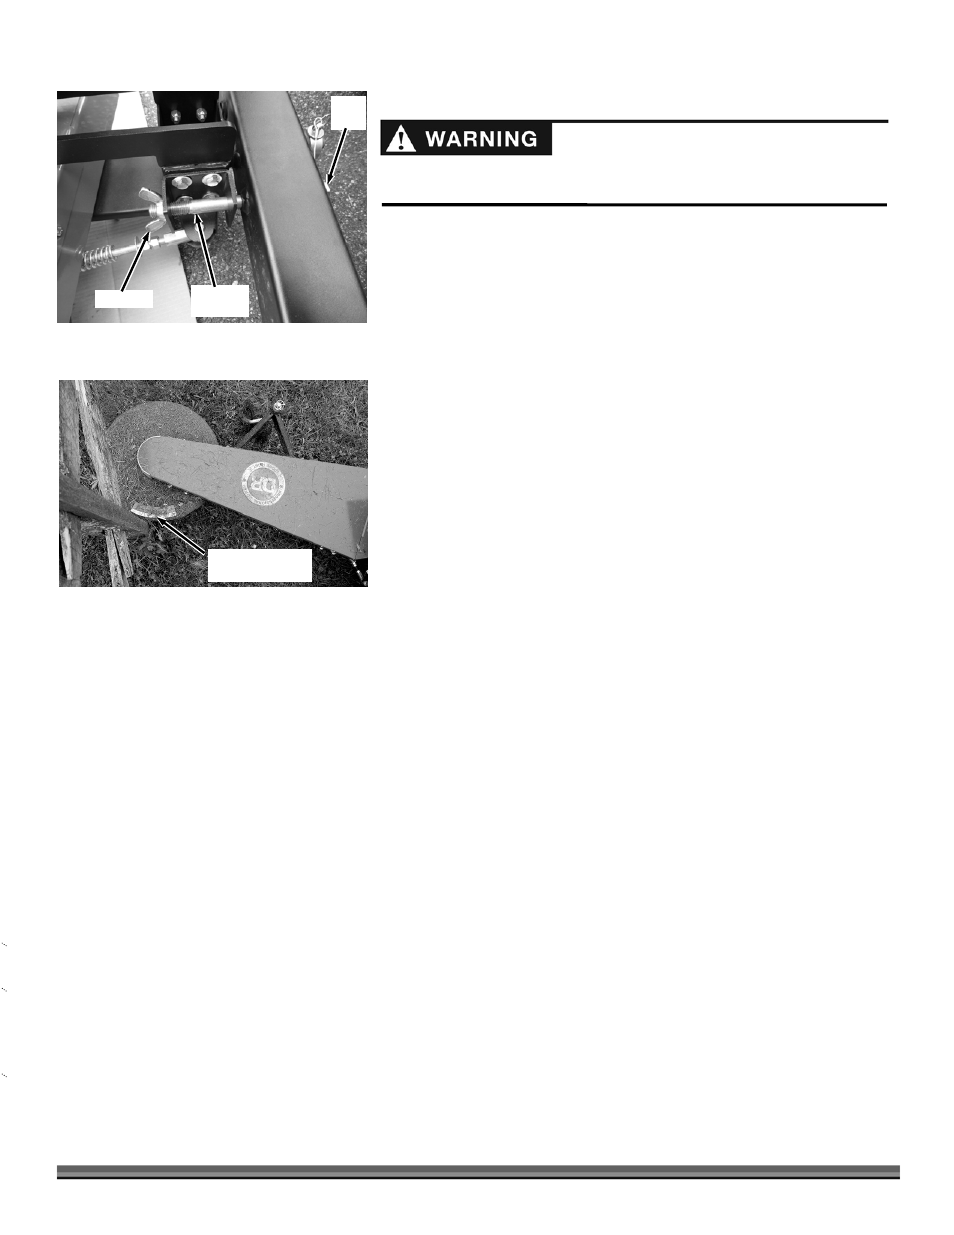
1. On the right hand side of the machine (trimmer head side), align the holes
of the Trimmer with the holes in the 3-Point Hitch Bracket. Insert the Locking
Bolt through the holes (Figure 28).
2. Secure the Bolt with the Wing Nut.
Note: Observe the Trimmer as it is lifted to ensure that the 3-Point Bracket does not
contact the PTO Shaft. If they do touch, the Tractor may have a setting to limit the
distance it is lifted off the ground to prevent contact. See your Tractor user manual
for details of Tractor settings.
3. Lift the Trimmer off the ground with the Tractor 3-Point Hitch before
transporting to prevent hitting any obstacles.
Obstacles
Dealing with obstacles in the terrain is easy with your new DR 3-POINT HITCH
TRIMMER/MOWER. The following section explains how to approach most
common obstacles.
Always check your work area before trimming and remove any debris that
might tangle or damage the machine.
Approach obstacles (fence posts etc) so the impact zone will be within the
area of the Optimum Impact Zone Label (Figure 29). This will ensure the best
spring action and trimming coverage around the obstacle.
If you do run into debris and the Trimmer becomes tangled, disengage PTO, shut down the Tractor Engine, remove the Key,
wait for all moving parts to come to a complete stop, then wait five minutes for parts to cool before attempting to untangle the
machine.
Never Trim or let the Wheel rest on the ground with the Tractor in reverse.
Heavy Growth
Take your time in heavy growth.
If the machine cannot do it all in one pass, overlap half of the cutting swath.
Ease the DR 3-POINT HITCH TRIMMER/MOWER into denser growth. If the material is too tough or woody to cut, the Cutting
Cords will wrap around it, wear down, or even break off.
Tip: Use the “two pass”, one half overlap method, whenever possible.
Wet Conditions
Because there is no housing to restrict the flow of cut material, you can also use your DR 3-POINT HITCH TRIMMER/MOWER to
mow wet or heavy growth. You can use the Trimmer in damp conditions, after a rain, or in the early morning dew without
clogging or stalling. You can also mow wet areas such as ditches and around ponds.
Slopes
Refer to your Tractor Users Manual for slope safety information and operation guidelines.
Windrows
The DR 3-POINT HITCH TRIMMER/MOWER Cutting Cords cut even tall grass in just one pass, so you can collect clippings and
leaves for mulch without raking. The machine ejects cut material to its right side, so you can use it like a lawn broom to make
windrows for easy clean-up.
Firebreaks
Use your Trimmer as a labor saving tool to cut material when creating firebreaks.
Optimum Impact
Zone Label
Figure 29
Transport
Position
Figure 28
Bolt
Head
Wing Nut
3-Point
Bracket
Trimmer Bracket