Step 5: install the handlebars – DR Power Walk-Behind Pro (2000 - 2001) User Manual
Page 11
DR
®
TRIMMER/MOWER
™
Assembly & Operating Instructions
5
3. Bring the upper handlebar section up and over the front end of the machine. Let it rest there.
Caution: DO NOT add gas or oil to the engine at this time.
Step 5: Install the Handlebars
A) Lower Handlebar
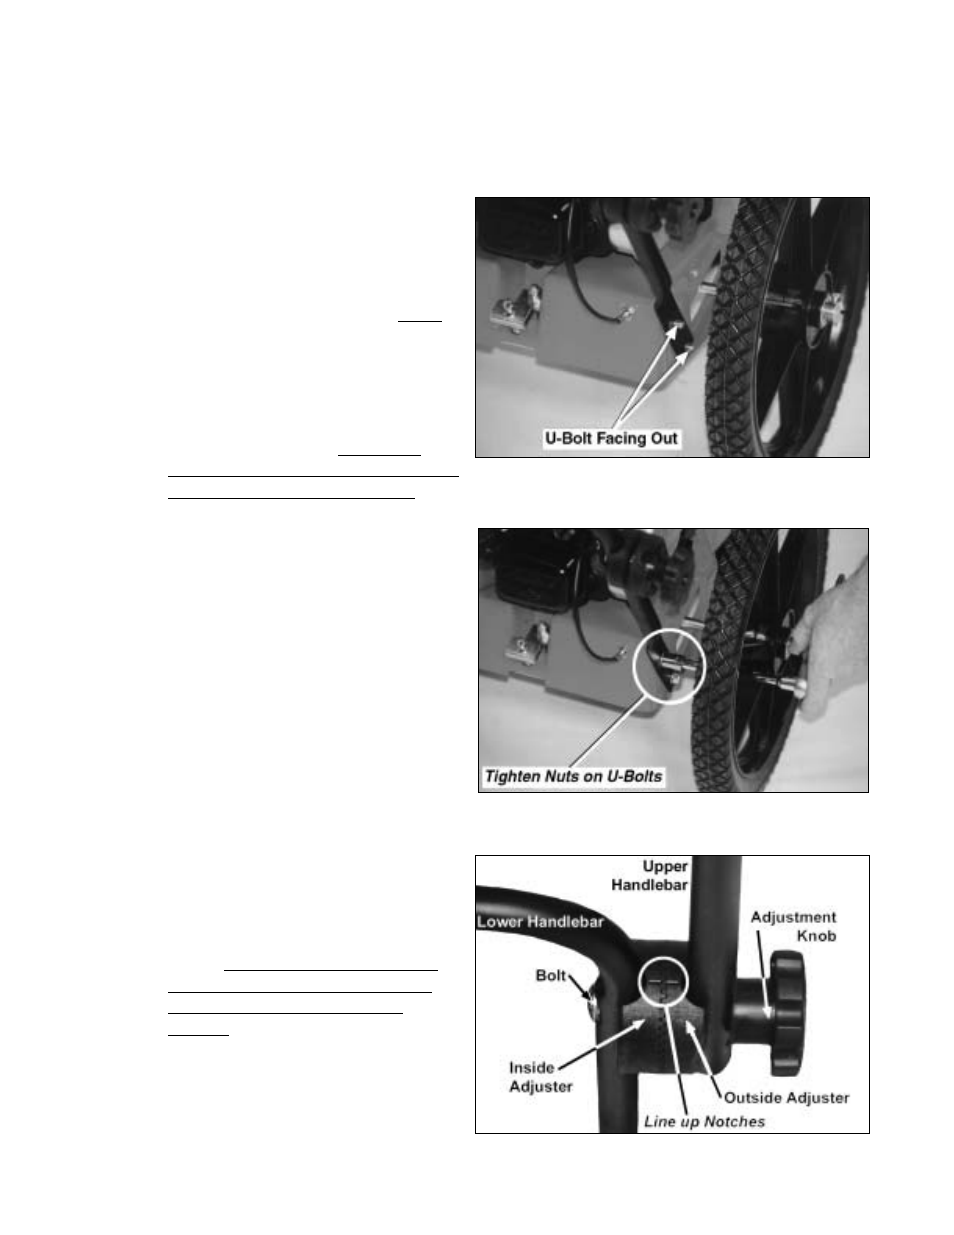
Note: There are 2 U-bolts, 4 washers,
and 4 lock nuts in your parts bag that will
be needed for the lower handlebar
assembly.
1. With the control cables on the inside
of the handlebar, position the lower
handlebar over the bolt holes in the
trimmer frame (Figure 7).
2. Place the U-bolts through the bolt
holes in the trimmer frame from the
inside out (Figure 7). Be sure the
black control cable on the underside of
the trimmer is clear of the U-bolt.
3. Mount the washers and nuts and secure
them snugly on both sides (Figure 8).
B) Upper Handlebar
Note how the components of the handlebar
adjuster assemblies go together before
mounting the upper handlebars. There is
an inside and an outside adjuster. The
outside adjuster has a beveled edge
(Figure 9).
1. Take apart the handlebar adjustment
assemblies one at a time.
2. Insert the bolt through the bottom hole
in the lower handlebar from the inside
facing out (Figure 9).
3. Mount the inside adjuster (no beveled
edge) with the cup snug to the lower
handlebar.
4. Mount the spring on the bolt, then add
the outside adjuster (has a beveled
edge). There is a notch at the top of
each adjuster—they should line up,
and the teeth should fit snuggly
together
(Figure 9).
Figure 7
Figure 8
Figure 9