To check the bearing housing assembly for damage – DR Power Walk-Behind Pro (2000 - 2001) User Manual
Page 30
DR
®
TRIMMER/MOWER
™
Assembly & Operating Instructions
24
To Partially Lower the Bearing Housing Assembly
(to remove debris)
If the bearing and trimmer head become clogged with debris the machine will not perform well.
As part of your regular maintenance routine, follow the steps below to keep the bearing housing
assembly free of debris.
WARNING! Before performing any maintenance procedure, the engine should be stopped
and the spark plug wire disconnected.
Tools Needed:
• 1/2" socket
• 1/2" open end or adjustable wrench
If possible, set the machine up on a bench. Do not tip the machine all the way back on its
handlebar unless you have drained the gas and oil.
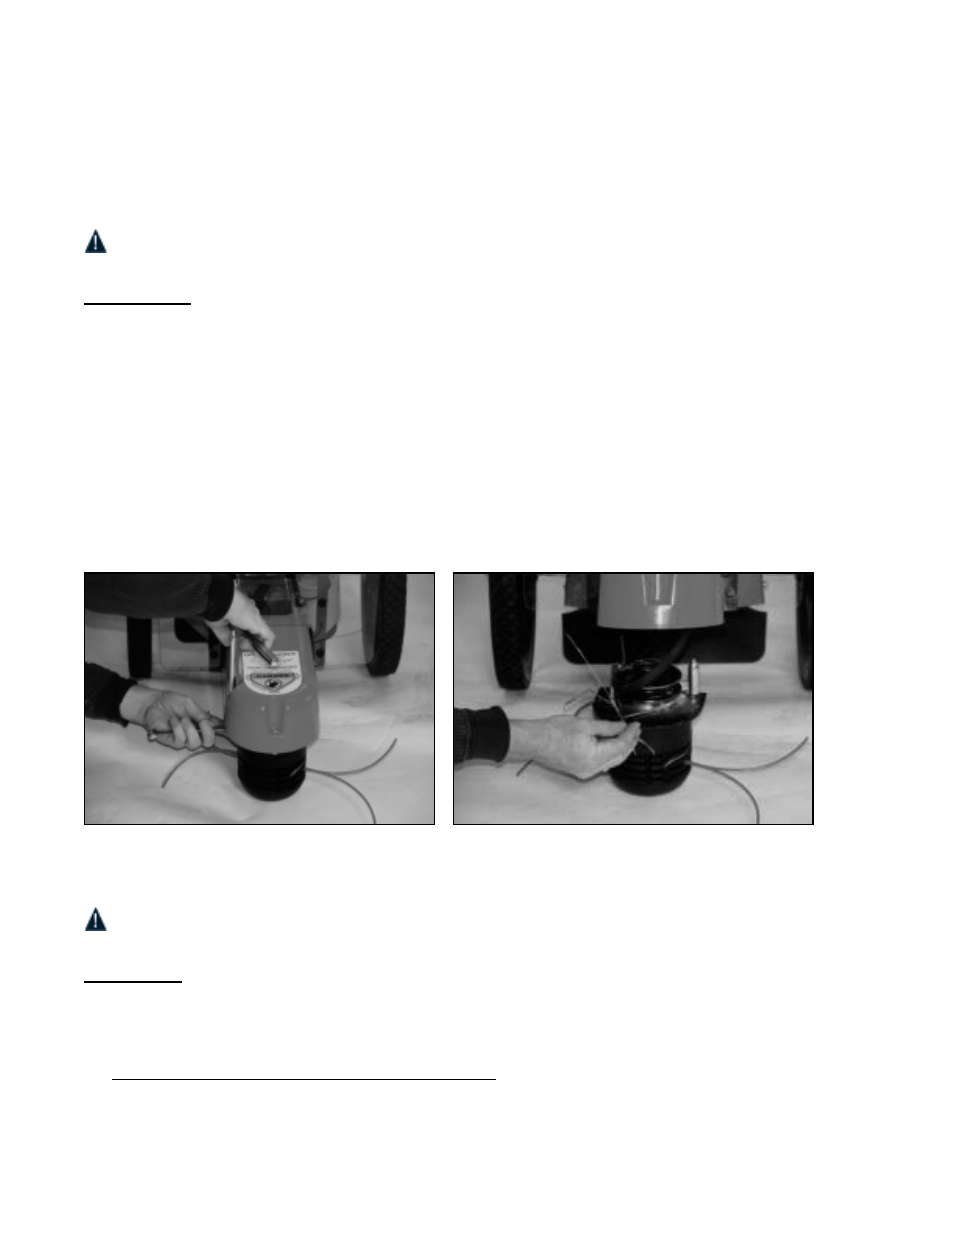
1. Remove the three bearing housing nuts (Figure 38) and carefully lower the bearing housing
assembly from the frame. Brush out any dirt and debris (Figure 39) and check the pulley for
burrs or dents.
2. Replace the bearing housing assembly and tighten the bolts.
Note: If the belt comes off, please refer to the instructions on page 27 to ensure proper
positioning.
To Check the Bearing Housing Assembly for Damage
WARNING! Before performing any maintenance procedure, the engine should be stopped
and the spark plug wire disconnected.
Tool Needed:
• 1/2" wrench
If the trimmer head doesn't rotate when you engage the trimmer head control and the bail bar, try
the following test:
1. Leaving the Mow-Ball
™
Support assembly in place, loosen and remove the three bearing
housing nuts and lower the bearing housing from the frame (Figures 38 & 39).
Figure 38
Figure 39