DR Power Walk-Behind Pro (2000 - 2001) User Manual
Page 13
DR
®
TRIMMER/MOWER
™
Assembly & Operating Instructions
7
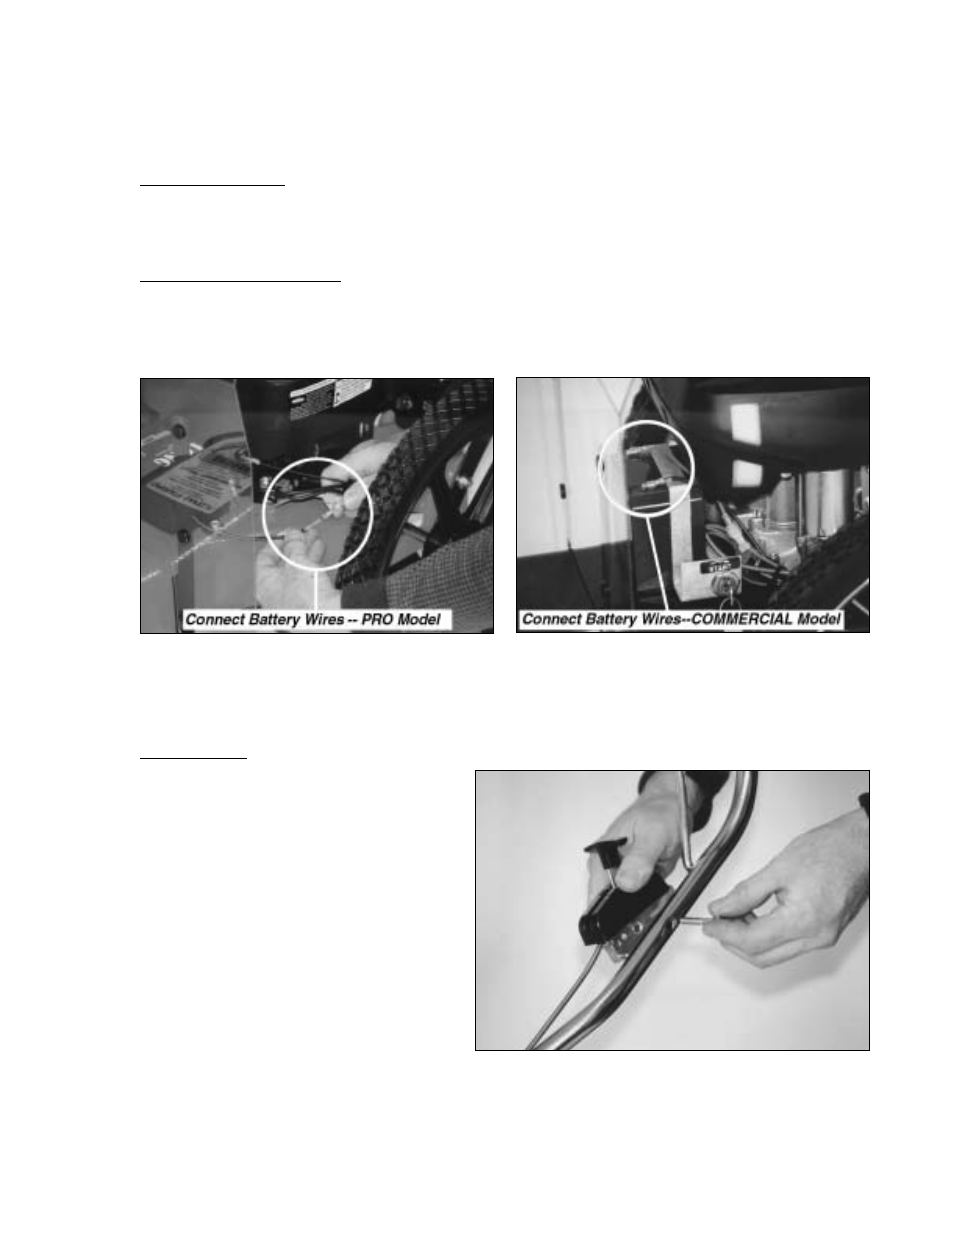
Step 8: Connect the Battery Wires
(Electric-Starting models only)
To prevent the battery from discharging during shipment, all electric-starting trimmers are
shipped with one or both battery wires disconnected.
On the PRO Model:
Connect the two black wires by pushing the plastic ends together (Figure 13). See the red wires
for comparison. The wires are located on the left front side when standing in the operator's
position.
On the Commercial Model:
Connect both wires to the battery terminals as shown in Figure 14. Red to red and black to
black.
Note: Be careful not to hit the wires on the metal bracket. You may short them out.
Step 8a: Connect the Throttle Cable
(Commercial Model Only)
Tools Needed:
• 7/16" wrench
1. Remove the 1-1/2" long bolt from the
left handlebar.
2. Attach the throttle control to the left
handlebar with the 1-1/2" long bolt
(Figure 14a). The throttle cable
should go around the front of the
engine, along the left side of the
engine, then up toward the handlebar.
Be sure the cable is over the lower
handle bar before attaching it.
3. Secure the throttle cable to the lower
handle bar with a cable tie.
Figure 13
Figure 14
Figure 14a