DR Power Walk-Behind Pro (2000 - 2001) User Manual
Page 32
DR
®
TRIMMER/MOWER
™
Assembly & Operating Instructions
26
3. Detach the brake arm from the brake
assembly (Figure 40).
4. Pull the belt off the pulley.
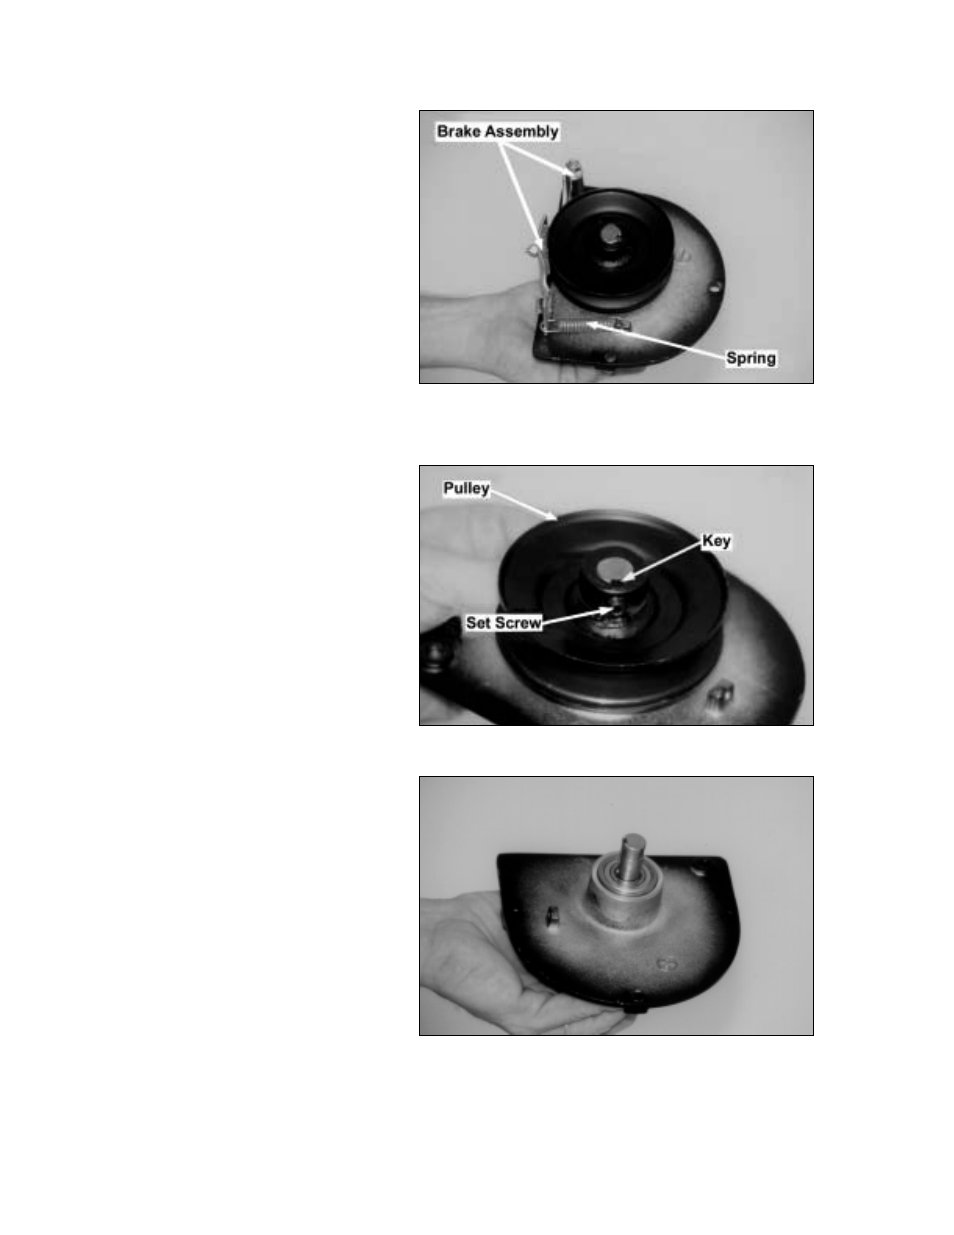
5. Remove the brake assembly and spring
from the bearing housing (Figure 42).
6. To remove the pulley, unscrew the set
screw from the pulley (Figure 43) with
an Allen wrench. Then tap the pulley
to loosen it from the shaft. Be careful
not to hit the shaft, as it will expand
and make the pulley harder to remove.
Remove the pulley. You may need a
pulley extractor.
To Mount the New Bearing
Housing
1. On the new bearing housing (Figure
44), mount the pulley and key (Figure
43), leaving the shaft recessed about
1/16", and secure with the set screw.
You may want to use LOCTITE
®
242
to keep the set screw in place.
2. Mount the brake assembly and spring
(Figure 42).
3. Attach the brake arm to the brake
assembly (Figure 40).
4. Mount the belt on the bearing housing
pulley. Be sure the belt is placed on
the INSIDE of the belt guides and that
the other end of the belt goes through
the belt retainer and around the engine
pulley. Also, be sure the belt is on the
INSIDE of the idler pulley #1. Please
see page 27 for proper belt
installation.
5. Set the new bearing housing assembly
into place. Insert the three bearing
housing bolts through the frame, and
tighten the nuts (Figure 38).
6. Reassemble the Mow-Ball
™
Support
assembly. See page 23 for
instructions.
Figure 42
Figure 43
Figure 44