Cutting cords – DR Power Walk-Behind Pro (2000 - 2001) User Manual
Page 19
DR
®
TRIMMER/MOWER
™
Assembly & Operating Instructions
13
4. Grip the sides of the handlebar, pulling up with one hand and pushing down with the other,
swinging the front of the trimmer to the left or right. If this action is difficult please see the
section “To Adjust the PTA
™
Feature” on page 29.
5. To lock in the left or right position, pull the PTA
™
lever back and turn it a quarter of a turn
and release. It will spring into place and lock into the axle plate.
To Return to Flat and Forward Mode
1. Pull the PTA
™
lever and turn a quarter of a turn so the lever is resting on the dog ears.
2. Release the lever, push down on the handlebars, and pivot the trimmer head straight ahead.
3. Pull and turn the PTA
™
lever a quarter turn, release the lever, and it will automatically lock
the machine into the forward position.
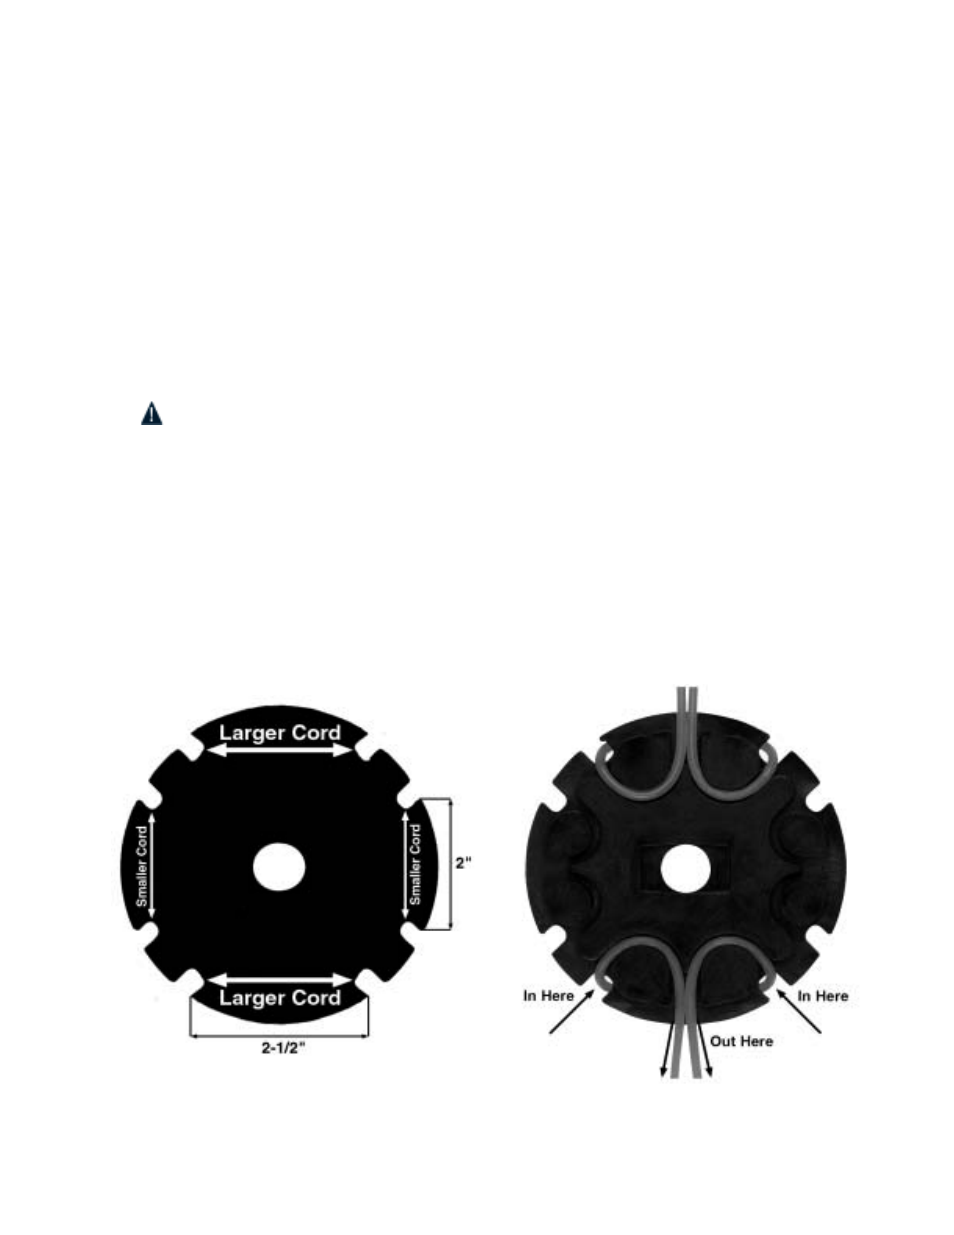
Cutting Cords
WARNING! Always turn the engine off when installing or changing cutting cords.
Note: Before trimming, engage the cutting head with the engine running and spin new cords for
a few seconds so they pull tight and set.
Figures 22 and 23 illustrate how the cords are installed on the line plates. There are two sets of
installation points on each line plate, 180 degrees apart. One set of holes is for larger cord (155
mil) and is marked with large arrows. The other set of holes accommodates smaller cord (130
mil) and is marked with small arrows. Always install two cords opposite each other for the best
performance.
Caution! Running the trimmer with only one cord installed, or cords installed at other than 180
degrees can cause excessive vibration and may damage the machine.
Figure 22
Figure 23