Replacing the wheels – DR Power Dual Action 10-Ton Electric (Aug 2011 - Present) User Manual
Page 20
20
DR
®
DUAL-ACTION ELECTRIC LOG SPLITTER
Replacing the Wheels
Tools and Supplies needed:
Channel lock Pliers
Clean Rags
Adjustable Wrench
Needle Nose Pliers
Jack and Jack Stands
Soft Face Hammer
1. Jack the Splitter off the ground and secure with Jack Stands.
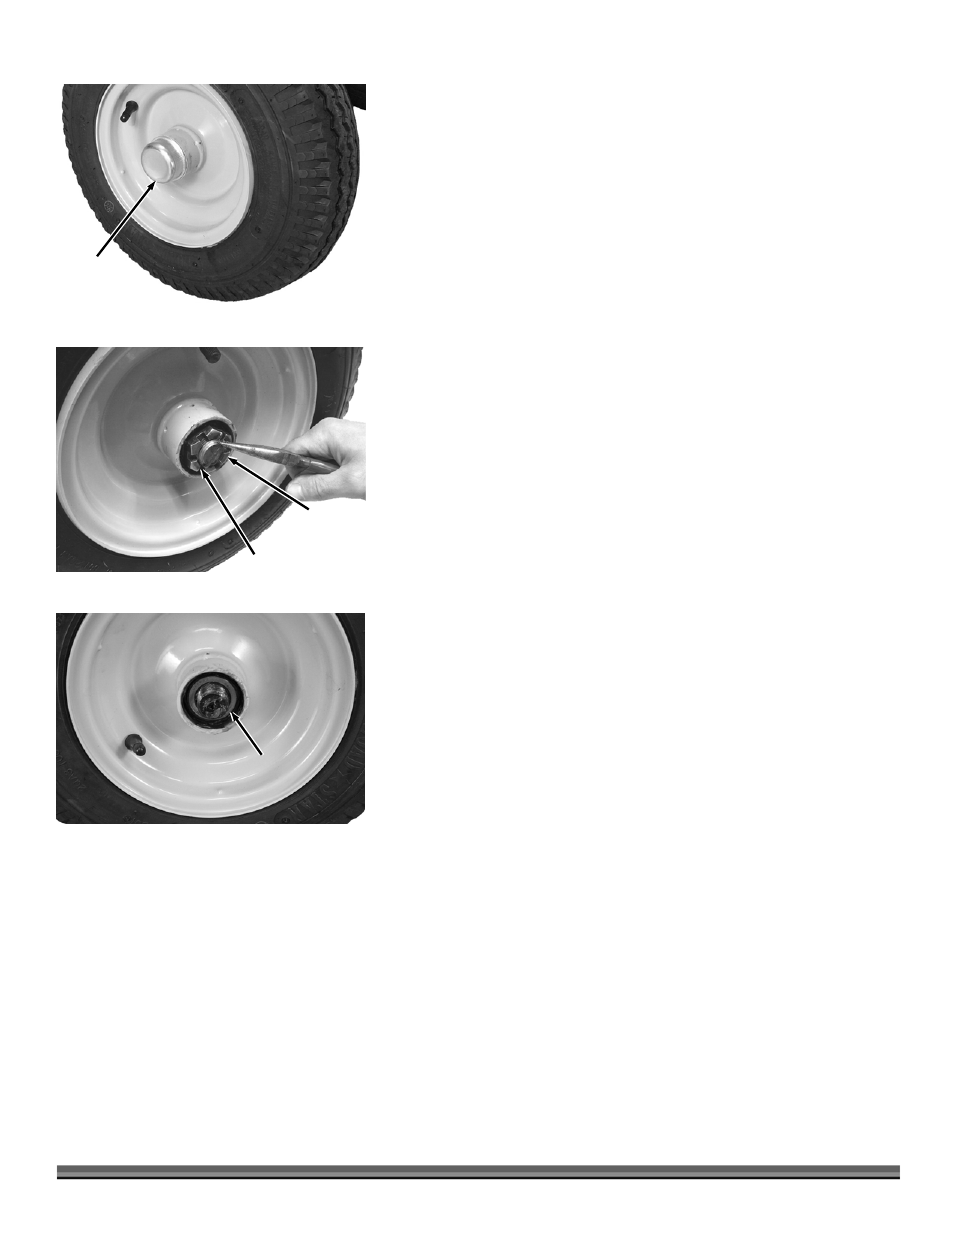
2. Remove the Dust Cap from the Wheel Assembly with Channel Lock Pliers
(Figure 30).
3. Straighten the ends of the Cotter Pin with Needle nose Pliers so the Cotter
Pin can be pulled from the hole in the Axle (Figure 31).
4. Remove the Castle Nut with the Channel Lock Pliers.
5. Pull the Wheel assembly and Taper Bearing from The Axle (Figure 32).
6. Slide a Wheel Assembly onto the Axle Shaft. Make sure the open side of the
Wheel Hub with the loose Taper Bearing is facing towards you.
7. Screw the Castle Nut onto the Axle and tighten it with an adjustable wrench
to seat the Bearings (Figure 31).
8. Back the Castle Nut off and then snug it up to the Bearing lightly.
9. Insert a Cotter Pin through the slots of the Castle Nut and into the hole in
the Axle.
10. Bend the ends of the Cotter Pin with Needle nose Pliers to secure it.
11. Place the Dust Cap onto the Wheel Assembly Hub and work it into the Hub
using a soft face Hammer (Figure 30).
12. Jack the back of the Splitter up and remove the jack Stands.
13. Lower the Splitter to the ground.
Figure 32
Taper
Bearing
Dust Cap
Figure 30
Figure 31
Castle
Nut
Cotter Pin