DR Power Dual Action 10-Ton Electric (Aug 2011 - Present) User Manual
Page 26
26
DR
®
DUAL-ACTION ELECTRIC LOG SPLITTER
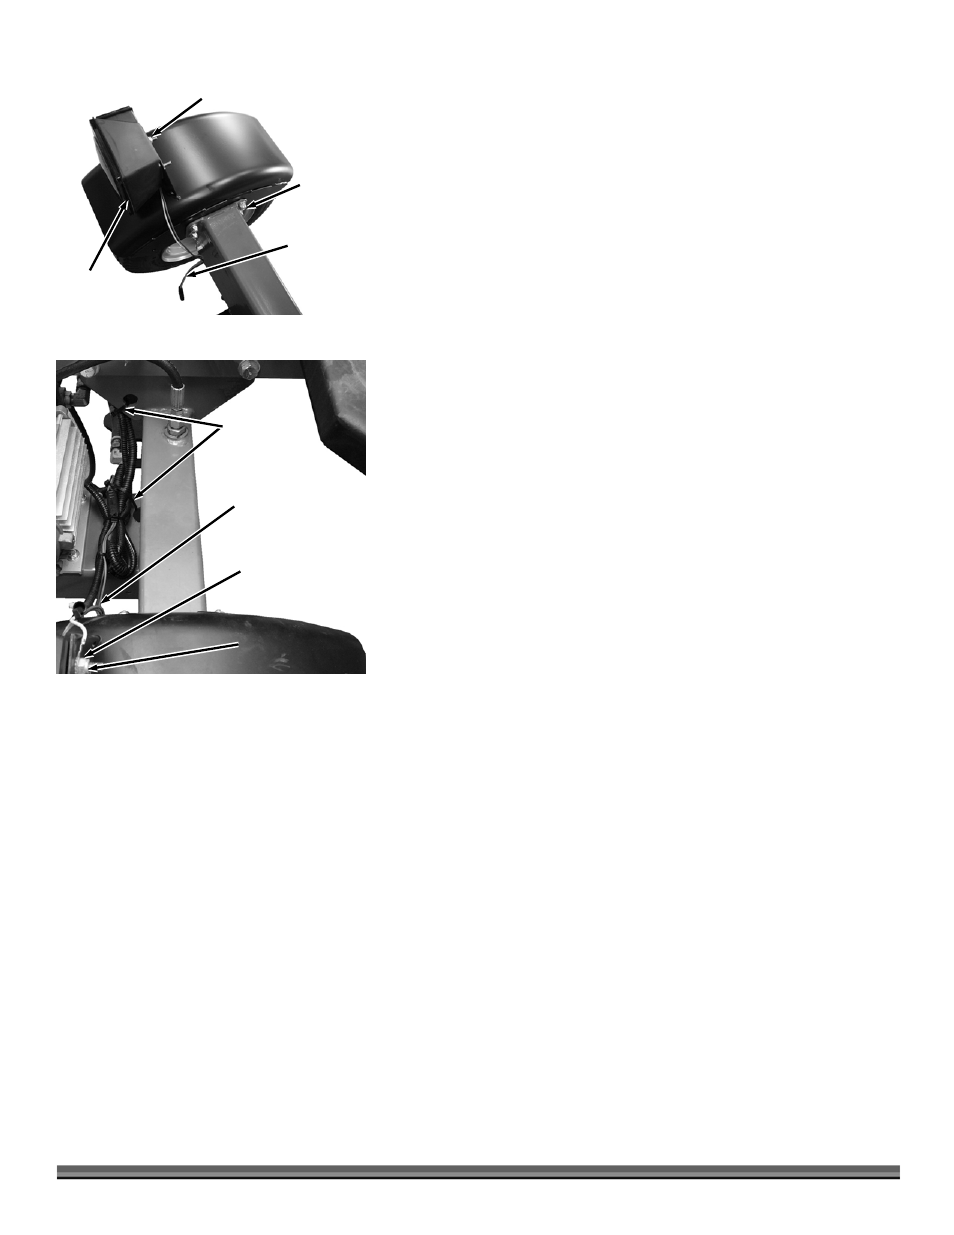
18. Assemble the Fenders to the Frame with eight 5/16-18 x 3/4" Carriage Bolts
(fender side) and Locknuts using a 1/2" Wrench (Figure 40).
19. Position the roadside Tail Light (yellow/brown wires) and curbside Tail Light
(green/brown wires) onto the Fenders and secure with one of the 1/4-20
Locknuts on the outside stud using a 7/16" Wrench.
20. Route the Yellow/Brown Wire Connector with a White Ground Wire behind
the Tank on the roadside (left side) of the Splitter.
21. Plug in the Connector, place the Ground Wire onto the inner Stud and
secure it with a 1/4-20 Locknut using a 7/16" Wrench (Figure 41).
22. Route the Green/Brown Wire Connector with a White Ground Wire behind
the Tank on the curbside (right side) of the Splitter.
23. Plug in the Connector, place the Ground Wire onto the inner Stud and
secure it with a 1/4-20 Locknut using a 7/16" Wrench.
24. Use the Cable Ties to secure the excess Harness to the Engine Mount hole.
Secure the center portion of Harness to the two holes in the Frame. Trim all
Cable Ties with Wire Cutters.
Green and
Brown Wires
(curbside)
White
Ground Wire
(both sides)
Cable Ties
Figure 41
Locknut
Roadside
Fender
Yellow and
Brown Wires
(roadside)
Roadside
Tail Light
Nylon Locknut
Carriage
Bolts and
Locknuts
Figure 40