Valve coil installation instructions, Remove old valve coil assembly – Gasboy Atlas Valve Replacement Kits User Manual
Page 5
MDE-4448 Atlas™ Diaphragm and Valve Coil Replacement Kits • April 2005
Page 5
Valve Coil Installation Instructions
Valve Coil Installation Instructions
Follow the directions below to replace the valve coil assembly.
Note: Valve coil assemblies have the volts and hertz stamped onto the valve coil body. This
information is located on the opposite side of the wiring assembly. Check to make sure
you have the correct replacement valve coil before replacing the existing coil.
Remove Old Valve Coil Assembly
1
Open the lower door.
2
Remove the junction box cover.
3
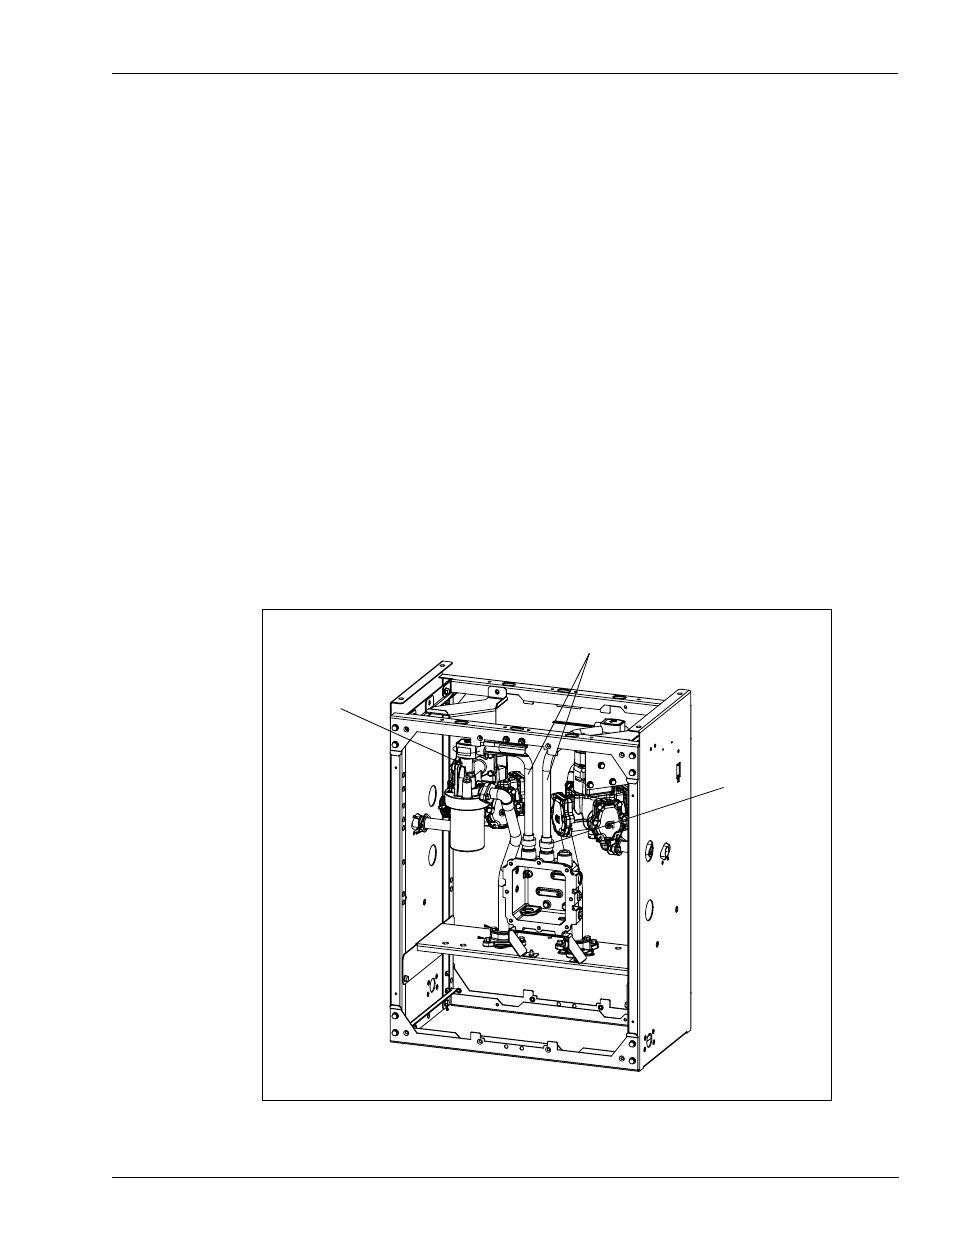
Locate the valve coil wiring conduit. See Figure 1: Valve Coil Assembly, Conduits and
Junction Box on page 5.
Caution:Replace one valve coil assembly at a time. Attempting to make two replacements
concurrently may cause problems with reconnecting valve coil wiring.
Figure 1: Valve Coil Assembly, Conduits and Junction Box
Valve Coil Wiring Conduits
Union connecting
Valve Coil Wiring
Conduit and
Junction Box
Valve