Infloor Electric Cable Series 386 User Manual
Page 13
13 of 36
Copyright ©2014
Completely embed the Factory Splice and heating cable in the floor mortar. Never bend
the factory splice. Never allow any part of the Factory Splice or heating cable to enter a
wall or cabinet or drop through the subfloor. Damage to the product will result.
STEP 3.9
Position the Power Leads
Carefully cut the tie binding the power lead coil.
Do not nick the braid covering the power lead.
Locate the Factory Splice to ensure the power
lead will reach the Infloor control electrical
box or junction box location. It is acceptable
to run the power leads several feet in the floor
area embedded in mortar if needed.
STEP 3.10
Set the Factory Splice
Draw an outline around the Factory Splice and
move it aside. Chisel a shallow channel to allow
the Factory Splice to lay flat with the rest of the
heating cable in the channel. Add hot glue in
the channel and set the Factory Splice in place.
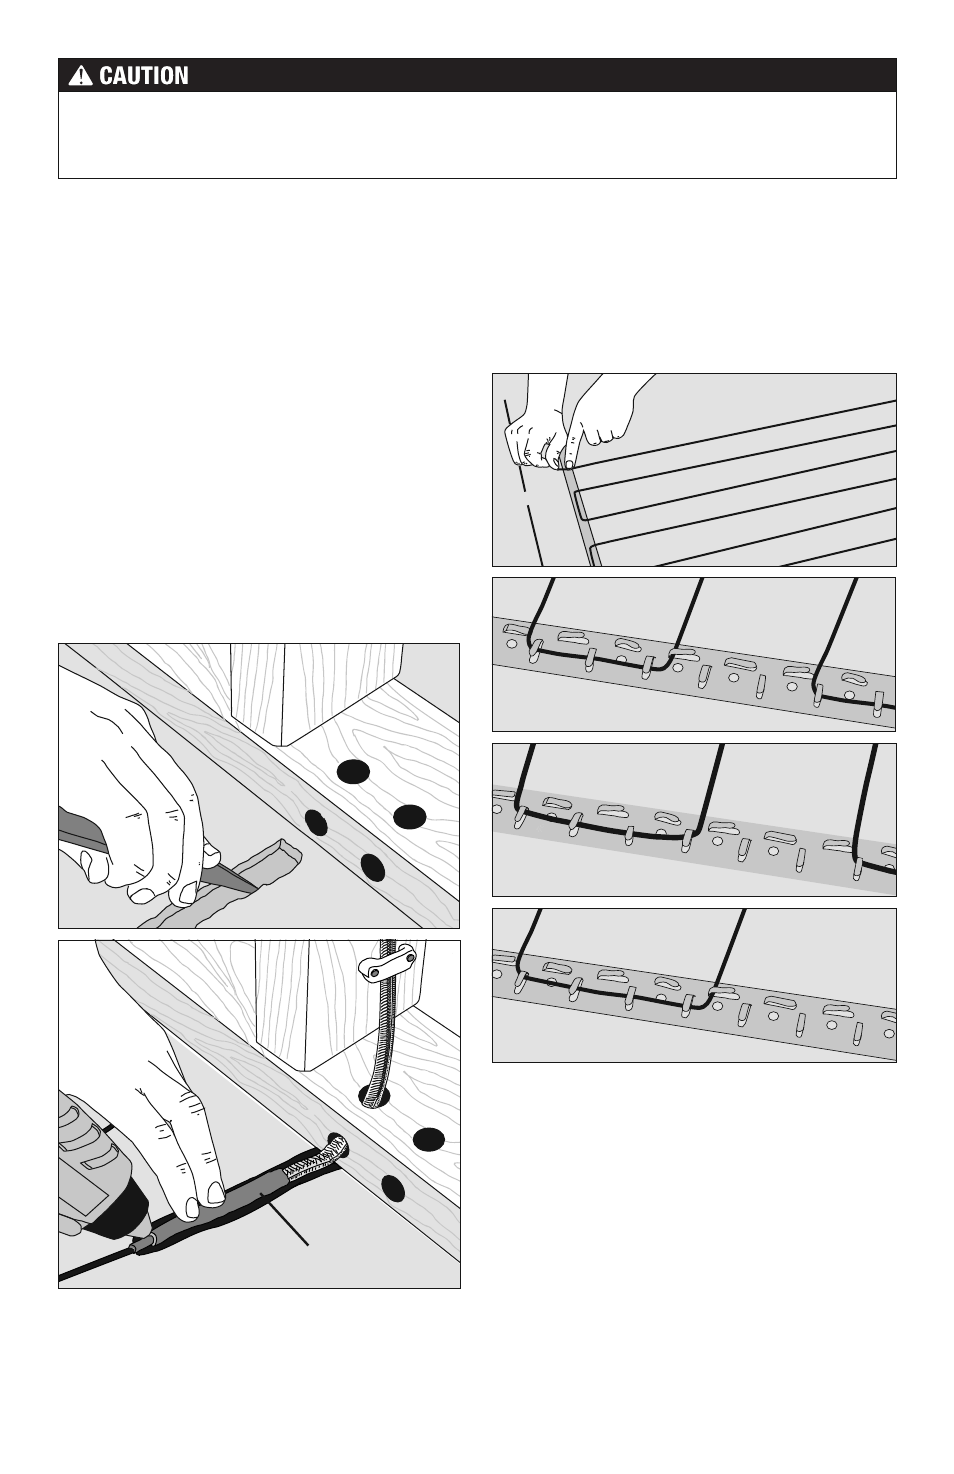
3” spacing
2.5” spacing
3.5” spacing
STEP 3.11
Weave the cable back and forth across the
area at the desired spacing until the other
side of the room has been reached. Once this
area is completed, press down all the tabs.
NEVER space the cables less than 2.5" apart.
Factory splice
STEP 3.12
If there are additional areas to cover with
cable, cut the lengths of strap necessary,
attach them to the floor, and begin weaving
the cable into that area.
STEP 3.13
To secure long lengths of heating cable,
place additional, short lengths of the strap at
3–4-ft. intervals. Spray the back of the strap
with a high-tack adhesive, and slide the strap,
upside down, under the cables. Turn the strap